
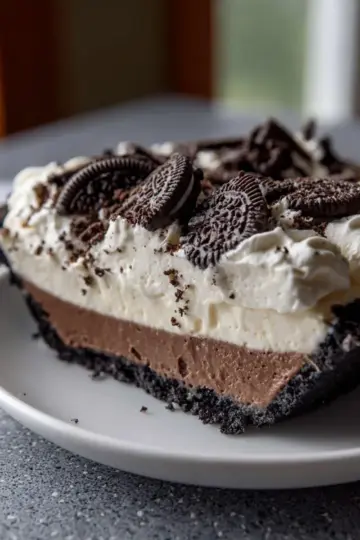
Introduction to No-Bake Creamy Grasshopper Pie
Why Choose a No-Bake Dessert?
No-bake desserts are perfect for busy young professionals who love to impress but might not have extensive baking skills or time. They save you from the hassle of preheating the oven, measuring out flour, and worrying about a cake that may sink or crumble. Instead, you can whip up a delicious No-Bake Creamy Grasshopper Pie in just a few easy steps, letting the refrigerator do all the work while you enjoy your downtime or even get some work done! Plus, they're great for hot-weather gatherings, ensuring your treats are cool, refreshing, and utterly delightful.
The Nostalgia of Grasshopper Pie
Have you ever tasted a grasshopper pie? For many, it evokes happy memories of family gatherings or summer barbecues. Its minty flavor combined with a luscious creamy filling is simply irresistible! It’s no wonder this pie has become a classic dessert that blends nostalgia with a contemporary twist. By using mint extract in this recipe, you're serving an enjoyable treat that captures that nostalgia while remaining family-friendly and accessible. It’s a great way to bond over shared memories while creating new ones—your friends and family are sure to love it!
For more on the history of grasshopper pie, feel free to explore this interesting article. It highlights the dish's storied past and cultural significance.
Ingredients for No-Bake Creamy Grasshopper Pie
Creating your No-Bake Creamy Grasshopper Pie at home is surprisingly simple, and the ingredient list is as delightful as the pie itself! Here’s what you'll need to whip up this creamy, minty treat that’s perfect for any gathering.
-
Chocolate Cookie Crust
-
1 ½ cups chocolate cookie crumbs (about 30 cookies)
-
6 tablespoons unsalted butter, melted
-
Creamy Filling
-
1 package (8 ounces) cream cheese, softened
-
1 cup powdered sugar
-
1 teaspoon vanilla extract
-
1 teaspoon peppermint extract
-
¼ teaspoon green food coloring (optional)
-
Whipped Topping
-
1 ½ cups heavy whipping cream, cold
-
½ cup mini chocolate chips
-
2 tablespoons chocolate shavings, for topping
You don’t need to be an expert baker to assemble this delicious pie. Simply gather these ingredients, and you’re on your way to impressing your friends and family! For tips on choosing the best chocolate cookies, check out this helpful guide.
Step-by-step preparation for No-Bake Creamy Grasshopper Pie
Creating the No-Bake Creamy Grasshopper Pie is a delightful process that blends effortless preparation with the intense satisfaction of a homemade dessert. Let’s walk through each step together to ensure your pie comes out perfectly!
Preparing the crust
Start by gathering your ingredients for the crust. You’ll need 1 ½ cups of chocolate cookie crumbs, which you can make from roughly 30 cookies or purchase pre-made. In a medium bowl, combine the cookie crumbs with 6 tablespoons of melted unsalted butter. Mix until the crumbs resemble wet sand. Press this mixture firmly into the bottom and up the sides of a 9-inch pie plate. Make sure it’s evenly distributed to provide a solid base for your pie. Now, chill the crust in the freezer for 15 minutes to firm up while you move to the next step.
Making the creamy filling base
Once your crust is set, it’s time to prepare the filling. In a large bowl, beat 8 ounces of softened cream cheese with an electric mixer until it’s smooth and creamy. Gradually add in 1 cup of powdered sugar and continue mixing until well combined. This will create a rich and sweet base for your No-Bake Creamy Grasshopper Pie that pairs perfectly with the chocolate crust.
Adding flavor and color
Next, enhance the flavor with 1 teaspoon of vanilla extract and 1 teaspoon of peppermint extract. These two extracts work together to bring that signature minty taste to your pie. If you’re feeling adventurous, add a few drops of green food coloring to achieve that vibrant grasshopper hue. Mix until the color is uniform, setting the stage for a visually appealing dessert.
Whipping the cream
In a separate, clean bowl, take 1 ½ cups of cold heavy whipping cream and begin beating it with your mixer. You’re aiming for stiff peaks here, which typically takes about 3-5 minutes. The whipped cream not only adds lightness but will also contribute to the airy texture of your filling.
Combining the filling
Here comes the fun part! Fold about one-third of the whipped cream into your cream cheese mixture gently. This helps to lighten the filling. Then, fold in the remaining whipped cream until just combined—be careful not to overmix! A little bit of fluffiness will give your pie that delightful creamy texture.
Assembling the pie
Now it’s time to bring it all together! Spoon the velvety filling into your chilled crust, smoothing the top with a spatula. It should look luscious and inviting. To add a little extra flair, gently fold in ½ cup of mini chocolate chips just before assembling, ensuring chocolatey goodness in every bite.
Chilling for perfection
Cover your no-bake pie loosely with plastic wrap and refrigerate it for at least 6 hours, but overnight is even better. This step is crucial—it allows the filling to set properly, making it easier to slice and serve later. Just imagine the thrill of cutting into your beautifully chilled No-Bake Creamy Grasshopper Pie at your next gathering!
Give yourself a pat on the back! Your pie is all set to dazzle your friends and family. If you’ve enjoyed this preparation guide, don’t hesitate to share it with others looking for easy yet impressive dessert ideas. You can also find inspiration from various dessert blogs and culinary sites like Food Network or Bon Appétit for more creative twists in the kitchen!
Variations on No-Bake Creamy Grasshopper Pie
Alternative Crust Options
While the classic chocolate cookie crust is undeniably delicious, feel free to mix things up! Consider using a graham cracker crust for a sweeter, less intense base. Alternatively, try a nut crust made from ground almonds or walnuts for a gluten-free option. Not only are these variations flavorful, but they also offer a delightful twist on the traditional No-Bake Creamy Grasshopper Pie.
Different Flavor Extracts
If you're a fan of experimenting, don't hesitate to play around with different flavor extracts. Instead of mint, try using almond or coconut extract for a unique spin. You could even toss in a splash of orange or lemon extract for a refreshingly zesty kick! Each variation will enhance your pie, making it a truly personalized delicious treat. Explore more flavors and find your perfect blend!
Cooking Tips and Notes for No-Bake Creamy Grasshopper Pie
Crafting the perfect No-Bake Creamy Grasshopper Pie can be a breeze with these handy tips:
-
Chill Time Matters: Allow the pie to set in the refrigerator for at least 6 hours, or even better, overnight. This ensures a firm filling that holds its shape beautifully when sliced.
-
Whipped Cream Technique: When whipping the heavy cream, make sure your bowl and beaters are cold. This helps achieve stiff peaks more easily—perfect for that light and airy filling!
-
Customize Your Crust: Want to switch things up? Try using graham cracker crumbs or even a gluten-free cookie option. Plus, a sprinkle of sea salt can enhance the chocolate flavor.
Remember, each pie is a canvas. Add your personal touch with toppings like crushed mint candies or a drizzle of chocolate sauce for extra flair. For further inspiration, check out resources like The Kitchn for creative dessert ideas!
Serving Suggestions for No-Bake Creamy Grasshopper Pie
When it comes to the delightful No-Bake Creamy Grasshopper Pie, presentation can elevate your dessert experience. Here’s how to make it even more memorable:
Pairing Ideas
- Fresh Mint Sprigs: Garnish each slice with a sprig of fresh mint. Not only does this add a pop of color, but it also enhances the minty flavor.
- Chocolate Drizzle: A simple drizzle of melted dark chocolate across the top can make your pie look like a gourmet treat.
Beverage Options
Serve with a chilled glass of milk or a refreshing mint-infused lemonade to complement the pie's creamy texture and minty taste.
This delicious pie is also a hit at gatherings! Need more inspiration? Check out this how-to guide on pie pairings for additional ideas!
Time Breakdown for No-Bake Creamy Grasshopper Pie
When time is of the essence but you still crave a delectable dessert, No-Bake Creamy Grasshopper Pie is an excellent choice. Here’s a simple breakdown of how to manage your time wisely while preparing this delightful treat.
Preparation Time
The prep work for this pie takes about 20 minutes. In that time, you’ll mix your crust and filling ingredients, so it’s quick and easy!
Chilling Time
Patience pays off with a chilling time of at least 6 hours. For the best results, consider refrigerating it overnight to achieve a perfectly set filling.
Total Time
Overall, you're looking at around 6 hours and 20 minutes from start to finish. While that includes chilling time, the hands-on portion is minimal, making this pie a fantastic go-to for busy schedules.
By following this timeline, you can enjoy your No-Bake Creamy Grasshopper Pie without feeling rushed. Happy baking! For more details on pie making, check out this helpful guide.
Nutritional Facts for No-Bake Creamy Grasshopper Pie
When indulging in this delicious No-Bake Creamy Grasshopper Pie, it’s handy to keep health and nutrition in mind. Here's what you need to know about its nutritional profile:
Calories
Each slice of this lovely pie clocks in at approximately 380 calories. While it’s a delightful treat, being aware of the calorie content can help you balance your indulgence with your overall dietary goals.
Sugar
With around 30 grams of sugar per slice, this pie does carry a sweet bite. If you're looking to manage your sugar intake, consider enjoying it in moderation or exploring alternate sweeteners.
By keeping track of calories and sugar, you can fully enjoy this creamy, minty delight without compromising on your health goals. For more detailed nutritional insights, check out guidelines from sources like the American Heart Association or the U.S. Department of Agriculture. Remember, balance is key!
FAQs about No-Bake Creamy Grasshopper Pie
Can I make it ahead of time?
Absolutely! In fact, making your No-Bake Creamy Grasshopper Pie ahead is recommended. This pie tastes even better after chilling overnight, as the flavors meld beautifully. Just prepare it a day in advance, let it set in the fridge, and you’re all set for your gathering.
How should I store leftovers?
If you have leftovers, no problem! Store your No-Bake Creamy Grasshopper Pie in an airtight container in the refrigerator. It should stay fresh for up to three days. Just keep in mind that the texture may change slightly the longer it sits.
What if I don’t have all the ingredients?
Don't fret if you’re missing an ingredient or two! For instance, if you lack peppermint extract, you can substitute it with mint-flavored syrup for a similar taste. Don’t have chocolate chips? Use chopped chocolate instead. The flexibility in this recipe makes it easy to adjust based on what you have on hand. For more tips on ingredient substitutions, check out this informative food guide.
Conclusion on No-Bake Creamy Grasshopper Pie
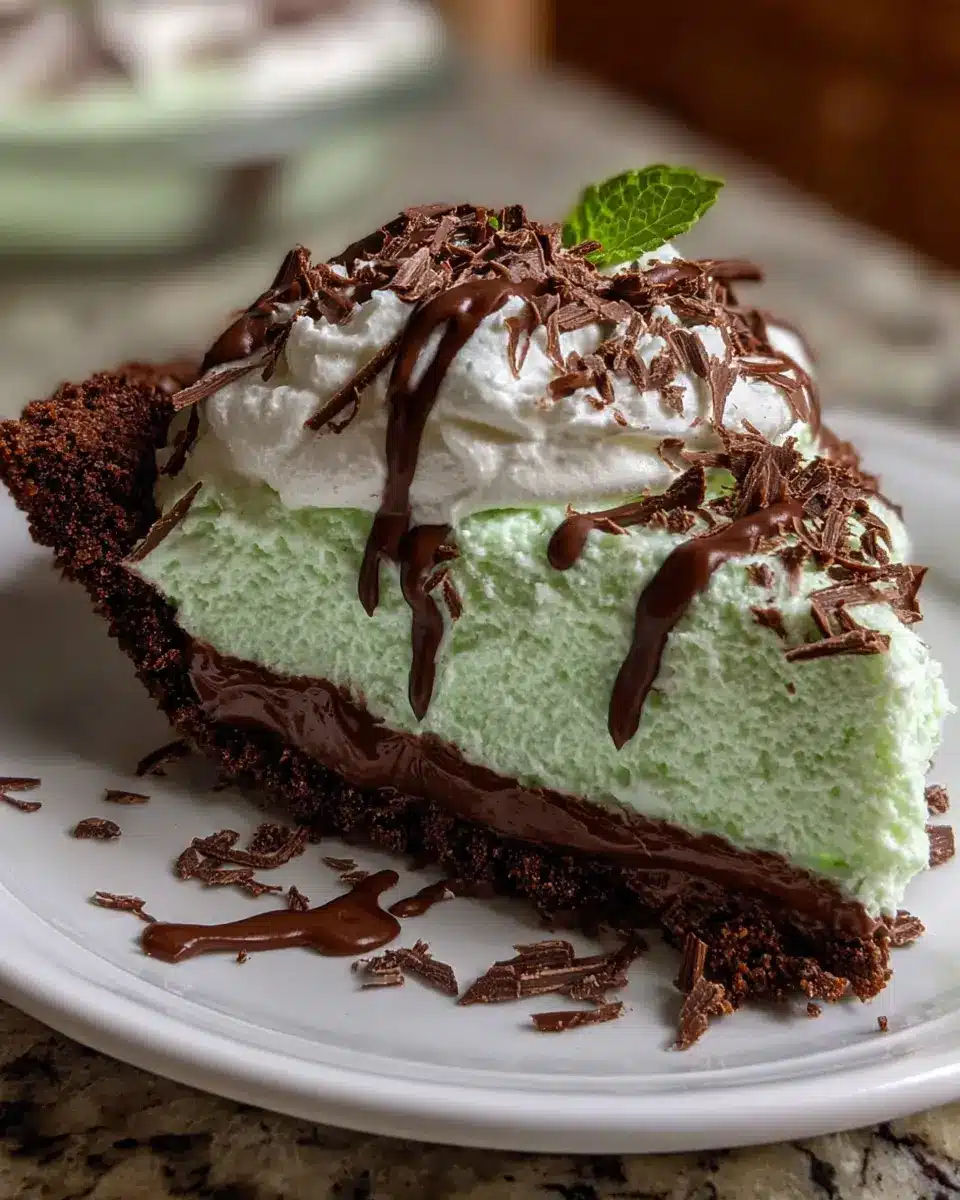
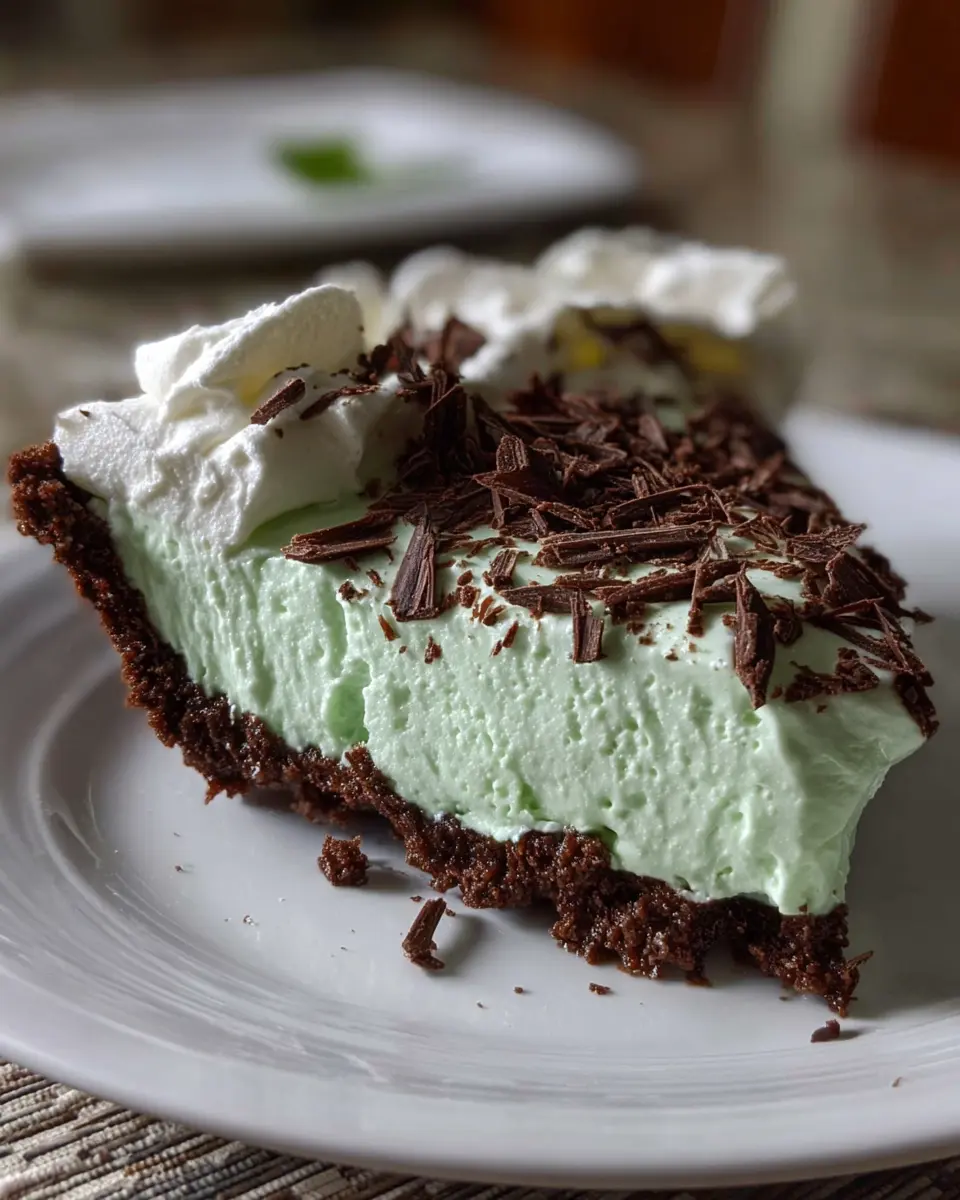
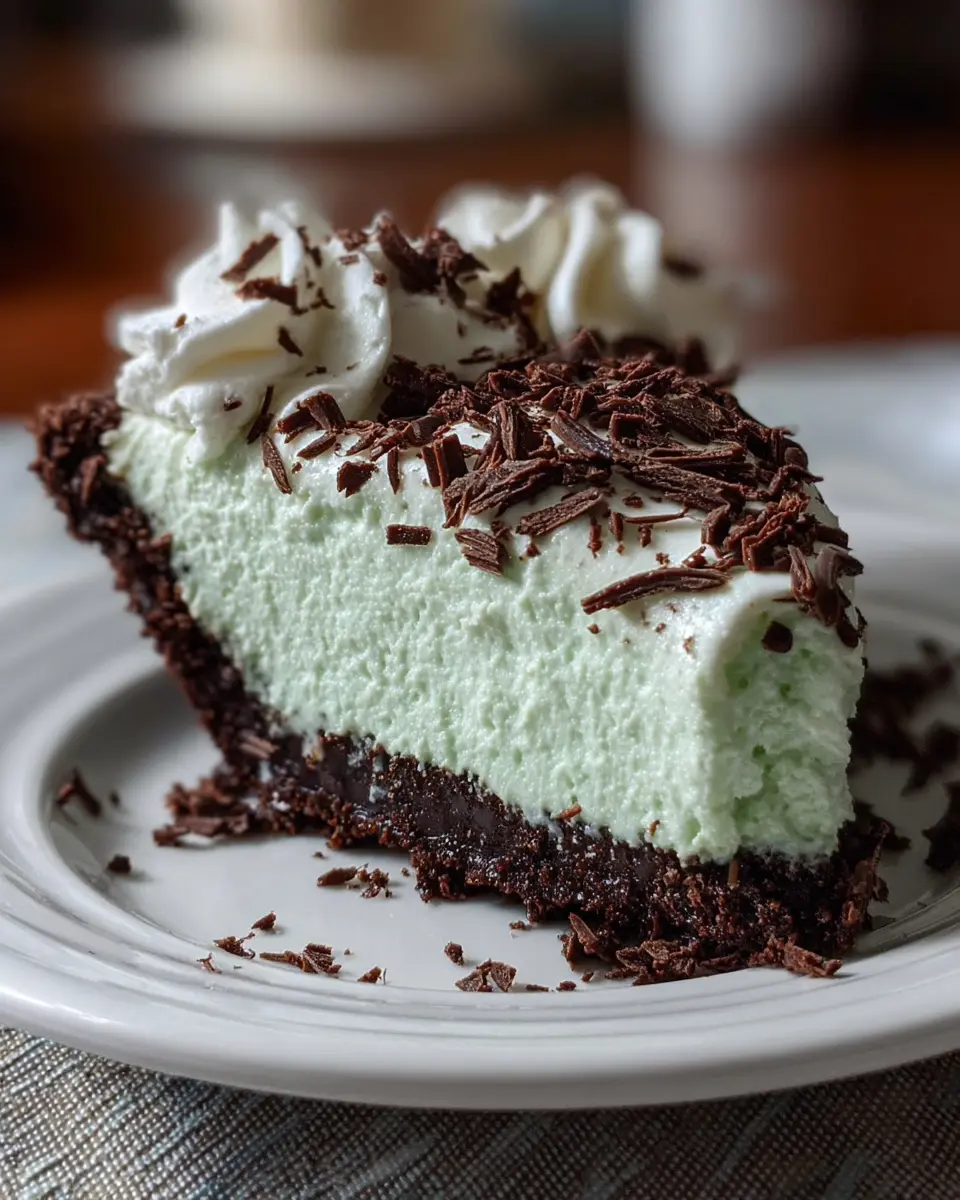
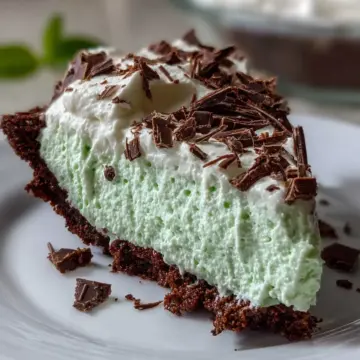
This No-Bake Creamy Grasshopper Pie is perfect for any occasion where you want to impress guests with minimal effort. The combination of creamy mint filling and a crunchy chocolate crust is simply irresistible. Serve chilled, and let each slice take you on a delightful flavor journey. Enjoy a slice today!
No-Bake Creamy Grasshopper Pie
Equipment
- 9-inch pie plate
- mixing bowl
- Electric Mixer
Ingredients
Crust
- 1 ½ cups chocolate cookie crumbs (about 30 cookies)
- 6 tablespoons unsalted butter melted
Filling
- 1 package cream cheese (8 ounces, softened)
- 1 cup powdered sugar
- 1 teaspoon vanilla extract
- 1 teaspoon peppermint extract
- ¼ teaspoon green food coloring (optional)
- 1 ½ cups heavy whipping cream cold
- ½ cup mini chocolate chips
- 2 tablespoons chocolate shavings for topping
Instructions
Preparation
- Prepare the crust: Mix the chocolate cookie crumbs and melted butter in a bowl until evenly moistened. Press the mixture firmly into the bottom and up the sides of a 9-inch pie plate. Chill the crust in the freezer for 15 minutes.
- Make the filling base: In a large bowl, beat the softened cream cheese with an electric mixer until smooth. Gradually beat in the powdered sugar until combined.
- Add flavorings: Mix in the vanilla extract, peppermint extract, and green food coloring, if using, until the color is uniform.
- Whip the cream: In a separate, clean bowl, beat the cold heavy whipping cream until stiff peaks form.
- Combine filling: Gently fold about one-third of the whipped cream into the cream cheese mixture to lighten it. Then, fold in the remaining whipped cream until just combined. Do not overmix.
- Fold in chips: Gently fold in the mini chocolate chips.
- Assemble the pie: Spoon the filling evenly into the chilled crust. Smooth the top with a spatula.
- Chill: Cover the pie loosely with plastic wrap and refrigerate for at least 6 hours, or preferably overnight, until the filling is firm.
- Serve: Before serving, sprinkle the top with chocolate shavings. Slice and serve cold.


Leave a Reply