
Introduction to Ladybug Cupcakes
Spring is the season of renewal and joy, making it the perfect time to whip up delightful Ladybug Cupcakes that will brighten any dessert table. These whimsical treats are not only pleasing to the eye but also scrumptious, featuring soft vanilla cake topped with silky green buttercream and adorable ladybug decorations. They can transform any gathering—from birthdays to garden parties—into a colorful celebration.
Why Ladybug Cupcakes are a Delight for Young Professionals
For busy young professionals, finding a fun yet manageable dessert project can be a challenge. Lucky for you, these Ladybug Cupcakes are straightforward to make and require less than an hour! Whether you're aiming to impress at a potluck or simply enjoy a sweet treat after a long week, this recipe is a fantastic choice.
Additionally, these cupcakes provide a great opportunity to unwind and tap into your creative side. With simple ingredients and easy-to-follow instructions, you’ll be able to experiment with baking and decorating techniques without overwhelming yourself. Plus, who could resist the charm of ladybugs? Their bright colors and playful details bring a bit of cheer to any table setting. Explore more about cupcake decorating techniques here and unleash your inner pastry chef!
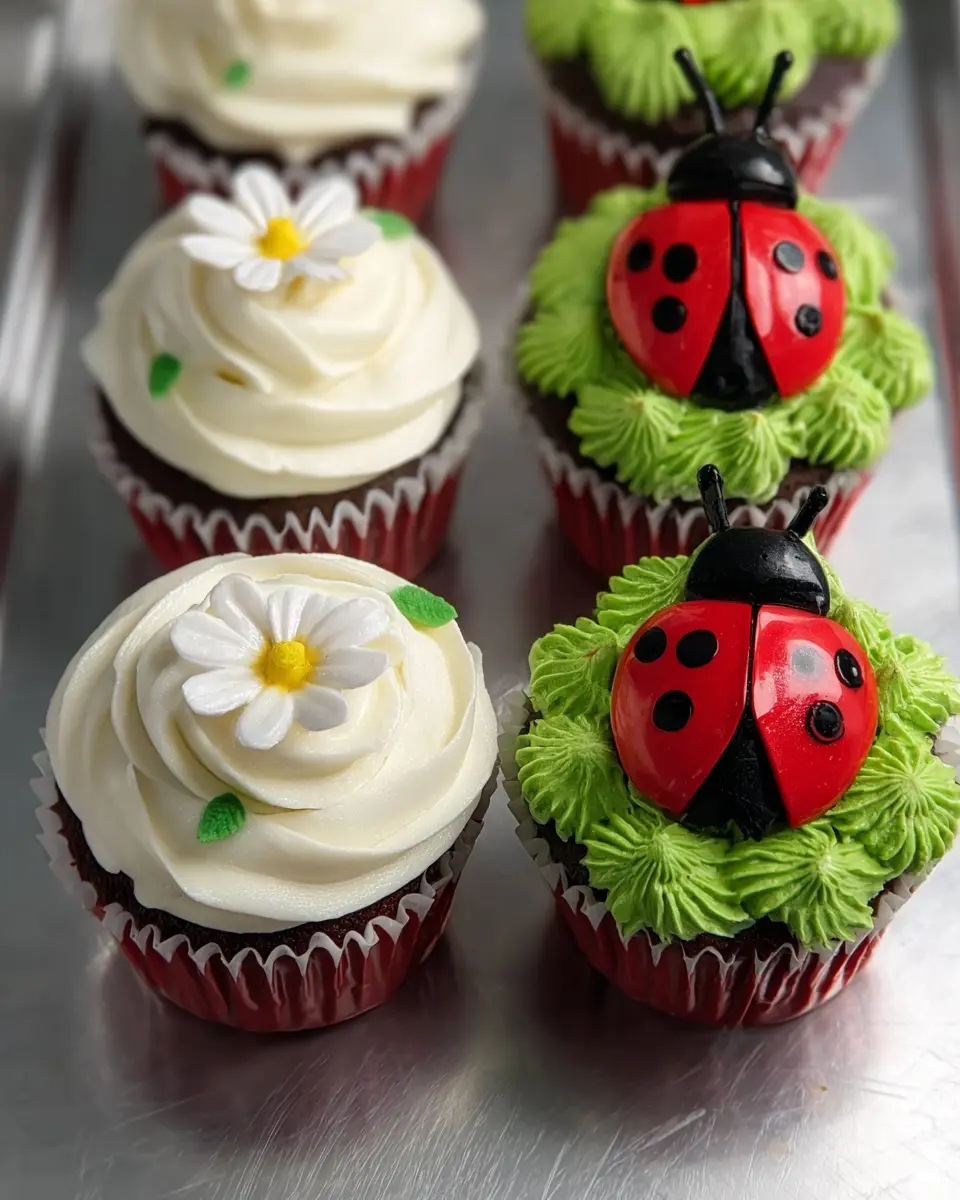
Ingredients for Ladybug Cupcakes
When it comes to crafting delightful Ladybug Cupcakes, gathering the right ingredients is essential for achieving that perfect balance of flavor and fun. Here’s what you'll need to whip up these charming treats, ideal for brightening any spring dessert table.
For the Vanilla Cupcakes
- 1 ½ cups all-purpose flour
- 1 ½ teaspoons baking powder
- ¼ teaspoon salt
- ½ cup unsalted butter, softened
- ¾ cup granulated sugar
- 2 large eggs
- 2 teaspoons vanilla extract
- ½ cup whole milk
For the Buttercream Frosting
- 1 cup unsalted butter, softened
- 4 cups powdered sugar
- 2 to 3 tablespoons heavy cream or milk
- 1 teaspoon vanilla extract
- 1 pinch salt
- Gel food colorings: green, red, black, and yellow
For the Decorations
- ½ cup white buttercream (for flowers)
- ¼ cup green buttercream (for leaves)
- 2 tablespoons black buttercream
- 2 tablespoons yellow buttercream
With these ingredients, you're just steps away from creating Ladybug Cupcakes that everyone will adore. If you're looking for a great buttercream guide, you can check out additional tips and tricks on sites like Bakerella. Enjoy the baking process!
Step-by-Step Preparation for Ladybug Cupcakes
Making Ladybug Cupcakes is an enchanting way to welcome spring, adding color and charm to any dessert table. Let’s dive into the preparation steps to ensure your cupcakes not only taste delightful but look stunning too!
Prepare the Baking Pan
Start by setting your oven to 350°F (175°C). While the oven heats, line a 12-cup muffin tin with colorful cupcake liners. This not only makes for a vibrant presentation but also helps with easy removal once baked. Make sure you have everything you need within reach—it makes the process smoother!
Mix the Dry Ingredients Together
In a medium bowl, whisk together 1 ½ cups of all-purpose flour, 1 ½ teaspoons of baking powder, and ¼ teaspoon of salt. This initial mixing is crucial as it ensures your Ladybug Cupcakes rise evenly and have a delightful texture.
Cream the Butter and Sugar for the Batter
In a large bowl, beat ½ cup of softened unsalted butter with ¾ cup of granulated sugar until the mixture is light and fluffy. This should take about 3-5 minutes. Then, add 2 large eggs, one at a time, mixing well after each addition. Don’t forget to stir in 2 teaspoons of vanilla extract for that unmistakable aroma and flavour!
Combine Wet and Dry Ingredients
Now it’s time to combine. Gradually add your dry ingredient mixture into the creamed butter and sugar, alternating with ½ cup of whole milk. Mix just until the batter is smooth—overmixing can lead to dense cupcakes, and we want them fluffy!
Bake the Cupcakes to Perfection
Divide the batter evenly among the prepared cupcake liners, filling each about two-thirds full. Bake in your preheated oven for 18 to 20 minutes, or until a toothpick inserted into the center comes out clean. Allow them to cool completely before frosting.
Create the Silky Buttercream Frosting
For that perfect buttercream, beat 1 cup of softened unsalted butter until creamy, then gradually add 4 cups of powdered sugar. Mix in 1 teaspoon of vanilla extract and a pinch of salt, adding 2 to 3 tablespoons of heavy cream or milk to achieve a silky consistency.
Tint the Frosting for Visual Appeal
Set aside some frosting to keep it white for your flowers. Use green gel food coloring for most of the frosting, and add small amounts of red, black, and yellow to create your Ladybug Cupcakes' vibrant decorations.
Pipe Beautiful Green Swirls
Transfer your green frosting to a piping bag fitted with a large star tip. Pipe gorgeous spiral swirls atop each cooled cupcake, resembling lush grass or spring foliage.
Decorate with Flowers and Leaves
Using white buttercream, pipe petals to create delightful flowers on a few cupcakes, adding green leaves for extra life. A yellow center will make these flowers pop!
Assemble the Ladybugs
Now for the fun part! Pipe small red ovals on the green swirls to form ladybugs. Add black heads, a center line, and little black dots for details. Feel free to get creative!
Add Finishing Touches
For a whimsical touch, sprinkle some small flowers on your cupcakes. If your decorating needs a moment to set, chill them for about 10-15 minutes.
Serve and Enjoy!
Your Ladybug Cupcakes are now ready to shine on your dessert table! Arrange them beautifully on a tray and serve at room temperature to enjoy the perfect texture and taste. Whether it’s a spring gathering or a cheerful birthday party, these cupcakes are sure to bring smiles to everyone’s faces!
If you’re curious about baking tips or want to delve deeper into making other fun-themed desserts, consider checking out resources like Baker’s Journal or The Spruce Eats. Happy baking!
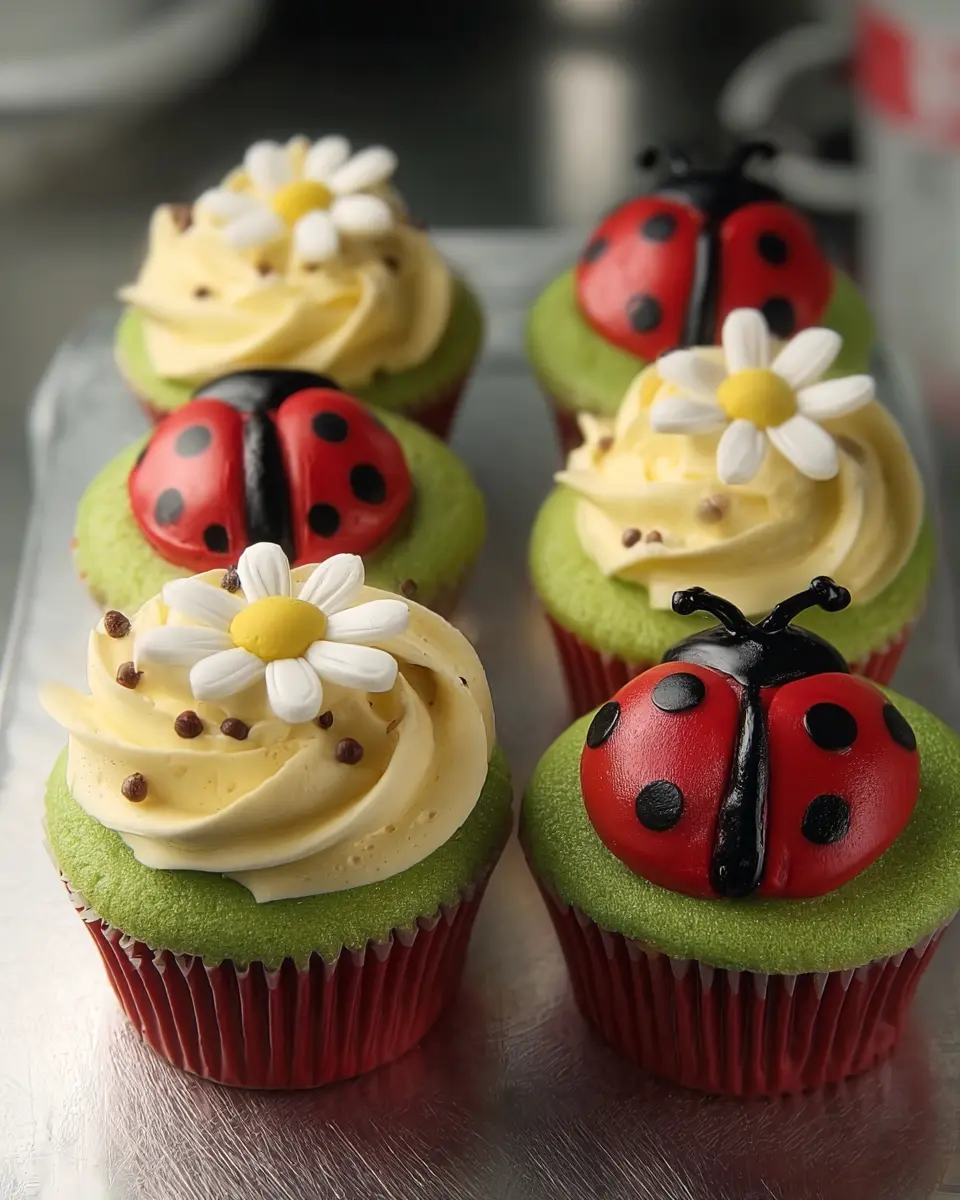
Variations on Ladybug Cupcakes
Chocolate Ladybug Cupcakes
Looking to add a twist to your Ladybug Cupcakes? Try baking chocolate cupcakes instead of vanilla! Simply substitute half of the all-purpose flour for cocoa powder in the original recipe. This rich addition will create a delightful contrast with the bright red ladybug frosting, making your dessert table extra inviting. Pair your chocolate cupcakes with the same vibrant green buttercream and floral decorations, and watch your guests smile with delight!
Gluten-Free Ladybug Cupcakes
For those following a gluten-free diet, transforming these Ladybug Cupcakes into a gluten-free treat is easier than you think! Swap out the all-purpose flour for a gluten-free blend. Be sure to choose one that includes xanthan gum for the best texture. The same fluffy batter and whimsical decorations will still shine through, offering all the charm without the gluten. It's a sweet way to ensure everyone can indulge in this springtime delight!
For more gluten-free baking tips, check out resources from Gluten-Free Living.
Baking Notes for Ladybug Cupcakes
Baking Ladybug Cupcakes is both fun and rewarding! Here are some handy tips to ensure your cupcakes turn out perfectly:
- Room Temperature Ingredients: Start with room-temperature butter, eggs, and milk for a smooth batter that blends easily.
- Don’t Overmix: Mix just until the ingredients are combined to keep your cupcakes light and fluffy.
- Cooling is Key: Let the cupcakes cool completely before frosting; this prevents the icing from melting.
- Gel Coloring: Use gel food coloring for vibrant colors without thinning the frosting.
- Storage Tips: Keep decorated cupcakes in a covered container and allow them to reach room temperature before serving for the best texture.
For more baking inspiration, check out The Joy of Baking and Sally's Baking Addiction. Happy baking!
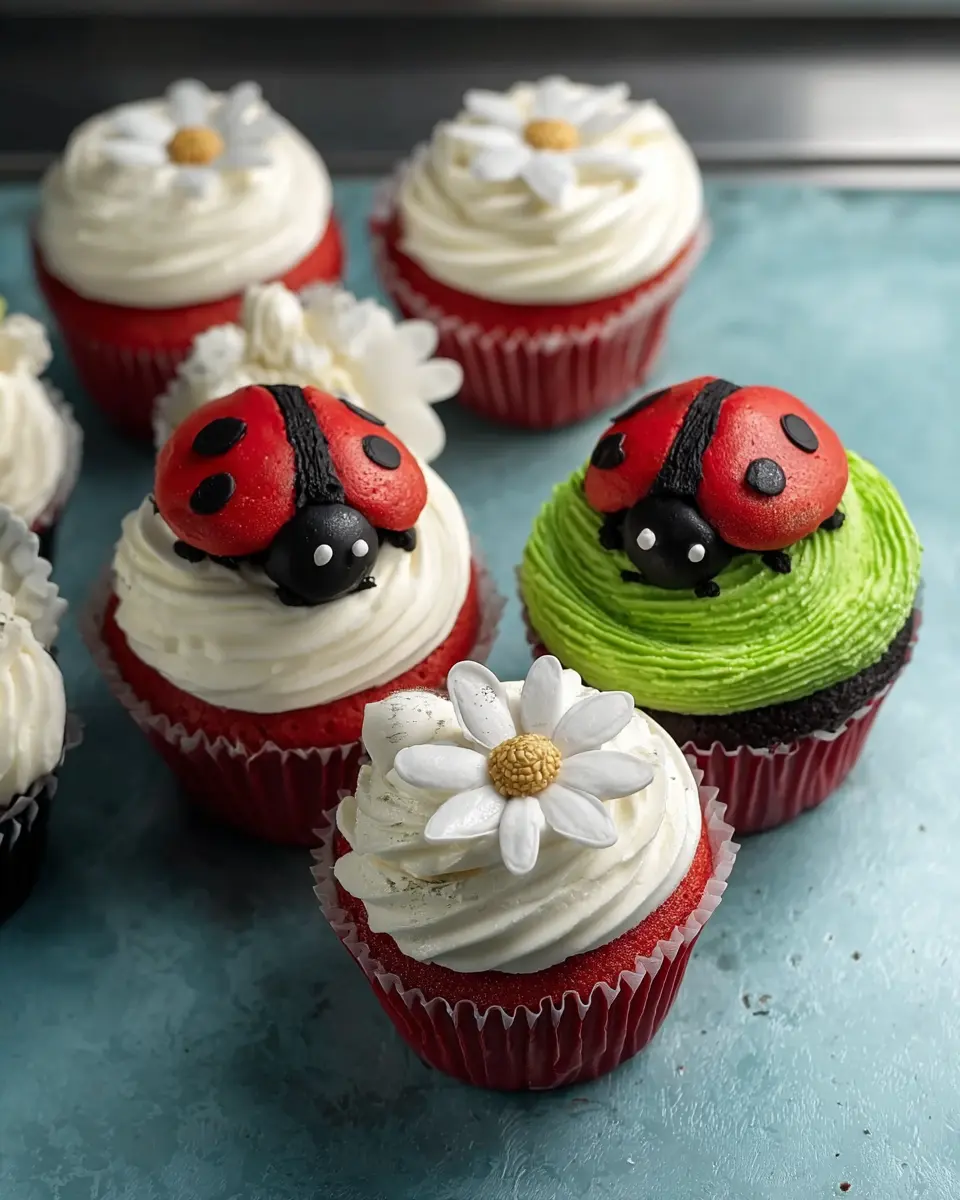
Serving Suggestions for Ladybug Cupcakes
To really make your Ladybug Cupcakes shine on any spring dessert table, consider a few charming display ideas. Arrange the cupcakes on a tiered cake stand for a whimsical touch that draws attention. Pair these delightful treats with fresh fruits like strawberries and blueberries to create a vibrant color palette.
You might also want to include themed decorations. Think picnic blankets or garden-inspired centerpieces, which can help set the mood. For a delightful drink accompaniment, serve iced lemon tea or sparkling lemonade—both complement the sweetness of the cupcakes beautifully. These little details will elevate your Ladybug Cupcakes from delicious to dazzling!
Tips for Creating Perfect Ladybug Cupcakes
Creating delightful Ladybug Cupcakes is all about attention to detail and creativity. Here are some handy tips to ensure your cupcakes dazzle on any dessert table:
-
Room Temperature Ingredients: Use room-temperature butter, eggs, and milk. This helps create a smoother batter and ensures even baking, which is crucial for that soft texture we all love.
-
Frosting Consistency: For ease of decorating, ensure your buttercream is thick enough. If it becomes too soft, pop it in the fridge for a short while to firm up.
-
Decorate with Love: Don't rush the decorating process. Take your time to pipe the ladybugs and flowers, allowing each layer of frosting to be appreciated. Mix up the designs for a fun garden effect.
Looking for more baking tips? Check out this article on cupcake decorating techniques for additional inspiration!
Time Details for Making Ladybug Cupcakes
Preparation Time
Get ready to whip these delightful treats up in just 20 minutes! Gather your ingredients, preheat the oven, and prepare the cupcake liners. It’s the perfect time to put on your favorite playlist and set the mood for baking.
Baking Time
These scrumptious Ladybug Cupcakes need about 18 to 20 minutes in the oven. You’ll want to keep an eye on them to ensure they rise perfectly and develop that beautiful golden hue.
Total Time
In just 55 minutes, you can transform simple ingredients into an adorable spring dessert that's bound to impress! So, gather your friends or family, and let's make this experience more enjoyable. Happy baking! For more tips on baking, check out Food Network's Baking Basics.
Nutritional Information for Ladybug Cupcakes
When whipping up these delightful Ladybug Cupcakes, it’s good to be aware of their nutritional values. Each cupcake contains approximately:
- Calories: 300
- Protein: 3g
- Sugar: 25g
These charming treats are perfect for a spring dessert table, but moderation is key. Planning a gathering? Consider pairing them with seasonal fruit for a balanced dessert spread! For more on dessert nutrition, check out Nutrition.gov for helpful tips and ideas.
FAQs about Ladybug Cupcakes
How can I make my cupcakes more colorful?
Adding vivid colors to your Ladybug Cupcakes can be a delightful way to enhance their appeal. One effective method is to use gel food coloring instead of liquid dyes, as gel provides more vibrant hues without compromising the frosting’s consistency. You can also mix a variety of colors in the buttercream, especially for decorative flowers. For more inspiration, check out this colorful baking guide for expert tips!
What's the best way to store Ladybug Cupcakes?
To keep your Ladybug Cupcakes fresh, store them in an airtight container at room temperature. This helps maintain their moist texture and vibrant appearance. If the weather is particularly warm, consider placing them in the fridge, but allow them to come back to room temperature before serving for the best flavor.
Can I make the buttercream in advance?
Absolutely! You can make the buttercream a few days ahead and store it in an airtight container in the fridge. Just remember to let it come to room temperature before using, and give it a quick re-whip to restore its creamy texture. This can save you valuable time when you’re ready to assemble your Ladybug Cupcakes.
Conclusion on Ladybug Cupcakes
Ladybug Cupcakes are a delightful addition to any spring dessert table. Their charming designs and sweet flavors are sure to impress guests at any gathering, from birthdays to garden parties. Give this recipe a try, and watch these cute treats become the star attraction! Happy baking!
Ladybug Cupcakes That Brighten Any Spring Dessert Table
Equipment
- Muffin tin
- Mixing Bowls
- whisk
- Electric Mixer
- piping bags
- star tip
Ingredients
For the Vanilla Cupcakes
- 1.5 cups all-purpose flour
- 1.5 teaspoons baking powder
- 0.25 teaspoon salt
- 0.5 cups unsalted butter softened
- 0.75 cups granulated sugar
- 2 large eggs
- 2 teaspoons vanilla extract
- 0.5 cups whole milk
For the Buttercream Frosting
- 1 cup unsalted butter softened
- 4 cups powdered sugar
- 2-3 tablespoons heavy cream or milk
- 1 teaspoon vanilla extract
- 1 pinch salt
- green gel food coloring
- red gel food coloring
- black gel food coloring
- yellow gel food coloring
For the Decorations
- 0.5 cups white buttercream reserved for flowers
- 0.25 cups green buttercream reserved for leaves
- 2 tablespoons black buttercream
- 2 tablespoons yellow buttercream
Instructions
Preparation
- Preheat oven to 350°F.
- Line a 12-cup muffin tin with cupcake liners. Set aside.
Mixing Batter
- In a medium bowl, whisk together the flour, baking powder, and salt until evenly combined.
- In a large bowl, beat the butter and sugar until light and fluffy.
- Add eggs one at a time, beating well after each addition. Mix in the vanilla extract.
- Add the dry ingredients in two additions, alternating with the milk. Mix just until smooth and no dry streaks remain.
Baking
- Divide the batter evenly among the cupcake liners, filling each about two-thirds full.
- Bake for 18 to 20 minutes. Cool completely before frosting.
Making Buttercream
- Beat the softened butter until creamy. Gradually add powdered sugar.
- Mix in vanilla, salt, and enough cream to create a smooth frosting.
Tinting Frosting
- Leave some frosting white for flowers. Tint most of the frosting green.
- Tint small portions red, black, and yellow.
Decorating
- Transfer green frosting to a piping bag fitted with a large star tip. Pipe spiral swirls onto each cooled cupcake.
- Use white buttercream to pipe flower petals. Add green leaves around the edges. Finish with yellow centers.
- Pipe small red oval shapes onto the green swirls. Add black heads, a center line, and black dots.
- Decorate one cupcake as a full red ladybug for variety.
- Add small flowers to a few cupcakes for a mixed garden look.
- Chill 10 to 15 minutes if needed so the details set neatly.
Serving
- Arrange on a tray or dessert stand. Serve at room temperature for the best texture.
Leave a Reply