
Introduction to Best Ever Moist Red Velvet Cupcakes
Why Red Velvet? The Allure of This Classic Treat
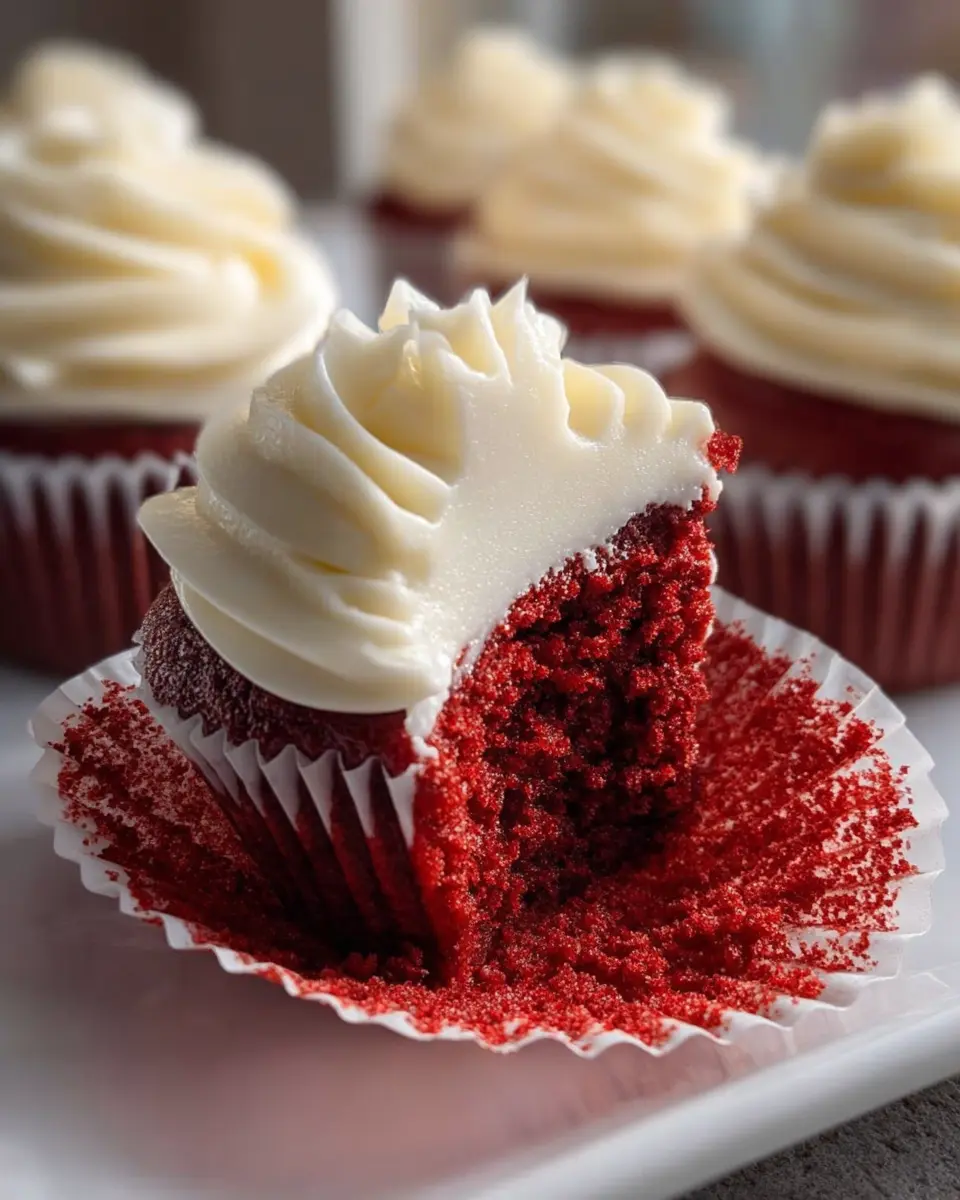
Ever wondered why red velvet has such a loyal fan base? These stunning cupcakes aren't just a treat for the eyes; they're all about moisture, flavor, and that signature vibrant hue. The combination of cocoa and buttermilk results in a rich, velvety texture that's completely irresistible. Plus, who can resist that enticing swirl of red?
Originating in the southern United States, red velvet has evolved over the decades, making its way into celebrations and everyday life alike. Whether it’s a birthday, Valentine’s Day, or just a Tuesday, these cupcakes bring a special touch to any occasion. Pair them with the classic tangy cream cheese frosting, and you've got a delightful contrast that enhances the overall experience.
While this version is all about the best ever moist red velvet cupcakes, remember that the secret lies in the ingredients. Using quality buttermilk and the right amount of red food coloring can elevate your baking.
If you’re on the hunt for a show-stopping dessert that balances beauty and taste, look no further. With this recipe, you’ll be whipping up batches of these delicious cupcakes in no time! Curious for more? Explore the background of red velvet on King Arthur Baking.
Ingredients for Best Ever Moist Red Velvet Cupcakes
A Breakdown of Essential Ingredients
Creating the best ever moist red velvet cupcakes begins with the right ingredients. Here's what you'll need:
- All-purpose flour: The backbone of your cupcakes, providing structure.
- Granulated and powdered sugar: Granulated sugar sweetens the batter, while powdered sugar makes the frosting creamy and smooth.
- Unsweetened cocoa powder: Just a hint of chocolate flavor adds depth to the red velvet taste.
- Buttermilk: This ingredient is essential for moisture and tenderness, giving your cupcakes that velvety texture.
- Unsalted butter and eggs: These enrich the batter and contribute to the luxurious crumb.
- Vinegar and baking soda: This combo creates the perfect rise while keeping the cupcakes soft. Don’t skip out on these!
Optional Add-ins for Extra Flavor
Want to elevate your cupcakes? Consider these optional add-ins:
- Chocolate chips: Adding semi-sweet or white chocolate chips can offer a delightful surprise in each bite.
- Crushed nuts: Pecans or walnuts can add a satisfying crunch and flavor contrast.
- Spices: A pinch of cinnamon or baking spices can enhance the overall flavor profile.
These tweaks not only enhance the taste but add a personal touch to your baking! Interested in more baking tips? Check out The Kitchn for extensive guides on crafting delicious cupcakes.
Step-by-Step Preparation of Best Ever Moist Red Velvet Cupcakes
Creating the best ever moist red velvet cupcakes is a delightful experience that not only fills your kitchen with an irresistible aroma but also rewards you with scrumptious treats. Follow these detailed steps for an effortless baking journey.
Gather Your Ingredients and Tools
Before diving into the mixing and baking, it’s essential to gather all your ingredients and tools. Here’s what you'll need:
- Ingredients:
- 1 ½ cups all-purpose flour
- 1 teaspoon baking soda
- 1 teaspoon unsweetened cocoa powder
- ½ teaspoon salt
- 1 cup granulated sugar
- ½ cup unsalted butter, softened
- 2 large eggs
- 1 teaspoon vanilla extract
- 1 cup buttermilk
- 1 tablespoon white vinegar
- 1 teaspoon red food coloring (gel works best!)
- ½ cup cream cheese, softened
- ¼ cup unsalted butter for frosting
- 2 cups powdered sugar, sifted
- Tools:
- Muffin tin
- Mixing bowls (both large and medium)
- Whisk and electric mixer
- Measuring cups and spoons
- Rubber spatula
Preheat the Oven and Prepare the Muffin Tin
Start by preheating your oven to 350°F (175°C). While the oven warms up, line a 12-cup muffin tin with cupcake liners. Using paper liners not only prevents sticking but also adds a festive touch to your best ever moist red velvet cupcakes.
Mix the Dry Ingredients Together
In a medium bowl, combine the flour, baking soda, cocoa powder, and salt. Whisk these together to ensure they’re evenly mixed and to incorporate air—this will help your cupcakes turn out light and fluffy!
Prepare the Wet Ingredients for Creaminess
In a large bowl, cream the granulated sugar and softened butter until they become light and fluffy. Next, add the eggs one at a time, mixing well after each addition. Stir in vanilla extract for that warm, comforting flavor. In a separate bowl, combine buttermilk, white vinegar, and red food coloring until smooth.
Combine the Mixtures for the Perfect Batter
Now it’s time to make the magic happen! Gradually add the dry mixture to the wet ingredients, alternating with the buttermilk mixture, starting and ending with the flour. Mix until just combined; overmixing can toughen the batter, so be gentle!
Fill the Muffin Cups and Bake
Carefully divide the batter among the muffin cups, filling each about two-thirds full—this helps them rise without overflowing. Bake for about 18 to 20 minutes or until a toothpick inserted in the center comes out clean. Your kitchen will smell heavenly, heightening your anticipation!
Let Them Cool — The Anticipation!
Once they’re baked, allow the cupcakes to cool in the pan for about 5 minutes. Then transfer them to a wire rack to cool completely. This cooling step is crucial for achieving the perfect frosting consistency, so try not to rush it!
By following these steps, you’ll master the art of baking the best ever moist red velvet cupcakes. Prepare to indulge in the velvety goodness that awaits!
Variations on Best Ever Moist Red Velvet Cupcakes
Red Velvet Cupcakes with Cream Cheese Swirls
Elevate your best ever moist red velvet cupcakes by adding a delightful cream cheese swirl! Simply prepare the cream cheese frosting as per the recipe but reserve a portion. After filling your cupcake liners with batter, drop in spoonfuls of frosting and use a toothpick to create a beautiful marble effect. This way, each bite offers a surprising twist that complements the cake’s moist texture and richness.
Mini Red Velvet Cupcakes for Bite-Sized Delights
If you’re looking for a perfect party treat, consider making mini versions of your best ever moist red velvet cupcakes. These bite-sized wonders are not only adorable but also bursting with flavor! Just reduce the baking time to about 10-12 minutes, and you’ll have a fun finger food that’s perfect for sharing. Want to impress your friends? Top them with a sprinkle of festive sprinkles or chopped nuts for an extra crunch.
Explore more ways to customize your cupcakes with flavors and presentations that excite!
Baking Notes for Best Ever Moist Red Velvet Cupcakes
Importance of Room Temperature Ingredients
Using room temperature ingredients is crucial for the best ever moist red velvet cupcakes. When butter, eggs, and cream cheese are warmed to a similar temperature, they combine more smoothly, creating a light and airy batter. This not only enhances flavor but also encourages a tender crumb. If you forget to take them out beforehand, a quick solution is to place eggs in warm water for a few minutes, or soften butter in the microwave for just 10-15 seconds.
Tips for Achieving Maximum Moisture
To ensure that your cupcakes achieve maximum moisture, focus on these key elements:
- Buttermilk: Using buttermilk is essential as it reacts with baking soda, leading to a delicate texture.
- Don’t Overmix: Mix until just combined. Overmixing can lead to tough cupcakes.
- Proper Cooling: Allow the cupcakes to cool properly before frosting, as this retains their moisture.
For additional tips, check out Baker’s Secret for expert advice on cupcake baking!

Serving Suggestions for Best Ever Moist Red Velvet Cupcakes
Pairing With Your Favorite Coffee or Tea
Elevate your best ever moist red velvet cupcakes by pairing them with a rich cup of coffee or a soothing herbal tea. The chocolate notes in the cupcake resonate beautifully with a bold espresso or a creamy latte, while a calming chai or peppermint tea provides a delightful contrast. Make it a cozy treat for yourself or a light afternoon gathering with friends.
For more pairing inspiration, check out Coffee Pairing Guide for a comprehensive list of brew types that complement sweet desserts perfectly.
Presenting Cupcakes at Gatherings or Celebrations
When showcasing your cupcakes at celebrations, aim for presentation that wow! Use colorful cupcake liners and arrange them on a decorative cake stand. Add some festive sprinkles or edible gold leaf on top of the cream cheese frosting for that extra touch of glam. Consider setting themed decorations around them, like fresh flowers or themed table cloths, to create a visually appealing spread.
Remember, the way you present your treats can make your gatherings even more memorable! For additional decor tips, refer to Inspiring Party Decoration Ideas.
Tips for Making Perfect Best Ever Moist Red Velvet Cupcakes
Frosting Techniques for Piping Mastery
Achieving that picture-perfect swirl on your best ever moist red velvet cupcakes is all about technique! Use a piping bag fitted with a star tip for elegant swirls. If you're a beginner, try a zip-top bag with the corner snipped off as a handy DIY piping bag. Remember to hold the bag upright and apply even pressure while swirling to create beautiful peaks!
Storing Your Cupcakes for Freshness
To keep your cupcakes fresh, store them in an airtight container at room temperature for up to three days. If you need to store them longer, refrigerate for up to a week. To prevent the cream cheese frosting from losing its texture, consider freezing un-frosted cupcakes and frosting individually—simply thaw and frost when you're ready to enjoy. This method will ensure you savor the best ever moist red velvet cupcakes at their finest!
For more baking tips, check out King Arthur Baking.
Time Breakdown for Best Ever Moist Red Velvet Cupcakes
Preparation Time: Setting the Stage
Get ready to whip up the best ever moist red velvet cupcakes in just 15 minutes! Gather your ingredients and preheat your oven to 350°F (175°C). Line a muffin tin with paper liners, and have your mixing bowls at the ready!
Baking Time: The Waiting Game
Once your batter is perfectly mixed, it’s time to bake! Slide those delightful cupcakes into the oven and enjoy 18 to 20 minutes of mouth-watering anticipation. The aroma that fills your kitchen is simply irresistible!
Total Time: From Start to Finish
From prep to plate, you’re looking at about 40 minutes for the entire process. That’s right—just 40 minutes until you can indulge in a beautifully frosted cupcake bursting with flavor. What a sweet reward for your efforts!
Nutritional Facts for Best Ever Moist Red Velvet Cupcakes
Calories and Sugar Content
Each of the best ever moist red velvet cupcakes contains approximately 350 calories and 40 grams of sugar. While this indulgence is delightful, it’s essential to enjoy these treats in moderation, especially if you’re mindful of your sugar intake.
Understanding What's in Each Cupcake
Let's break down what makes these cupcakes both scrumptious and worth the occasional treat:
- Fats (18g): Mostly from butter, providing richness and moisture.
- Carbohydrates (45g): Thank you to the flour and sugar, forming the base of these lovely cupcakes.
- Protein (4g): Contributed primarily by eggs and cream cheese frosting.
Consider swapping some ingredients for healthier options, like using less sugar or trying lighter cream cheese for the frosting. For additional insights into cupcake nutrition, the American Heart Association offers valuable tips on balancing sweetness in your diet.
These best ever moist red velvet cupcakes not only satisfy your sweet tooth but can be made to fit a more balanced dietary lifestyle with some creative adjustments!
FAQs About Best Ever Moist Red Velvet Cupcakes
What Makes These Cupcakes So Moist?
The secret behind the best ever moist red velvet cupcakes lies in the combination of buttermilk and vinegar. This duo not only adds a delightful tang but also reacts with baking soda to create a tender crumb. Plus, make sure not to overmix once you combine the wet and dry ingredients—this keeps them fluffy!
Can I Make These Cupcakes Ahead of Time?
Absolutely! You can bake the cupcakes a day in advance. Just let them cool completely before placing them in an airtight container. For optimal freshness, frost them the day you plan to serve. If you want them to stay moist longer, consider freezing the cupcakes without frosting. Thaw them in the fridge overnight before serving.
How Do I Store Leftover Cupcakes?
To keep your best ever moist red velvet cupcakes fresh, store them in an airtight container at room temperature for up to three days. If they last longer (which is rare!), transfer them to the fridge for additional days. Remember, let them come to room temperature before enjoying for the best flavor!
For more tips on baking, check out reliable sources like The Kitchn or Serious Eats.
Conclusion on Best Ever Moist Red Velvet Cupcakes
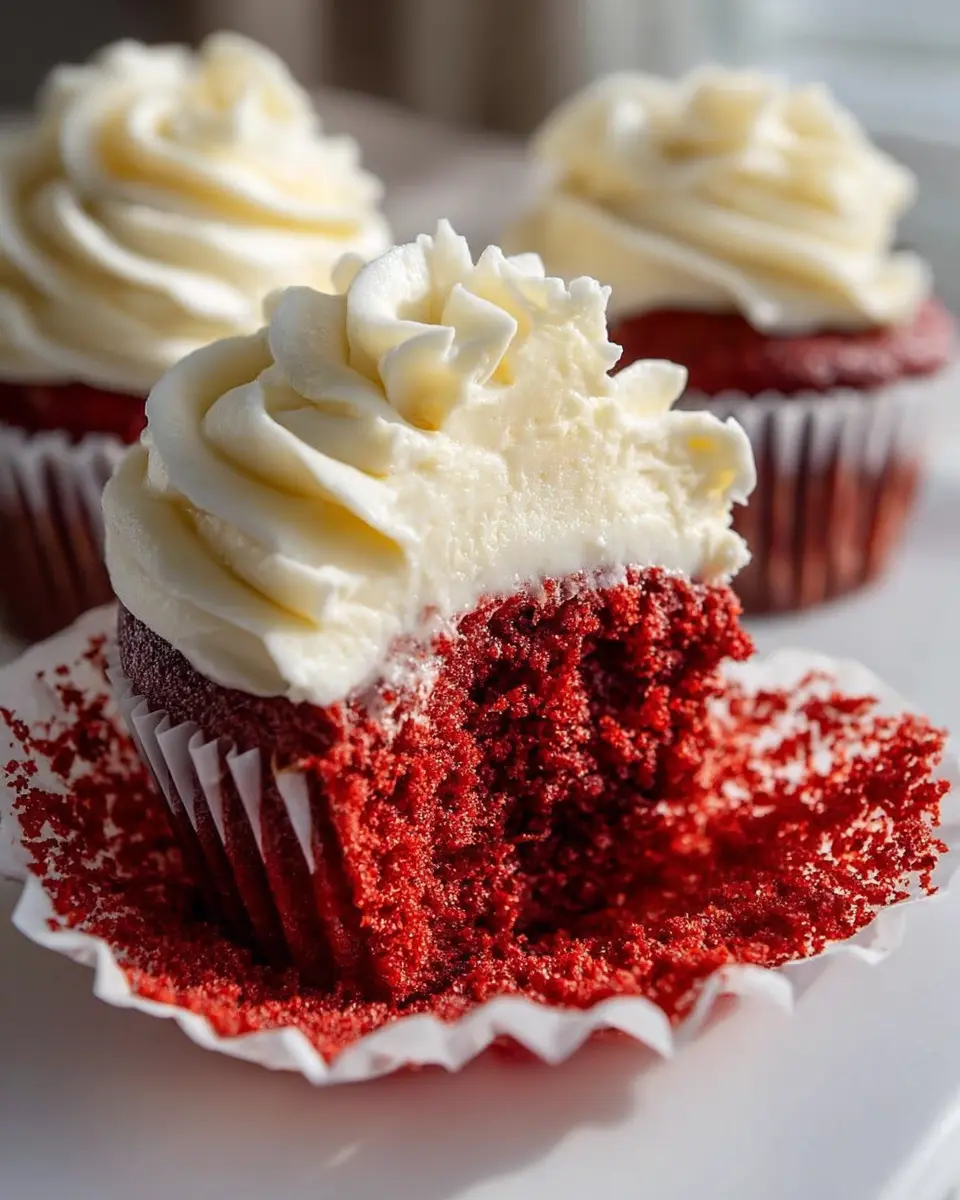
Creating these best ever moist red velvet cupcakes is not just a baking project; it's a delightful experience! With their rich flavor, stunning color, and the creamy tang of the frosting, you'll find yourself returning to this recipe time and again. Share them with friends, family, or simply indulge yourself!
Why You’ll Love Making These Cupcakes Again and Again
Each bite of these moist red velvet cupcakes transports you to a world of rich flavor and indulgence. Here’s why you’ll keep coming back to this recipe:
-
Ease of Preparation: Even novice bakers can whip these up without a hitch. The step-by-step instructions make it simple.
-
Perfect for Any Occasion: Whether it’s a birthday party, a holiday gathering, or just a treat for yourself, these cupcakes fit the bill perfectly.
-
Customizable: Want to add a twist? Consider experimenting with different frosting flavors or integrating fun toppings. The base is versatile enough to accommodate your creativity.
-
Impressive Presentation: The vibrant red hue topped with a creamy white frosting makes for a show-stopping dessert.
Don't forget to share your baking adventures on social media! Use hashtags to join a community of fellow baking enthusiasts. And if you're eager to improve your skills even further, check out resources like King Arthur Baking for tips and tricks.
In conclusion, these cupcakes will not just satisfy your sweet tooth but also create lasting memories in your kitchen. Happy baking!
Best Ever Moist Red Velvet Cupcakes with Classic Cream Cheese Frosting
Equipment
- Muffin tin
- Mixing Bowls
- whisk
- Electric Mixer
Ingredients
Cupcake Ingredients
- 1.5 cups all-purpose flour
- 1 teaspoon baking soda
- 1 teaspoon unsweetened cocoa powder
- 0.5 teaspoon salt
- 1 cup granulated sugar
- 0.5 cup unsalted butter softened
- 2 large eggs
- 1 teaspoon vanilla extract
- 1 cup buttermilk
- 1 tablespoon white vinegar
- 1 teaspoon red food coloring or more for deeper color
Frosting Ingredients
- 0.5 cup cream cheese softened
- 0.25 cup unsalted butter softened
- 2 cups powdered sugar sifted
- 0.5 teaspoon vanilla extract
Instructions
Cupcake Instructions
- Preheat your oven to 350°F (175°C). Line a 12-cup muffin tin with paper liners.
- In a medium bowl, whisk together the flour, baking soda, cocoa powder, and salt. Set aside.
- In a large bowl, cream together the sugar and butter until light and fluffy. Beat in the eggs one at a time, then mix in the vanilla extract.
- In a small bowl, mix the buttermilk, vinegar, and red food coloring until combined.
- Alternate adding the dry ingredients and the buttermilk mixture to the wet ingredients, beginning and ending with the dry ingredients. Mix until just combined; do not overmix.
- Divide the batter evenly among the prepared muffin cups, filling each about two-thirds full.
- Bake for 18 to 20 minutes, or until a toothpick inserted into the center comes out clean. Let the cupcakes cool in the pan for 5 minutes before transferring them to a wire rack to cool completely.
Frosting Instructions
- To make the frosting, beat the cream cheese and butter until smooth. Gradually add the powdered sugar, mixing until combined. Add the vanilla and beat until light and fluffy.
- Frost the cooled cupcakes.
Leave a Reply