
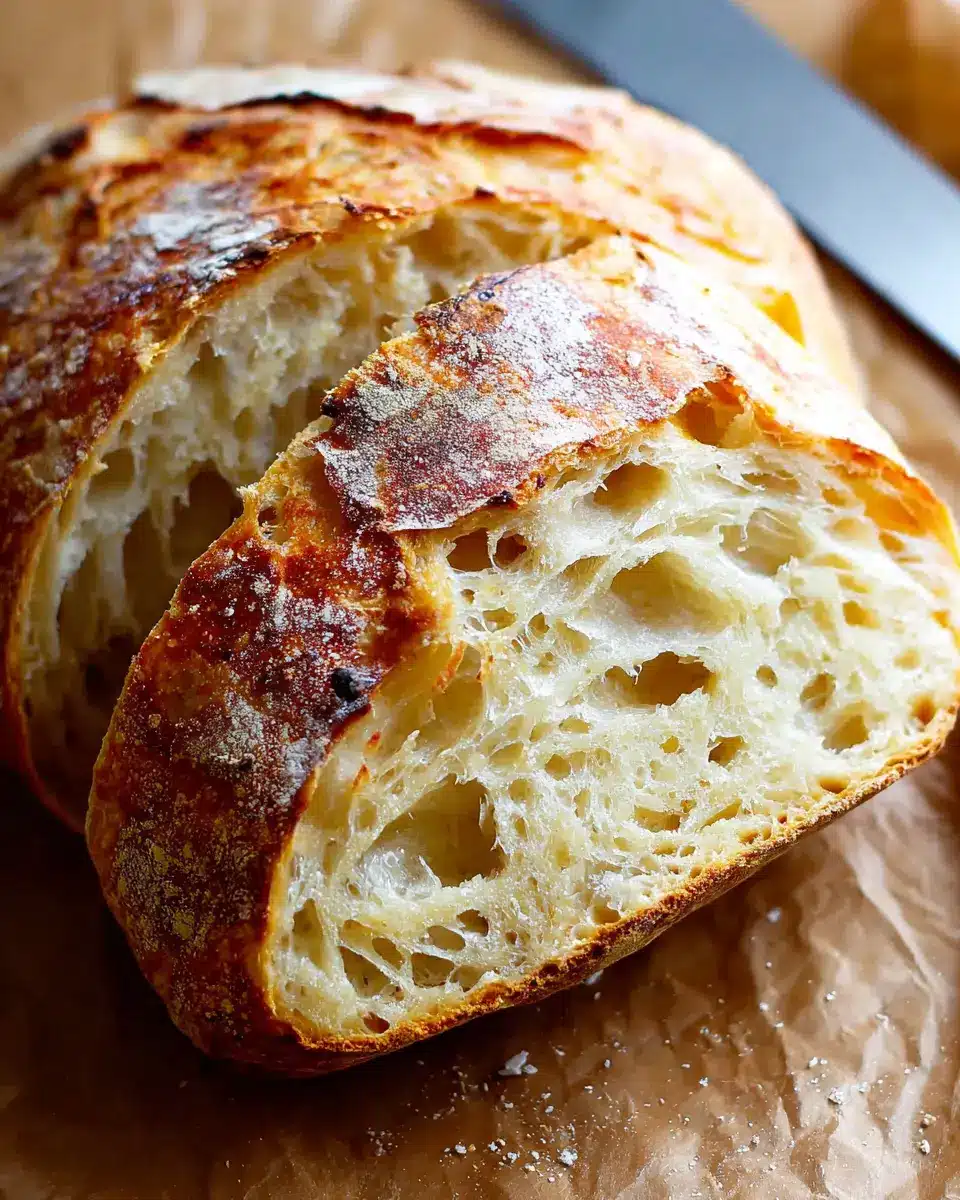
Introduction to No Knead Bread
If you’re a young professional navigating a busy schedule, you’ll love the simplicity and convenience of no knead bread. This delightful bread requires minimal effort and no strenuous kneading, making it an ideal choice for those who may not have hours to dedicate to baking. With just a few ingredients and a bit of patience, you can create a beautifully crusty loaf that’s perfect for sandwiches or dipping into soups.
Why No Knead Bread is Perfect for Young Professionals
Imagine coming home after a long day, and all you need to do to enjoy fresh, homemade bread is mix a few ingredients and let it rest. The no knead method allows for a slow fermentation process that develops incredible flavors without demanding too much of your time. You can easily mix the dough before heading to bed, let it rise overnight, and bake it the next day, fitting seamlessly into your routine.
- Effortless Preparation: Just mix, let it sit, and bake.
- Flexible Timing: Works with your schedule; no rush required.
- Delicious Results: Impress your friends with bakery-quality bread.
Take a closer look at the no knead bread recipe below, and discover how easy it can be to bring the joy of home-baked bread into your life!
For more tips and tricks on bread-making, you might want to explore King Arthur Baking's resources for guidance.
Ingredients for No Knead Bread
Essential Ingredients for the Classic Recipe
Creating the perfect no knead bread starts with just a few fundamental ingredients that work together to produce a delightful loaf. Here’s what you need:
- 3 ¼ cups (425 grams) all-purpose flour: This is the backbone of your bread, providing structure and texture.
- 2 teaspoons fine sea salt: Essential for flavor and controlling yeast fermentation.
- ½ teaspoon active dry yeast: This little powerhouse helps the dough rise, resulting in that airy crumb we all love.
- 1 ½ cups warm water (around 110°F): Be sure to use warm water to activate the yeast effectively.
Optional Ingredients for Variations
While the classic recipe is stellar on its own, you can easily mix things up! Here are some optional ingredients to consider:
- Herbs and Spices: Add dried rosemary or garlic powder for extra flavor.
- Seeds: Incorporating sunflower seeds, sesame seeds, or poppy seeds can enhance the texture and appearance.
- Cheese: Striking a balance between flavors? A bit of grated Parmesan or sharp cheddar works wonders.
- Olive Oil: Drizzle a tablespoon into the dough for a richer taste.
Feel free to get creative! Your no knead bread can be customized to your taste preferences and occasions. For more on baking techniques, explore this guide on bread flour from King Arthur Baking. Happy baking!
Preparing No Knead Bread
Making no knead bread is one of the simplest and most rewarding kitchen adventures you can embark on. With just a few ingredients and a little patience, you'll have a beautiful loaf that’s crusty on the outside and delightfully soft on the inside. Let's walk through the steps to create this delicious bread.
Mixing the Dough
Start by gathering your ingredients: all-purpose flour, fine sea salt, active dry yeast, and warm water. In a large mixing bowl, combine 3 ¼ cups of flour, 2 teaspoons of salt, and ½ teaspoon of yeast. It’s best to whisk these dry ingredients together to ensure they’re evenly distributed. Next, add in 1 ½ cups of warm water (about 110°F) and mix it with a wooden spoon or spatula. Don’t worry if the dough looks loose and shaggy; that’s the beauty of no knead bread! The moisture will do the work for you.
Letting the Dough Rise
Once the dough is mixed, it’s time to let it rise. Cover the bowl with plastic wrap or beeswrap and let it sit at room temperature for 12 to 18 hours. Yes, you read that right! This slow fermentation process is what develops that amazing depth of flavor. It’s almost like a mini magic trick happening right in your kitchen. Just be sure to check in on it from time to time and marvel at how it transforms.
Shaping the Dough
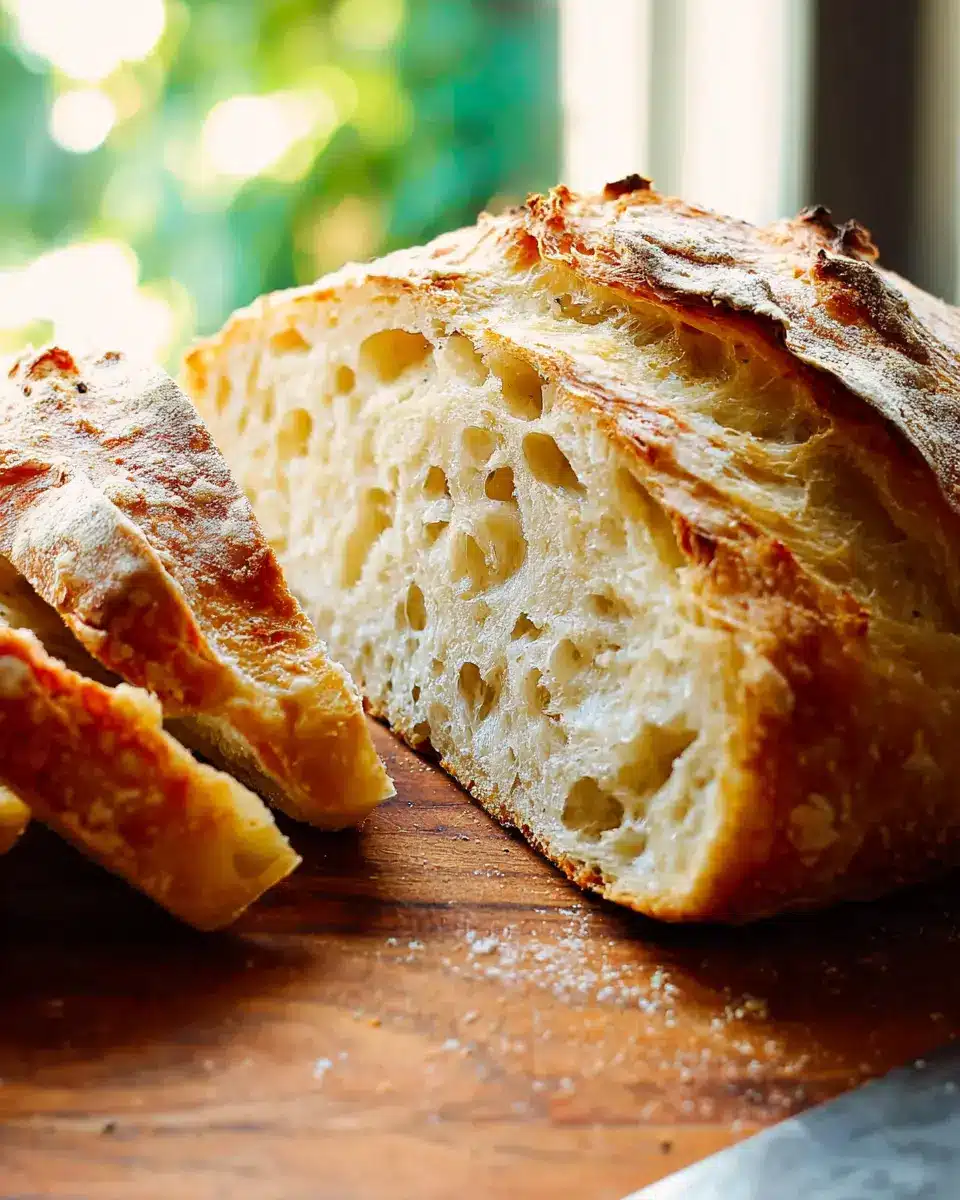
After your dough has risen beautifully, it’s time to shape it. Sprinkle a clean surface with flour and gently transfer the dough onto it. Using your hands, fold the dough over itself several times until it feels a bit tighter. For those who are wondering, this is how we shape the lovely no knead bread into a ball! If it’s sticky, don’t be shy; add a bit more flour as needed. Lightly flour the top and flip it onto parchment paper, allowing the smooth side to face up. Cover it loosely and let it rest while you prepare to bake.
Preheating the Oven and Dutch Oven
Now for the fun part! Place your Dutch oven inside the oven and preheat it to 450°F. This heating step is crucial for achieving that perfectly crispy crust and allows your bread to gain a nice rise during baking. Let the Dutch oven heat for about 20-30 minutes while the dough continues to rest. If it seems to have flattened a little, don’t worry; a quick reshape will do wonders before it hits the oven.
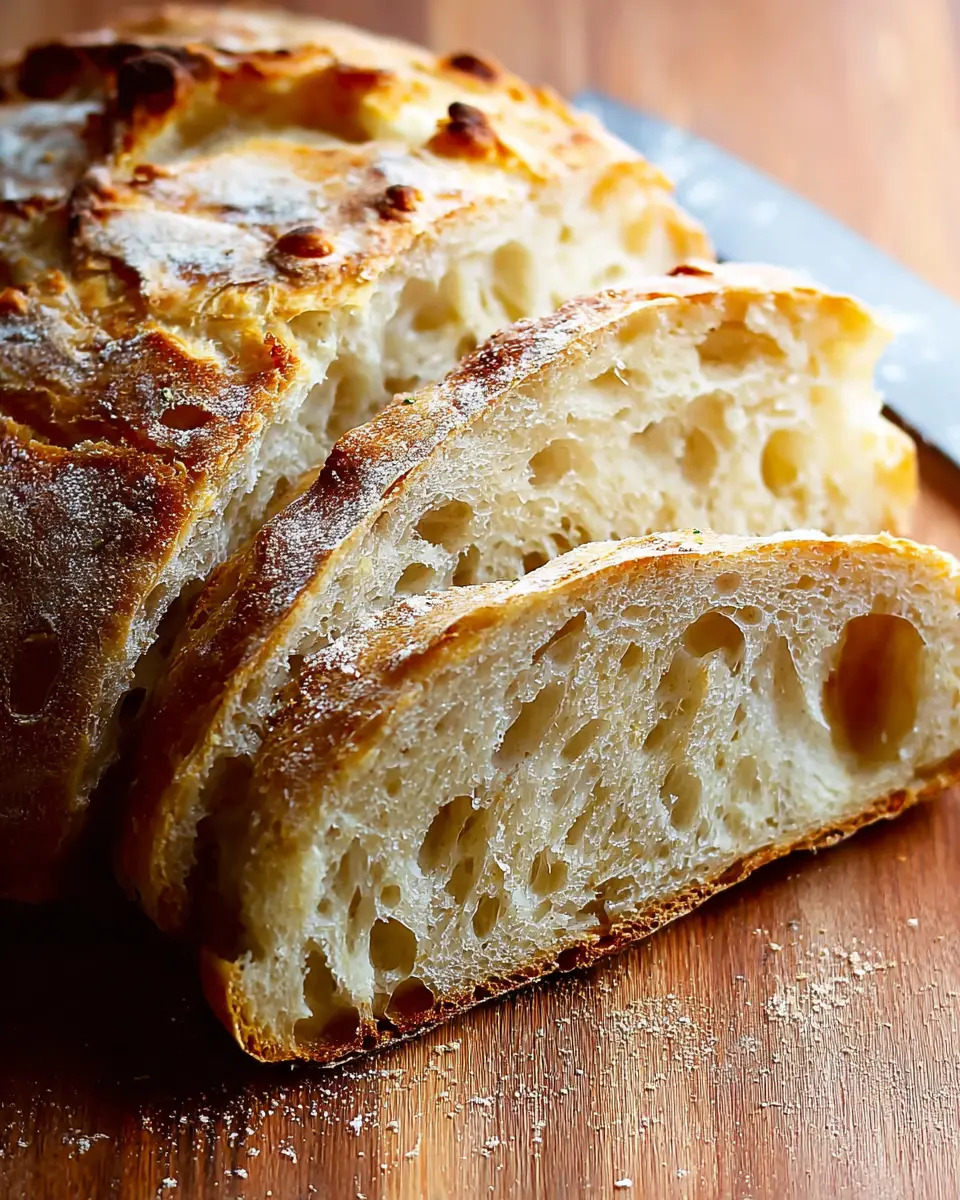
Baking the Bread
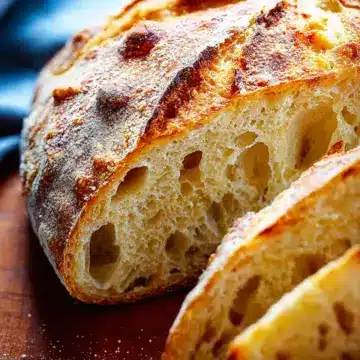
Carefully remove the hot Dutch oven using oven mitts—that pot is no joke! Gently lift the parchment paper with your dough and place it inside. Cover with the lid and bake for 30 minutes. After that, carefully remove the lid and continue baking for another 10-20 minutes until golden brown. And there you have it, a beautiful loaf of no knead bread! Allow it to cool on a wire rack for at least 30 minutes before slicing. Enjoy the aroma wafting through your home—it's a cozy, satisfying experience you won’t want to miss.
Variations on No Knead Bread
Herbed No Knead Bread
Elevate your no knead bread experience by adding fresh or dried herbs. Think rosemary, thyme, or oregano—these fragrant additions will infuse your loaf with delightful flavors. Simply mix your chosen herbs into the dry ingredients before combining with water. Serve it as a fragrant table centerpiece or alongside a cozy soup.
Sundried Tomato and Olive No Knead Bread
For a Mediterranean twist, try incorporating chopped sundried tomatoes and olives. This variation not only adds a burst of color but also enriches the bread with tangy flavors. Mix in about a half cup of sundried tomatoes and a quarter cup of olives during the initial dough mixing stage. It’s perfect for sandwiches or simply toasted with a drizzle of olive oil. Check out more ideas for no knead bread variations to keep your baking exciting!
Cooking Tips and Notes for No Knead Bread
Tips for Achieving the Perfect Crust
To get that perfect crust on your no knead bread, consider these helpful tips:
- Preheat your Dutch oven. Heating it alongside your oven ensures an optimal bake.
- Use parchment paper. It makes transferring your dough easier and helps prevent sticking.
- Bake with the lid on for the first half. This traps steam, creating a beautiful crust.
Common Mistakes to Avoid
Avoid these common pitfalls for your no knead bread success:
- Underestimating the rise time. Giving your dough ample time to rest leads to better flavor and texture.
- Using too much flour while shaping. It's easy to overdo it, but a little stickiness is often a good sign!
- Skipping the cooling phase. Letting your bread cool for 30 minutes ensures better slicing and flavor development.
For more insights on baking bread, check out King Arthur Baking for their expert tips!
Serving Suggestions for No Knead Bread
Pairing with Soups and Stews
There's nothing quite like enjoying a warm slice of no knead bread with your favorite soup or stew after a long day. The crusty exterior and soft interior make it perfect for dipping! Try pairing it with a hearty beef stew or a creamy tomato basil soup. The bread not only soaks up all those delicious flavors but also adds a satisfying texture to your meal. For an extra kick, you can spread a bit of garlic butter on the bread before dipping!
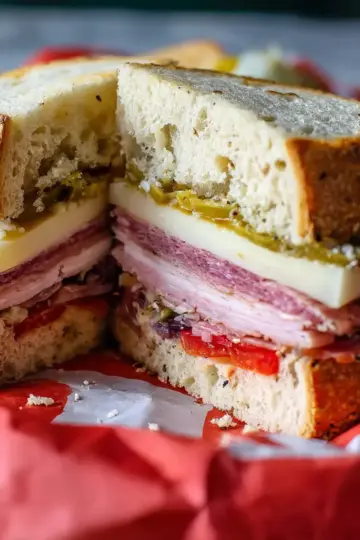
Using for Sandwiches and Toasts
Want to elevate your lunchtime routine? Slice your no knead bread to create delightful sandwiches. It's sturdy enough to hold fillings like turkey bacon, chicken ham, or roasted veggies without falling apart. Or, opt for a simple morning toast topped with avocado, a pinch of salt, and a sprinkle of chili flakes for a nutritious start to your day. With its superb crust and structure, it’s versatile enough to fit into any meal plan. And don’t forget—leftover slices also make fantastic croutons for salads!
Time Breakdown for No Knead Bread
Preparation Time
Making your no knead bread starts with a simple 30-minute prep session. Just mix the ingredients, and you’re ready to let magic happen overnight!
Rising Time
Patience is key! Let the dough rise for 12 to 18 hours at room temperature. This long fermentation develops amazing flavor and texture.
Baking Time
When it’s time to bake, it takes around 30 minutes. Make sure to remove the lid halfway through for that delightful crust.
Total Time
In total, you're looking at about 18 hours and 30 minutes from start to finish. But don’t worry—most of that time is hands-off, allowing you to get other things done!
Nutritional Facts for No Knead Bread
When enjoying a slice of no knead bread, understanding its nutritional profile can help you make better dietary decisions. Here’s a quick overview of what to expect per serving:
Calories per Serving
One serving of no knead bread typically contains around 120 calories, making it a satisfying yet manageable choice.
Protein Content
With approximately 4 grams of protein per serving, this bread provides a great foundation for a hearty meal. Pair it with toppings like turkey bacon or chicken ham for an even more nutritious option!
Sodium Levels
Each slice has roughly 230 milligrams of sodium. If you're watching your salt intake, adjusting the salt content in your recipe can help keep it in check.
For more detailed nutrition tips, check out resources from the USDA or NutritionData.com.
FAQ about No Knead Bread
Can I make No Knead Bread without a Dutch Oven?
Absolutely! While a Dutch oven helps achieve that perfectly crusty exterior, you can use a baking stone or a heavy baking sheet instead. Just preheat your oven, place a shallow pan at the bottom, and add water to create steam while baking. This method can still yield delicious, crusty no knead bread!
How do I store leftover No Knead Bread?
To keep your no knead bread fresh, wrap it in a clean kitchen towel and store it at room temperature. If you plan to keep it longer than a few days, consider slicing the bread and freezing it in airtight bags. When you're ready to eat, simply toast the slices or let them thaw for a delightful treat.
What if my dough doesn’t rise?
If your no knead bread dough isn't rising, it might be due to inactive yeast. Ensure your yeast is fresh and active, or try increasing the proofing time. A warmer environment can help—try placing the dough in a slightly warmed oven with the light on to create a cozy atmosphere for rising.
Conclusion on No Knead Bread
No knead bread is a game changer for any home baker. With minimal effort and simple ingredients, you can create a beautifully crusty loaf that is sure to impress. Give this recipe a try, and enjoy the delicious aroma of freshly baked bread filling your kitchen! For more tips and baking inspiration, check out King Arthur Baking.
No Knead Bread
Equipment
- Non-Enameled Dutch Oven
- parchment paper
- Fine Sea Salt
Ingredients
- 3 ¼ cups all-purpose flour 425 grams
- 2 teaspoons fine sea salt
- ½ teaspoon active dry yeast
- 1 ½ cups warm water about 110°F
Instructions
- Stir together the flour, salt and yeast in a large mixing bowl until combined. Add in the warm water and stir with a wooden spoon or spatula until the dough is evenly mixed and no large flour streaks remain.
- Cover the bowl with plastic wrap or beeswrap, and let the dough rest at room temperature for 12 to 18 hours.
- Transfer the dough to a well-floured surface. Fold the dough on top of itself until it feels a bit tighter and holds its shape. Lightly flour the top of the dough and flip it upside-down onto a piece of parchment paper.
- Place the Dutch oven inside your oven, then set oven to 450°F. Wait for 20-30 minutes for the oven to heat.
- Very carefully, use oven mitts to remove the Dutch oven from the oven. Transfer the dough ball (along with the parchment) to the Dutch oven. Cover with the Dutch oven lid and bake for 30 minutes.
- Remove the lid and bake for 10-20 more minutes, until the crust of the bread reaches your desired level of doneness.
- Remove from the oven, uncover, and transfer the bread to a wire cooling rack. Cool for at least 30 minutes, then slice and serve.


Leave a Reply