
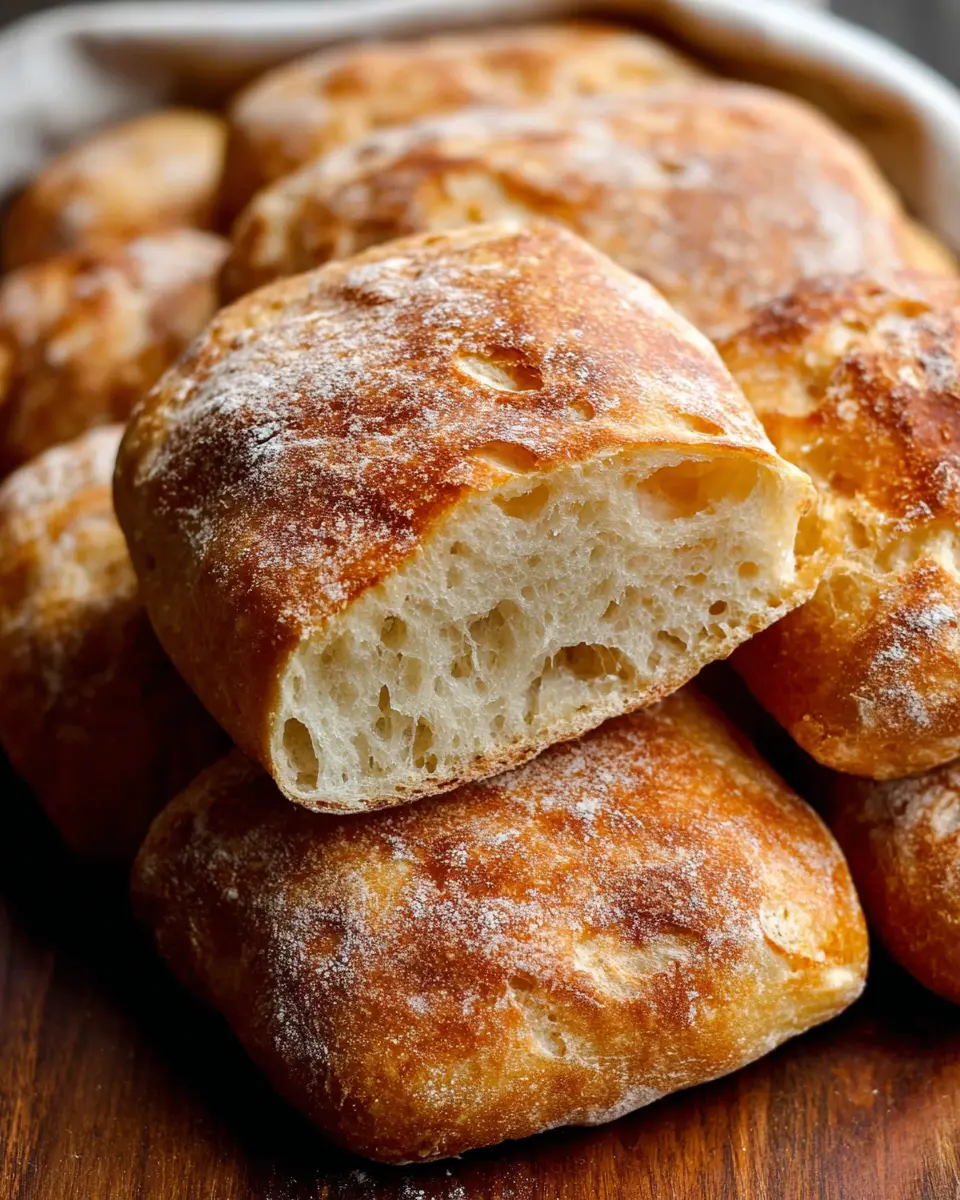
Introduction to Homemade Ciabatta Bread
Making homemade ciabatta bread is a culinary adventure that brings the delightful aroma of fresh bread right into your kitchen. For young professionals juggling busy schedules, this is not just baking; it's an experience that offers both relaxation and satisfaction. Imagine pulling apart warm, airy loaves, perfect for sandwiches or alongside a beautiful salad.
Why Homemade Ciabatta is a Game-Changer for Young Professionals
When life gets hectic, cooking can feel like a chore. However, the process of crafting ciabatta engages both your hands and mind, allowing you to unwind. The extended fermentation and kneading create a unique texture and flavor—much better than store-bought options. Plus, with just four ingredients, it’s simple and straightforward.
Investing 13 hours in a two-day ciabatta journey pays off in taste. Not only does this bread elevate your meals, but it also impresses friends and family. Think of a cozy weekend brunch, featuring ciabatta rolls filled with Turkey Bacon and vegetables, or using them as a fabulous base for homemade sandwiches with Chicken Ham. Discover the joy of baking and take a step toward healthier eating habits by knowing exactly what goes into your bread. You’ll soon find making ciabatta becomes a cherished ritual, rather than just a task. So, why not treat yourself to the wholesome goodness of homemade ciabatta bread?
Ingredients for Homemade Ciabatta Bread
Essential Ingredients for the Biga/Preferment
Creating the perfect homemade ciabatta bread begins with the biga, a crucial part of the process that enhances flavor and texture. Here’s what you need:
- 1 cup (130g) bread flour: Opt for high-protein bread flour for that chewy texture.
- ⅛ teaspoon active-dry or instant yeast: This small amount is all you need to kickstart the fermentation.
- ½ cup (120g) room-temperature water: Make sure it's about 70°F (21°C) to help the yeast thrive.
Letting this mixture sit overnight really elevates the overall flavor!
Ingredients for Ciabatta Rolls
Once your biga is ready, it’s time to bring everything together for those delightful rolls. Gather the following:
- 1 teaspoon (3g) active-dry or instant yeast: To give your dough a good rise.
- 1 cup (240g) warm water: This should be around 100–110°F (38°–43°C).
- 2 and ½ cups (325g) bread flour: Again, make sure this is bread flour for the best results.
- 1 and ½ teaspoons (8g) table salt: Essential for flavor.
- Olive oil: Use this to coat your hands and utensils as needed.
With these ingredients, you’ll be on your way to baking some exceptional ciabatta! Don’t forget to check out more tips on measuring your ingredients accurately by using a kitchen scale for consistent results!
Preparing Homemade Ciabatta Bread
Making homemade ciabatta bread is a delightful two-day adventure that transforms simple ingredients into a crusty, airy masterpiece. While it may seem like a lengthy process, each step is essential for that irresistible texture and flavor. Let’s break it down!
Day 1: Making the biga/preferment
On the first day, you’ll create a crucial component known as biga. This starter helps develop the flavor and texture of your bread. Simply whisk together:
- 1 cup (130g) bread flour
- ⅛ teaspoon active-dry or instant yeast
- ½ cup (120ml) room-temperature water
Mix until you achieve a cohesive dough, cover it tightly, and let it rest at room temperature for 8–24 hours. This slow fermentation enhances the bread's aroma and crumb structure.
Day 2: Mixing the dough
When you’re ready on Day 2, it's time to bring everything together. Uncover your biga and in a new mixing bowl, activate another teaspoon of yeast in 1 cup of warm water. After about 10 minutes, combine the biga, 2 and ½ cups of bread flour, and 1 and ½ teaspoons of table salt. Mix until fully integrated. This will create a wet and sticky dough, which is exactly what you want for that chewy, airy ciabatta.
First rest and stretch-and-fold technique
Let the dough rest for 30 minutes, covered, then the interesting part begins. Visualize a clock on your dough; use a spatula or greased hands to perform a gentle stretch-and-fold at the 12 o'clock position, pulling it down to 6 o'clock. Turn the bowl 90 degrees and repeat this process at every "hour" around the bowl. In total, you should complete 8 folds. This technique strengthens the gluten structure and helps retain the air you’re trying to incorporate.
Repeat stretch-and-folds
After the first round of stretch-and-folds, let the dough rest for another 30 minutes. Perform three more rounds of this technique. Once you finish the last round, you can place the dough in the refrigerator for 1 hour to even up the development—a slight break before the final shaping!
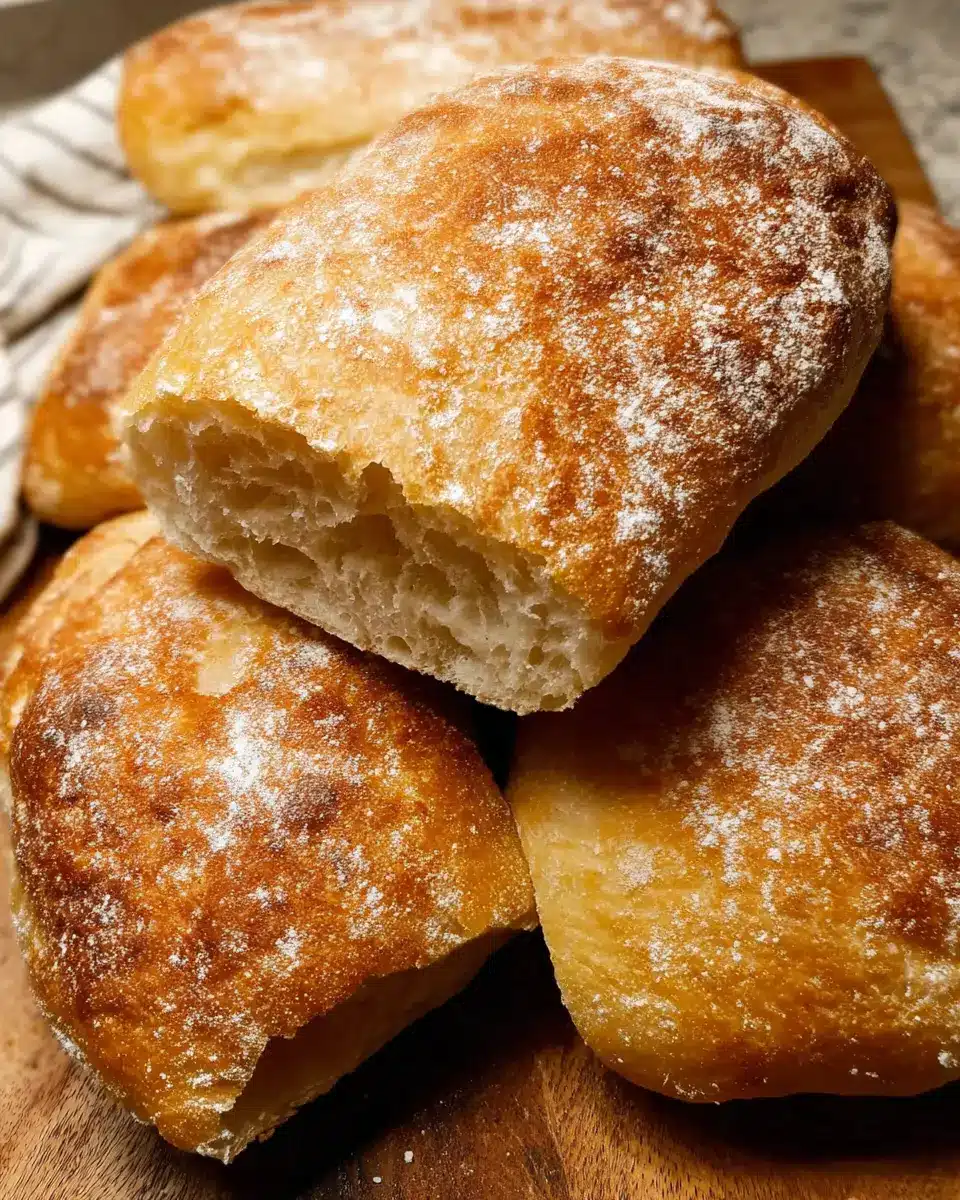
Shaping the rolls/bread
Here comes the fun part! Generously flour your working surface and very gently transfer the dough onto it. Shape it into a rough rectangle (about 10x7 inches) and cut it into eight pieces if going for rolls, or two pieces for loaves. Handle the dough with care to maintain those delightful air pockets. Transfer the shaped dough onto lightly floured parchment paper.
Proofing before baking
Gently cover the shaped dough with a kitchen towel, allowing it to proof at room temperature for 1 hour. Meanwhile, preheat your oven to 450°F (232°C) with a baking sheet inside to ensure it’s ready to bake. When the hour is up, you're all set to enjoy some delicious homemade ciabatta bread. The aroma will be irresistible!
For detailed baking tips, make sure to check out sources like King Arthur Baking for more expert guidance. Happy baking!
Variations on Homemade Ciabatta Bread
Herb-infused ciabatta bread
Elevate your homemade ciabatta bread by infusing it with fresh or dried herbs! Try adding 2 teaspoons of finely chopped fresh rosemary or thyme directly into the dough during mixing. Not only will this add a delightful aromatic flavor, but it will also enhance its rustic appearance. Pair it with a delicious olive oil dip for an unforgettable appetizer.
Focaccia-style ciabatta
Feeling adventurous? Transform your ciabatta dough into a delectable focaccia! After completing the stretch-and-folds, spread the dough in a generously oiled 9x13-inch baking pan. Dimple it with your fingers and drizzle with extra virgin olive oil, sea salt, and your favorite toppings like cherry tomatoes or olives. The result will be soft, chewy, and irresistibly flavorful—perfect for sharing with friends!
For even more inspiration, consider looking at popular focaccia recipes available online. Creativity is key in the kitchen, so don’t hesitate to explore new flavors!
Baking Notes for Homemade Ciabatta Bread
Tips for Successful Ciabatta
To create the perfect homemade ciabatta bread, remember that patience is your best ally. Allow the dough to rise properly, and don't skip the resting periods—they're crucial for developing that delightful texture. Use a kitchen scale for accurate measurements, as precision makes a world of difference. Opt for bread flour for a chewier bite, and consider adding herbs or spices to enhance flavor. For the best crust, ensure your oven is adequately preheated before baking and use steam during the process!
Handling the Sticky Dough
When it comes to working with sticky dough, don’t be afraid to get generous with the flour. Lightly flour your hands and work surfaces to make handling easier. Using a bench scraper can be a game changer, helping you manipulate the dough without deflating it. If the dough feels too wet, just keep adding flour in small amounts until it’s manageable—this is perfectly normal and part of the process. Remember, this rustic bread is meant to be a little messy, so embrace the fun!
Serving Suggestions for Homemade Ciabatta Bread
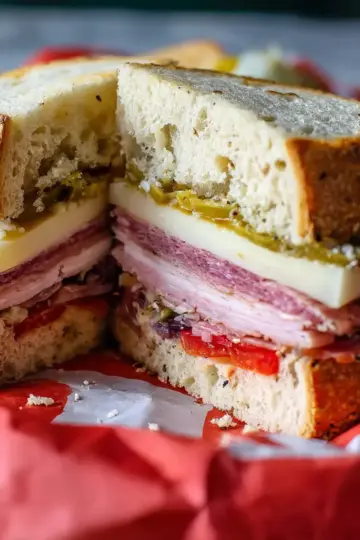
Delicious Sandwich Ideas
Homemade ciabatta bread is perfect for delightful sandwiches. Try it stuffed with Turkey Bacon and fresh arugula, drizzled with olive oil and balsamic vinegar. Or, whip up a veggie delight with grilled zucchini, roasted red peppers, and Chicken Ham. For a simple yet tasty option, layer slices with creamy avocado and mixed greens. These combinations enhance the ciabatta's rustic charm and are sure to impress!
Serving with Dips
For a lighter snack, slice your ciabatta into thick pieces and serve it with dips. Imagine freshly baked bread paired with a spicy hummus or a rich artichoke dip. You could even create a charcuterie board with olives, cheeses, and spreads for a fun gathering. The chewy, airy texture of the ciabatta complements these flavors beautifully, offering a delightful experience at any occasion.
Feel free to share your own delicious combinations in the comments!
Tips for Making Perfect Homemade Ciabatta Bread
Essential Tools for Success
To create homemade ciabatta bread that rivals your favorite bakery, having the right tools is essential. A kitchen scale will help you measure ingredients accurately for consistent results. A bench scraper is great for gently handling the sticky dough, and a stand mixer with a dough hook makes mixing a breeze. Lastly, don’t forget a thermometer to ensure your water is at the right temperature for yeast activation!
Importance of Measuring Accurately
Accurate measurements are crucial in bread-making. Even slight deviations can affect texture and flavor. I highly recommend using a kitchen scale to measure flour and water in grams for the best accuracy. Remember, a scooped cup of flour can weigh significantly more than a spooned and leveled cup, leading to differences that can impact your ciabatta outcome. Take the time to measure correctly for that perfect texture!
Time Details for Homemade Ciabatta Bread
Preparation Time for the Biga
To kick off your journey to homemade ciabatta bread, you'll need to prepare the biga, which is a preferment that enhances flavor and texture. Set aside about 8 to 24 hours for this stage. The longer, the better!
Total Dough Preparation Time
Once the biga is ready, the total time for dough preparation will take approximately 4 to 6 hours. This includes the mixing, resting, and stretching phases, so plan accordingly for successful results.
Baking Time
When it’s time to bring your bubbly dough to life, allow around 20 to 25 minutes for baking. Be ready to enjoy that golden-brown crust and delightful aroma filling your kitchen!
Nutritional Information for Homemade Ciabatta Bread
When you're indulging in homemade ciabatta bread, it's good to know what you're getting in each roll! Here’s a quick breakdown of the nutritional information:
Calories per roll
Each ciabatta roll contains approximately 233 calories. Perfect for a satisfying snack or a delicious addition to any meal!
Protein content
With about 7.4 grams of protein per roll, these delightful treats are not just tasty but also a decent source of protein.
Basic nutritional breakdown
- Total Fat: 2.8 g
- Sodium: 437.5 mg
- Carbohydrates: 43.7 g
- Sugar: 0.2 g
- Cholesterol: 0 mg
These rolls offer a lovely balance of macronutrients, making them an excellent choice for your next meal. Want to dive deeper into the nutritional aspects? Check out resources like USDA FoodData Central for more detailed information. Whether you're planning a casual lunch or a cozy dinner, this ciabatta bread will surely impress!
FAQs about Homemade Ciabatta Bread
How can I make my ciabatta crustier?
To achieve a crustier ciabatta, consider adding steam during baking. You can place a shallow pan filled with ice cubes or hot water in the oven while your bread bakes. This steam creates a crispy outer layer. Also, extending the baking time slightly will deepen that golden-brown crust we all love.
Can I freeze ciabatta bread?
Absolutely! You can freeze homemade ciabatta bread after it cools completely. Wrap it tightly in plastic wrap, then place it in a freezer-safe bag. When you’re ready to enjoy, let it thaw at room temperature before slicing. It can stay fresh for up to three months and still taste delightful!
What to do if my dough doesn't rise?
If your dough isn’t rising, it could be due to inactive yeast. Check the expiration date on your yeast, and ensure your water temperature was right—too hot can kill it! Try moving the dough to a warmer spot, as yeast loves warmth. Giving it a little extra time can often save the day!
For more bread tips, check out resources like King Arthur Baking for expert advice!
Conclusion on Homemade Ciabatta Bread
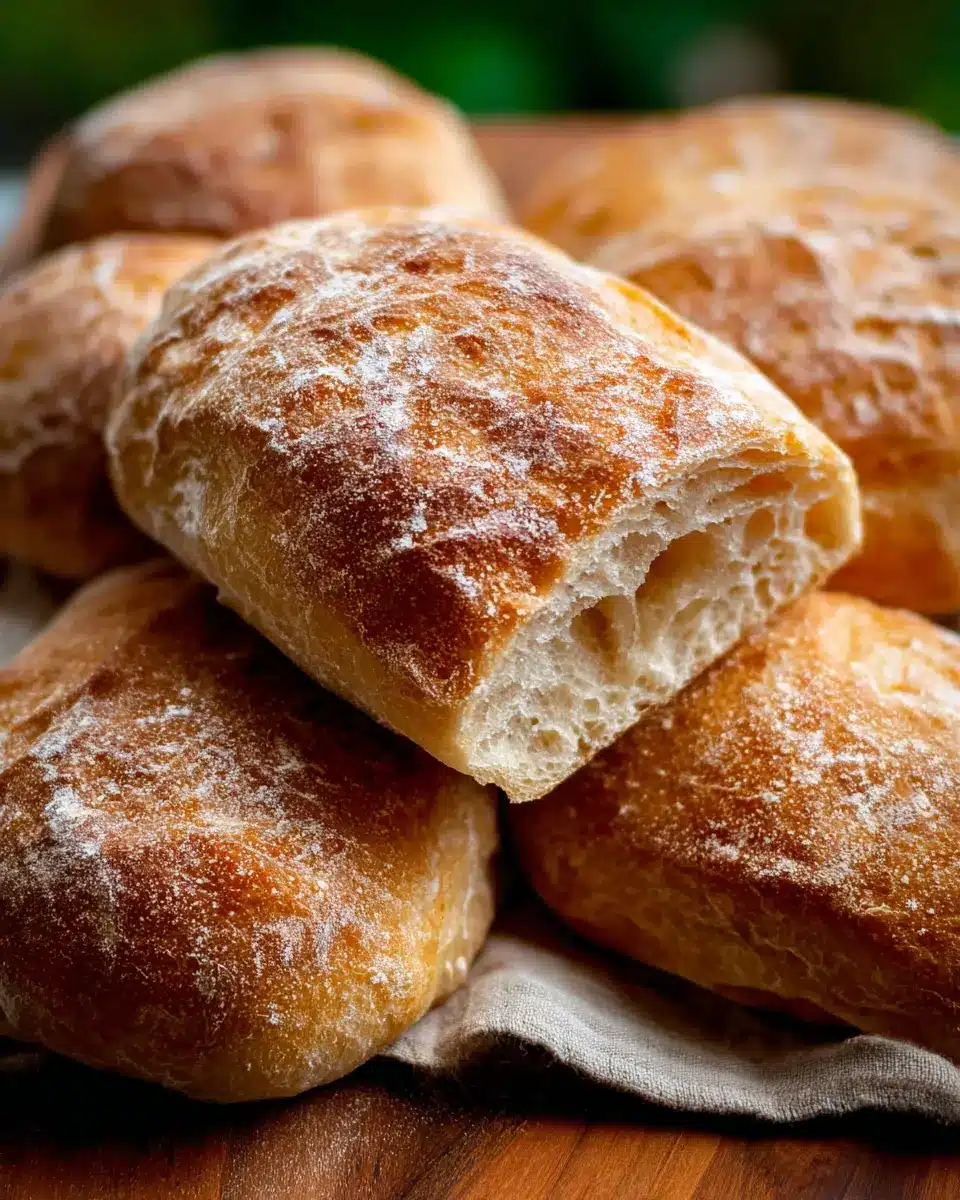
Recap on the joys of homemade ciabatta
In wrapping up, creating homemade ciabatta bread is truly a rewarding experience! The combination of crisp crust and delightful chewiness brings warmth to any meal. Enjoy the journey of your baking adventure, and don't hesitate to experiment with flavors. Happy baking, and may your kitchen be filled with the aroma of freshly baked bread!

Homemade Ciabatta Bread
Equipment
- Large Mixing Bowl
- silicone spatula
- bench scraper
- Stand Mixer
- baking sheet
- Oven
Ingredients
Biga/Preferment
- 1 cup bread flour spooned & leveled
- ⅛ teaspoon active-dry or instant yeast
- ½ cup room-temperature water about 70°F (21°C)
Ciabatta Rolls
- 1 teaspoon active-dry or instant yeast
- 1 cup warm water about 100–110°F (38°–43°C)
- 2.5 cups bread flour spooned & leveled, plus more as needed
- 1.5 teaspoons table salt
- olive oil as needed for coating hands and spatula
Instructions
Preparation
- Day 1: Make the biga/preferment by whisking together the bread flour and yeast, then adding water and mixing until combined. Cover and let rest at room temperature for 8–24 hours.
- Day 2: Make the dough by mixing yeast and warm water, then add biga, flour, and salt. Mix until combined and the dough is uniform.
- Rest the dough for 30 minutes at room temperature.
- Perform the first stretch-and-fold, lifting and folding the dough for a total of 8 folds over the bowl. Rest again for 30 minutes.
- Repeat the stretch-and-fold process three more times, letting it rest for 30 minutes between each.
- Shape the rolls or bread by transferring it to a floured surface and cutting it into pieces or loaves.
- Proof before baking by covering the shaped dough with a towel and letting it rest for 1 hour.
- Preheat the oven to 450°F (232°C) and prepare to bake the bread on a preheated baking sheet with ice cubes underneath to create steam.
- Bake for 20–25 minutes until golden brown. Check for doneness by tapping on the bread and looking for a hollow sound.
- Let the rolls cool for at least 45 minutes before slicing and serving.
- Store leftover bread at room temperature for up to 5 days or in the refrigerator for up to 1 week.


Leave a Reply