
Introduction to Easy Milk Bread Loaf
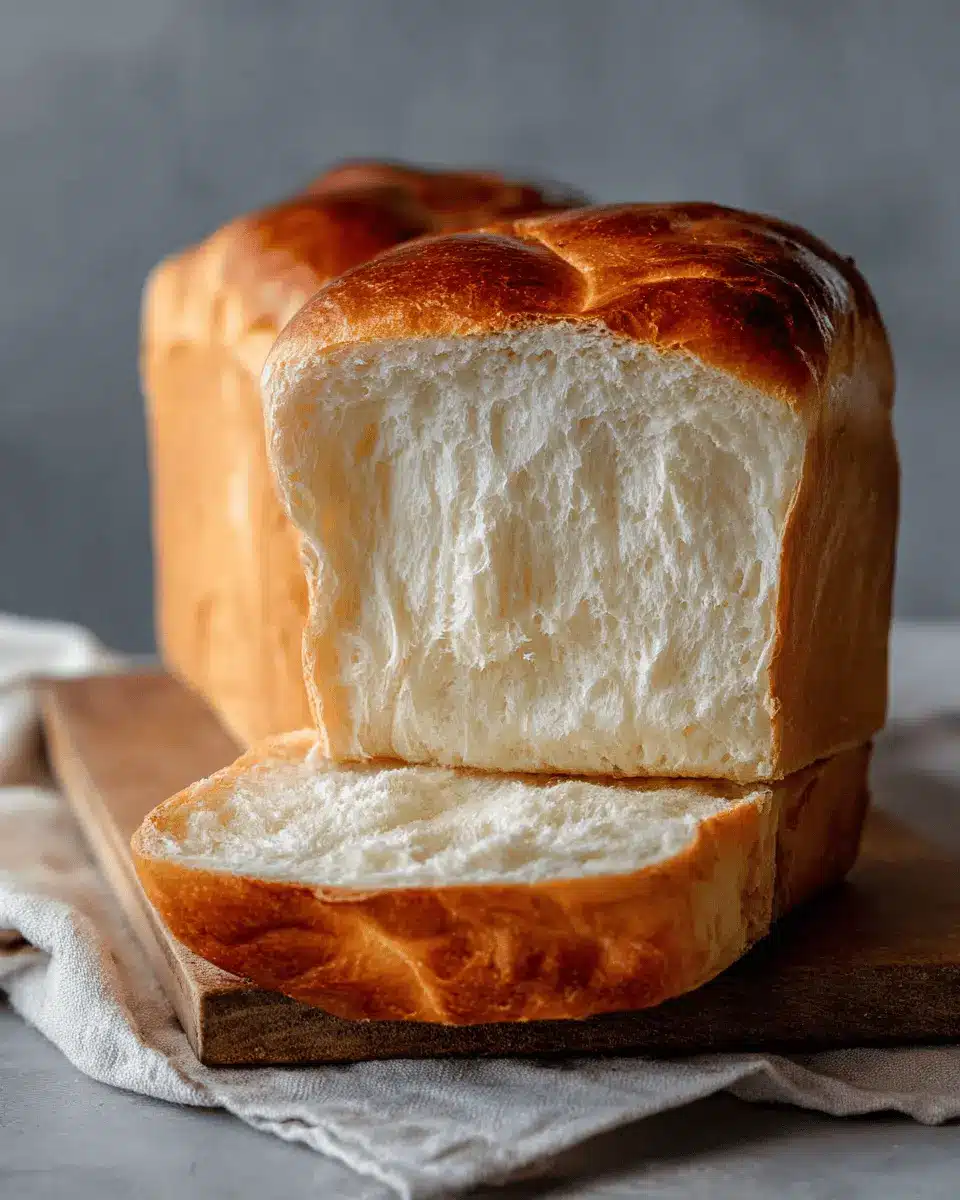
Homemade bread, anyone? There's something special about baking your own bread that warms the heart. The aroma that fills your kitchen, the soft, fluffy texture, and the satisfaction of creating something delicious from scratch are just a few of the reasons you’ll love making this easy milk bread loaf.
But why exactly should you embark on this baking adventure? For starters, homemade bread is free from preservatives and artificial additives you often find in store-bought loaves. Plus, you have full control over the ingredients—choosing high-quality flour, fresh milk, and butter can significantly elevate your bread.
Making your own bread can also be a mindful, therapeutic experience. Kneading the dough, watching it rise, and particularly the moment you pull it out of the oven, gives you a sense of accomplishment that’s hard to beat. Moreover, studies show that the act of cooking, especially when shared, can enhance your mood and strengthen connections with loved ones. So, why not grab your apron and give this easy milk bread loaf recipe a try? You might just find that baking becomes your new favorite hobby! For more on the benefits of homemade bread, you can | check out this article on health benefits and wellness.

Ingredients for Easy Milk Bread Loaf
Essential Ingredients for Fluffiness
To create your easy milk bread loaf, you'll need a few key ingredients that contribute to its irresistibly fluffy texture:
- Bread Flour (500 g / 3¾ cup): The high protein content helps develop gluten, giving the bread its structure.
- Instant Yeast (1½ tsps): This allows your dough to rise quickly and easily, creating those delightful air pockets.
- Cold Water (225 g / just under 1 cup) & Cold Milk (115 g / ½ cup): Using cold liquids helps control the dough temperature and enhances fluffiness.
- Sugar (40 g / 3 tablespoons): Not just for sweetness, sugar also feeds the yeast.
- Sea Salt (9 g / 1½ tsp): Essential for flavor and aids in regulating yeast activity.
- Unsalted Butter (25 g / 1¾ tbsp): Adds richness and moisture.
Optional Ingredients for Extra Flavor
For those looking to elevate their easy milk bread loaf, consider adding some optional ingredients:
- Honey or Maple Syrup: A drizzle can offer a subtly sweet twist.
- Milk Powder: A couple of tablespoons could enhance the creaminess and deepen the flavor.
- Seeds or Nuts: Sprinkle some on top before baking for added texture and taste.
- Herbs or Spices: A pinch of cinnamon or garlic powder can give your bread a unique flair.
Discover more about bread ingredients in this guide by King Arthur Baking. Happy baking!
Step-by-step Preparation of Easy Milk Bread Loaf
Creating a delicious easy milk bread loaf at home is not only rewarding but also a fantastic way to impress family and friends! Let’s dive into the steps, ensuring you have a freshly baked, fluffy loaf ready to enjoy.
Gather Your Ingredients and Tools
Before you begin whipping up your bread, it’s essential to gather all your ingredients and tools. Here’s what you'll need:
-
Ingredients:
-
500 g bread flour (3¾ cup)
-
40 g sugar (3 tablespoons)
-
1½ teaspoons instant yeast
-
225 g cold water (just under 1 cup)
-
115 g cold milk (½ cup)
-
9 g sea salt (1½ teaspoons)
-
25 g unsalted butter (1¾ tablespoons)
-
Tools:
-
A loaf pan (10 x 5 inches)
-
Stand mixer
-
Rolling pin
-
Measuring scale (for accuracy!)
Having everything ready will make your baking process smooth and enjoyable.
Mix the Dough
Start by placing the bread flour, sugar, yeast, cold water, and cold milk into your stand mixer. Mix on low speed until a dough forms. This step is crucial since combining these ingredients correctly lays the foundation for your easy milk bread loaf. After combining, cover the bowl with a cloth and allow the dough to rest for 30 minutes. Why? This resting phase, known as autolyse, helps develop gluten, enhancing the dough's texture.
The Resting Phase
After the initial mixing, it's time to introduce salt. Add it to your rested dough and knead for an additional minute in the mixer. Then, incorporate your butter pieces and continue kneading until the dough passes the windowpane test. This test, which checks if the dough can stretch without tearing, is vital for achieving that delightful fluffiness.
Shape the Dough
When your dough is ready, transfer it to a floured surface. Cut it into three even pieces, forming each one into a ball. An important tip here: Don’t pull it apart; gently cut to maintain the dough's integrity. Cover these balls with a damp cloth or oiled plastic wrap and let them rest for another 15 minutes.
Proofing the Dough
Now comes the exciting part—proofing! Shape each dough ball into a log, then place them side by side in your greased loaf pan. Cover and allow them to rise until they fill 80-90% of the pan, usually about 1 to 1.5 hours. This step is essential for achieving that light and airy texture we all love!
Baking Time!
Preheat your oven to 375°F during the last 20 minutes of proofing. Bake your loaf for 30-35 minutes, loosely covering it with foil halfway through to prevent excessive browning. To check doneness, you can use an instant-read thermometer: your bread should reach an internal temp of 190°F.
Cooling and Brushing with Butter
Once baked, remove your easy milk bread loaf from the oven and drop the pan from a short height onto a counter to prevent shrinkage. Immediately transfer the loaf to a cooling rack and brush the top with melted butter for an irresistible shine and richness. Allow it to cool for at least 15 minutes before slicing. This patience pays off as hot bread can be hard to cut without squishing.
With these steps, you'll be well on your way to serving warm slices of homemade easy milk bread loaf. Enjoy your baking journey!
Variations on Easy Milk Bread Loaf
Milk Bread with Herbs and Cheese
Elevate your easy milk bread loaf by incorporating fresh herbs and cheese into the dough. Simply mix in a handful of your favorite chopped herbs like rosemary or thyme along with grated cheese such as cheddar or mozzarella before shaping. This savory twist creates a delightful flavor that pairs beautifully with soups and salads, making it a perfect addition to your lunch spread.
Sweet Milk Bread with Chocolate or Cinnamon
If you lean towards sweetness, try adding chocolate chips or a sprinkle of cinnamon to your easy milk bread loaf. For a chocolate version, fold in about 150g of chocolate chips before rolling. Alternatively, create a cinnamon swirl by mixing sugar and cinnamon together, then spreading it on the dough before rolling it into logs. Both options transform your bread into a delicious treat for breakfast or dessert!
Feel free to experiment with your favorite additions and watch your easy milk bread transform into something truly special. For more creative ideas, check out additional recipes on King Arthur Baking.
Cooking Tips and Notes for Easy Milk Bread Loaf
Importance of ingredient temperature
Using cold water and milk helps keep your dough at an ideal temperature during kneading. This is crucial for achieving that airy texture in your easy milk bread loaf. If it's a warm day, consider chilling your liquids for about 30 minutes before mixing to prevent the dough from becoming too sticky.
Tips for kneading success
Kneading thoroughly is vital for developing gluten, which gives your bread structure. Aim for a windowpane test—your dough should stretch thin without tearing. Remember, patience is key; sometimes, kneading takes longer with different mixers, so don't rush it!
How to know when the loaf is ready
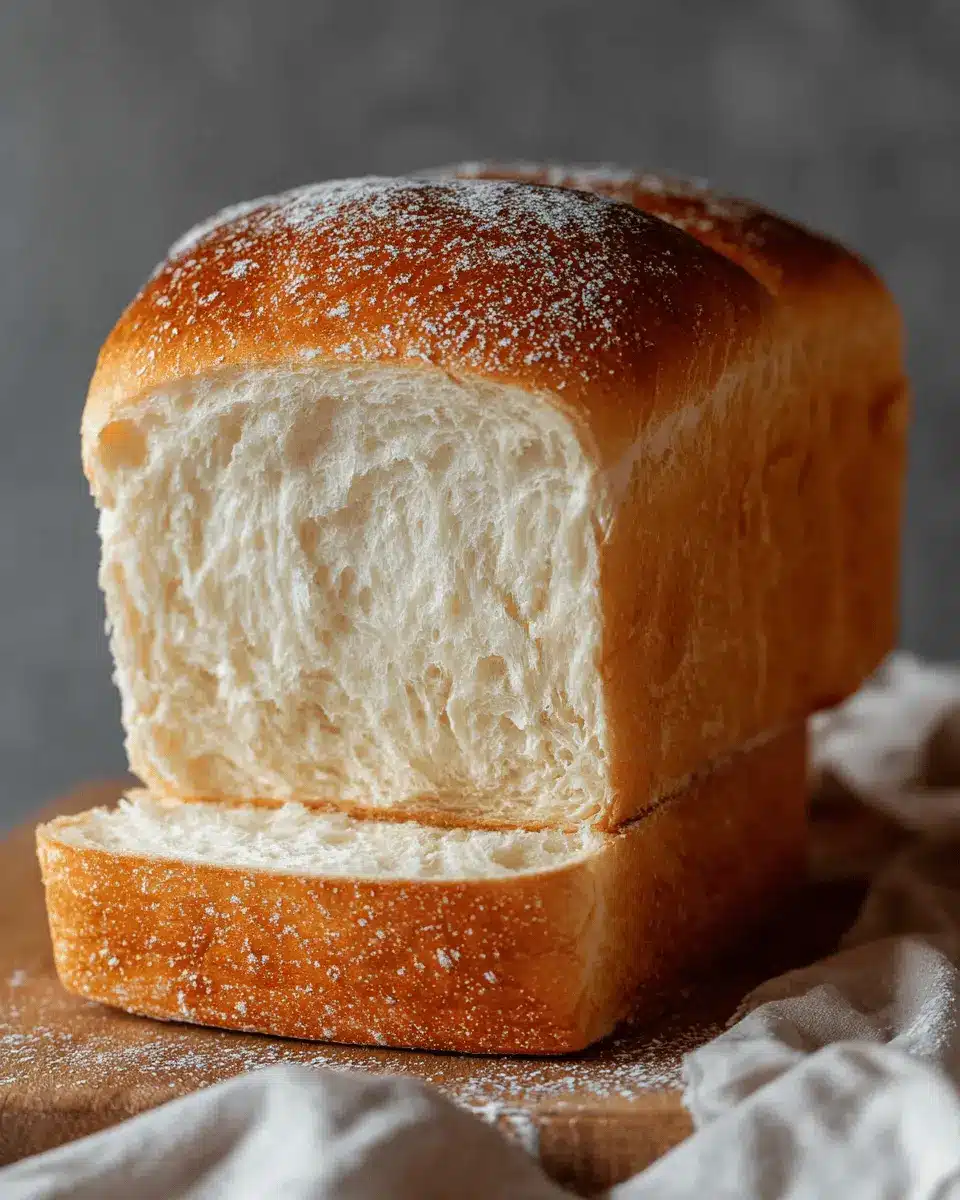
Your loaf is finished when it fills 80-90% of the pan and has a golden-brown top. For the best results, check with a thermometer; the internal temperature should reach 190°F (87°C). This ensures a perfectly baked milk bread loaf that’s soft and fluffy.
Serving Suggestions for Easy Milk Bread Loaf
Perfect companions for breakfast
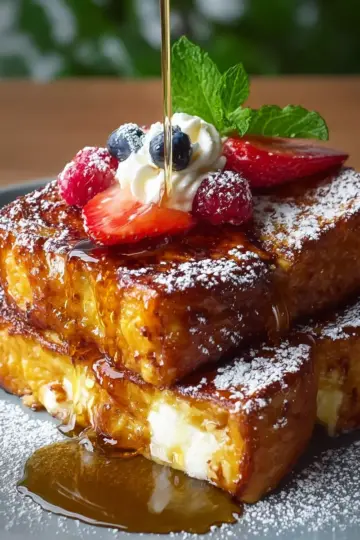
Start your day with a delightful breakfast featuring your easy milk bread loaf. Toast a slice and slather on butter or your favorite jam for a simple yet satisfying treat. For those who prefer something warm and hearty, try topping it with avocado and a sprinkle of sea salt. Serve it alongside a steaming cup of coffee or herbal tea.
Using milk bread for sandwiches
The fluffy texture of your easy milk bread loaf makes it perfect for creating delicious sandwiches. Layer slices with turkey bacon, chicken ham, or a mix of fresh veggies for a quick lunch. Alternatively, use it to make simple grilled cheese or even a classic peanut butter and jelly combination. The versatility of this bread truly shines in every bite!
For more creative sandwich ideas, check out this guide!
Time Breakdown for Easy Milk Bread Loaf
Understanding the time breakdown for making this easy milk bread loaf can help you plan your baking adventure. Here’s how it all adds up:
Preparation Time
Spend about 30 minutes gathering your ingredients, mixing the dough, and letting it rest.
Proofing Time
After kneading, allow the dough to rise for a total of approximately 3 hours and 15 minutes. This includes two proofing stages that will help develop flavor and texture.
Baking Time
You’ll need around 30-35 minutes to bake your loaf to perfection.
Total Time
In total, you're looking at roughly 4 hours and 20 minutes before you can enjoy that delightful, fresh milk bread loaf. Happy baking!
For more tips on bread-making, consider checking out King Arthur Baking for wonderful resources.
Nutritional Facts for Easy Milk Bread Loaf
Calories per slice
Each slice of this easy milk bread loaf contains approximately 189 calories. This makes it a delightful choice for breakfast or a light snack that balances enjoyment with calorie awareness.
Nutritional benefits of ingredients
- Bread Flour: High in carbs and a good source of energy, bread flour also contributes protein, which is essential for muscle repair.
- Milk: Rich in calcium and vitamin D, contributing to bone health and overall wellness.
- Sugar: Provides a quick energy boost and enhances flavor.
- Butter: Adds healthy fats and richness, contributing to satiety.
- Sea Salt: Enhances flavor while helping regulate hydration and muscle function.
By using wholesome ingredients, this easy milk bread loaf not only satisfies cravings but also packs nutritional benefits that nourish. For more insights on ingredient benefits, check out Healthline for further reading. Remember, moderation is key to enjoying baked goods while maintaining a balanced diet!
FAQs about Easy Milk Bread Loaf
Can I make this without a stand mixer?
Absolutely! If you don't have a stand mixer, you can easily make this easy milk bread loaf by hand. Simply mix the ingredients in a large bowl until they come together, then knead the dough on a floured surface for about 10-15 minutes. It will take a bit more effort, but the result will be just as delicious!
How do I store leftover milk bread?
To keep your milk bread fresh, wrap it in plastic wrap or place it in an airtight container at room temperature. This will help maintain its softness. You can also freeze it for longer storage; just slice the loaf beforehand for easy access later.
What’s the best way to reheat milk bread?
Reheating your easy milk bread loaf is simple and keeps it fluffy. Wrap slices in aluminum foil and warm them in a 350°F (175°C) oven for about 10 minutes. Alternatively, pop them in the toaster for a quick and crispy fix. Enjoy the delightful fragrance of freshly baked bread all over again!
For more tips on bread baking, check out Baking 101 by King Arthur Baking.
Conclusion on Easy Milk Bread Loaf
In summary, this easy milk bread loaf recipe is your ticket to baking a beautifully soft and fluffy bread at home. Perfect for breakfast or any time of day, it brings comfort and joy to the table. Enjoy the delightful aroma and texture that will make every slice a treat! For more baking tips, check out King Arthur Baking.
Easy Milk Bread Loaf
Equipment
- loaf pan
- Stand Mixer
Ingredients
- 500 g bread flour 3¾ cup
- 40 g sugar 3 tablespoon
- 1½ tsps instant yeast
- 225 g cold water a little bit less than 1 cup
- 115 g cold milk ½ cup
- 9 g sea salt 1½ tsp
- 25 g unsalted butter 1¾ tbsp
- butter for coating the pan and brushing the bread
- flour for coating the pan
Instructions
Making Bread Dough
- Mix bread flour, sugar, yeast, water and milk in a stand mixer, kneading on low speed until the dough is formed.
- Cover the mixing bowl and let it rest for 30 minutes. Meanwhile, bring the butter out from the fridge, cut it into 4 pieces and leave it on the counter to soften a little.
- Add salt and continue to knead the dough for 1 minute.
- Add butter cubes and knead until the dough passes the windowpane test. (This step takes about 7 minutes, with 6 minutes on low speed and 1 minute on medium speed.)
- Form the dough into a ball (it will be a bit sticky) and put it in a lightly greased bowl. Cover and let it rise in a warm place for 1 hour until it almost doubles in size.
Shaping
- Transfer the dough onto a working surface and cut it into 3 even pieces. Form each piece into a ball. Cover the dough balls with a damp dish towel or greased plastic wrap, allowing them to rest for 15 minutes.
- Roll the dough out with a rolling pin to an oval shape and then roll it up to a log, do the same for the other two pieces, cover and let it rest for another 15 minutes.
- For each log, rotate the dough 90 degrees before rolling them out again into long rectangles and rolling each rectangle back up into a cinnamon roll type of shape.
- Grease a 10 x 5 loaf pan and coat with a thin layer of flour. Put the rolled up dough into the pan, cover with greased plastic wrap and let it rise in a warm place until it fills 80-90% of the pan.
Baking
- Preheat the oven to 375°F in the last 20 minutes of proofing. Move the rack to about ⅓ of the way from the bottom.
- Put it in the oven to bake for 30-35 minutes. Loosely cover with a piece of foil after baking for 15 minutes to prevent the bread color from turning too dark.
- Remove bread from the oven and drop the pan on the counter top once to help prevent it from shrinking, then transfer the bread on a cooling rack right away. Brush the top with melted butter and let it cool for 15 minutes before enjoying.

Leave a Reply