
Introduction to Artisan Garlic Parmesan Bread
Why you need this garlic parmesan bread in your life
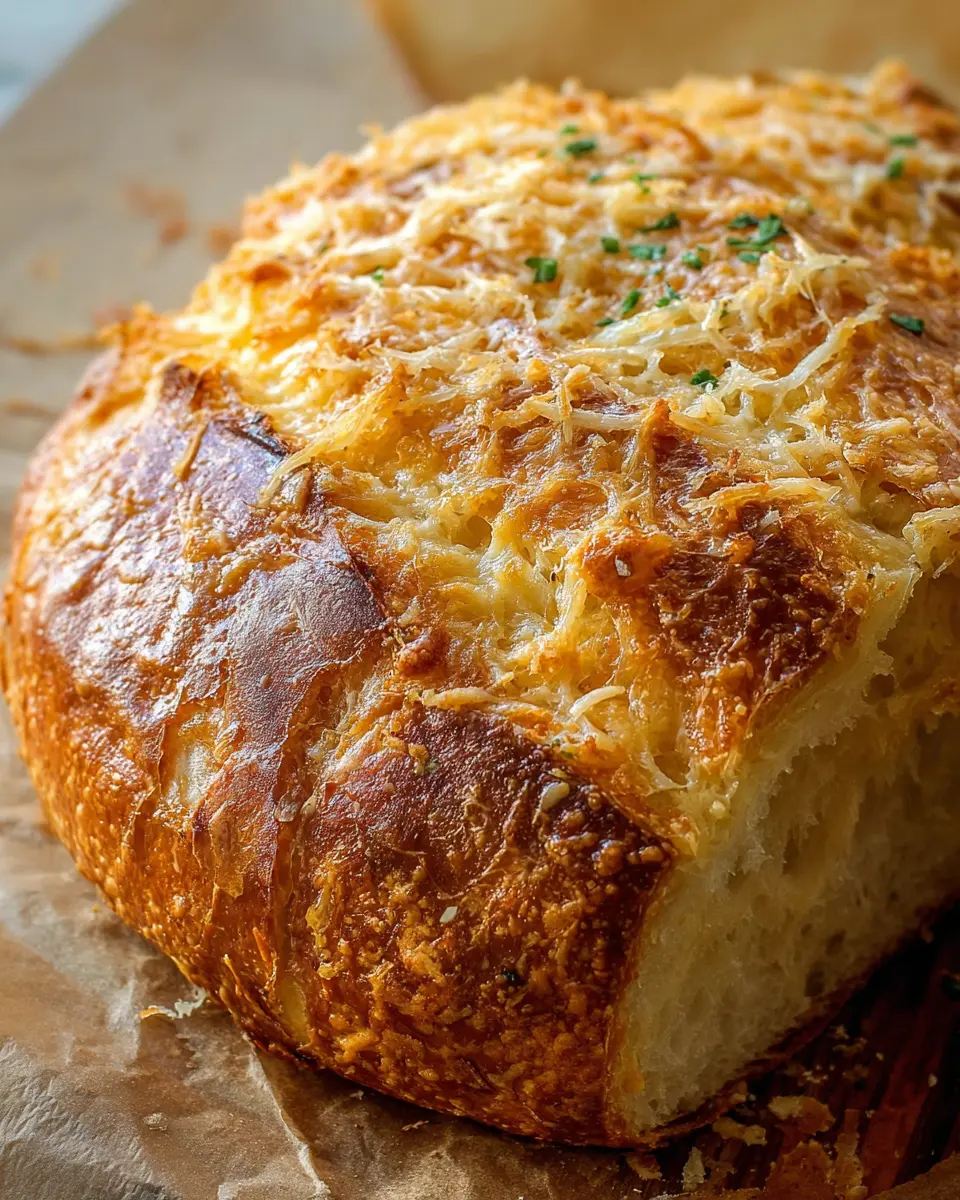
If you're searching for that perfect companion to your meals or simply a delightful snack, look no further! This Artisan Garlic Parmesan Bread is here to elevate your culinary experiences. Imagine breaking into a warm loaf with a crust that crackles and a soft, cheesy interior that’s flavorful without being overwhelming. What's not to love?
Not only is this recipe incredibly easy to follow, but the end result is also downright irresistible. Garlic lovers will rejoice in the aromatic infusion, while Parmesan aficionados will relish every cheesy bite. Trust me, the sheer pleasure of inviting this bread into your kitchen is something you won’t regret. Serve it alongside a classic pasta dish or simply enjoy it on its own with a dollop of your favorite spread.
Baking this bread lets you engage in the time-honored tradition of baking from scratch, which can be therapeutic in our fast-paced lives. Plus, the mesmerizing aroma wafting through your home will delight everyone who crosses your threshold. Looking to impress? This artisan bread is sure to be a conversation starter at any gathering.
Get ready to dive into the simple steps that lead to a deliciously satisfying creation!
Ingredients for Artisan Garlic Parmesan Bread
Essential ingredients you might already have
To create your own delicious Artisan Garlic Parmesan Bread, you'll need a few staple ingredients that are likely already in your pantry. Here’s what you’ll need:
- All-purpose flour or bread flour: 3¼ cups provide the perfect base for a chewy, crusty bread.
- Coarse kosher sea salt: 1¼ teaspoons brings out the flavors beautifully.
- Active dry yeast: Just ½ teaspoon helps the dough rise perfectly.
- Warm water: 1½ cups + 2 tablespoons activate the yeast and create the dough's structure.
Throw in some minced garlic—6 cloves will add that irresistible flavor—and 1 cup of freshly grated Parmesan cheese for richness.
Special add-ons for premium flavor
For an extra pop of flavor in your Artisan Garlic Parmesan Bread, consider including:
- Fresh rosemary: ¼ teaspoon can elevate the herbaceous notes in your bread.
- Roasted garlic: If you have the time, using roasted garlic instead of fresh can provide a sweeter, more nuanced flavor profile.
These special touches not only enhance the taste but also make your home smell amazing as it bakes. Find more tips on baking bread at King Arthur Baking.
Preparing Artisan Garlic Parmesan Bread
Baking bread can feel like a daunting task, but with this Artisan Garlic Parmesan Bread, you'll find it’s not only achievable but also incredibly satisfying. Let’s roll up our sleeves and dive into each step of the process!
Mixing Dry Ingredients
Start by gathering your essential ingredients to set the foundation for your bread. In a medium bowl, combine:
- 3¼ cups of all-purpose or bread flour
- 1¼ teaspoons coarse kosher sea salt
- ½ teaspoon active dry yeast
Whisk these dry ingredients together thoroughly. This step is crucial, as it ensures the yeast is evenly distributed throughout the mixture.
Creating the Dough
Next, it’s time to bring in the warmth! Gradually add 1½ cups plus 2 tablespoons of warm water to the dry ingredients while stirring with a wooden spoon. Mix until the ingredients are combined and you have a rough dough ball. It’s okay if it looks a bit shaggy; you’re on the right track!
First Rise for Flavor Development
Once your dough is thoughtfully combined, transfer it to a large, clean bowl. Cover it with plastic wrap and let it rise in a draft-free area at room temperature. This initial rise is where the magic happens—let it sit for about 18 hours. The longer it rests, the more flavor it develops. For those in a hurry, even a 12-hour rise can yield satisfying results.
Incorporating Garlic and Cheese
Ready to bring in the flavor? When your dough has risen and is dotted with bubbles, it's time to add the star ingredients: garlic and cheese! Gently knead in:
- 6 cloves of minced garlic (fresh or roasted)
- ½ cup of freshly grated or shredded Parmesan cheese
- A pinch of rosemary, if you’d like to add a hint of herbaceousness
This step transforms your Artisan Garlic Parmesan Bread into something truly special.
Shaping the Dough and Second Rise
After incorporating those delightful flavors, place your dough onto a large piece of parchment paper. Lightly dust with flour and form it into a loaf shape. Cover with plastic wrap again and allow it to rest for another 30 minutes. This second rise will help your loaf develop a beautifully airy structure.
Preheating and Baking the Bread
At this point, you want to ensure your oven is prepared to create that perfect crust. Preheat a Dutch oven at 450°F (232°C) for 30 minutes. Once it’s hot, carefully transfer your dough into the Dutch oven, score the top with a sharp knife to allow for expansion, and mist the surface with water to promote a crispy crust. Cover and bake for 30 minutes before removing the lid and sprinkling on the remaining cheese. Let it bake for an additional 8-12 minutes or until it reaches a beautiful golden-brown hue.
Allow your Artisan Garlic Parmesan Bread to cool for at least 30 minutes before slicing. It's worth the wait, trust us!
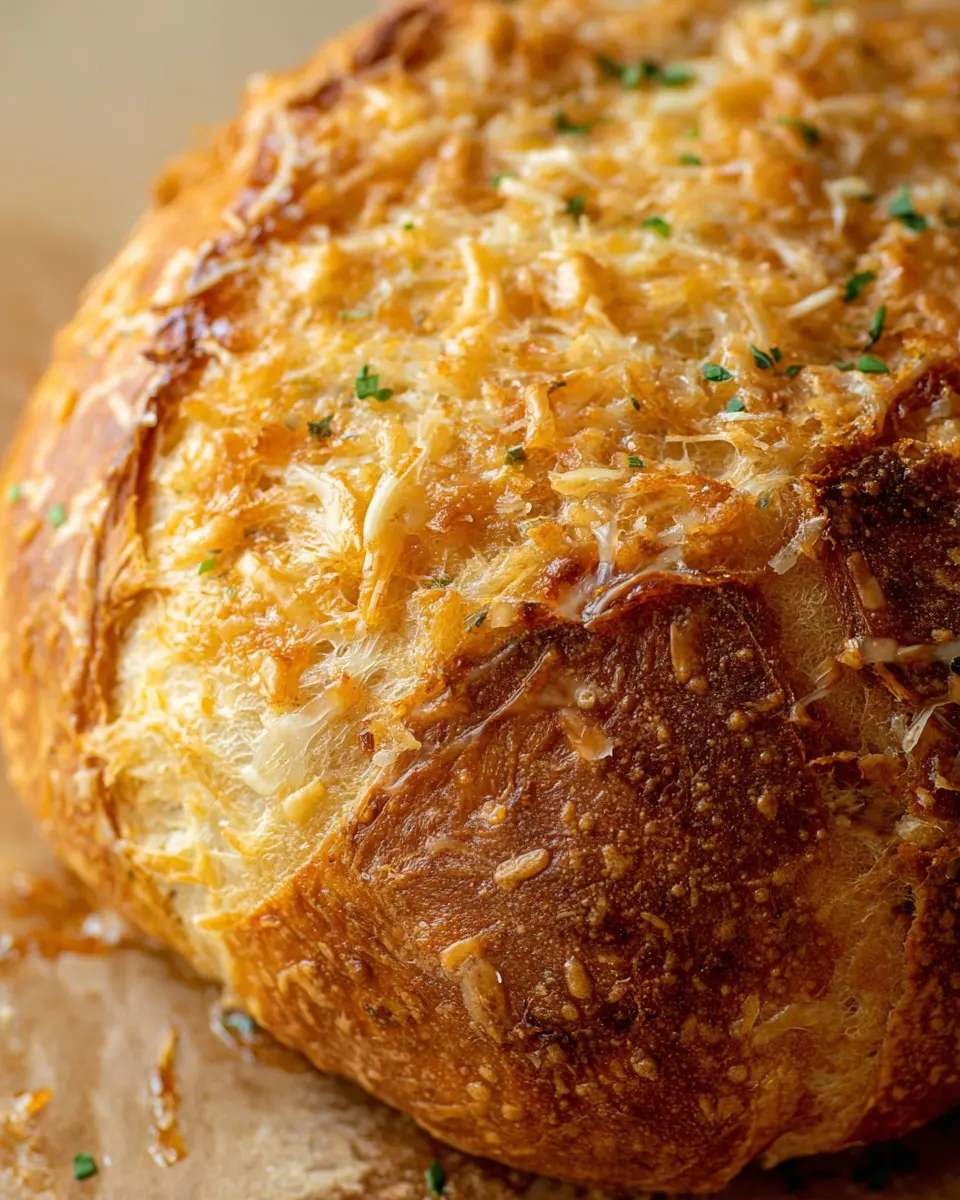
By following these simple steps, you'll wind up with a loaf that’s crispy on the outside, soft and cheesy on the inside, and full of that comforting garlic flavor. Happy baking!
Variations on Artisan Garlic Parmesan Bread
Add herbs for a unique twist
Elevate your Artisan Garlic Parmesan Bread by adding a variety of herbs. Fresh parsley, thyme, or even a hint of sage can introduce a delightful aroma and complexity to the flavor. Experimenting with an herb blend allows you to customize your bread to your taste. Plus, herbs have numerous health benefits, making them a fantastic addition!
Incorporate different cheeses for additional flavor
Why stop at Parmesan? Try mixing in cheeses like mozzarella, provolone, or even a sharp cheddar for a rich, decadent twist. Each cheese brings its unique texture and taste, creating a wonderfully diverse flavor profile. You can play with different cheese combinations to find the perfect match for your palate. Remember, the sky's the limit! For more inspired cheese pairings, check out Cheese.com for guidance.
These variations can make your Artisan Garlic Parmesan Bread an unforgettable experience. Happy baking!
Cooking Tips and Notes for Artisan Garlic Parmesan Bread
Common Pitfalls to Avoid
Baking Artisan Garlic Parmesan Bread can be incredibly rewarding, but there are a few common missteps to steer clear of. First, ensure your yeast is fresh; expired yeast can result in dense bread. Don't skip the long rise time—it's crucial for flavor and texture. Lastly, resist the temptation to peek too often during baking; a closed oven creates the steam needed for that glorious crust.
Tips for Achieving the Perfect Crust
To achieve a beautiful crust on your Artisan Garlic Parmesan Bread, start by preheating your Dutch oven thoroughly; this creates an ideal environment for crust formation. Misting the dough before baking helps develop that golden exterior. Additionally, a good score on the dough allows steam to escape while promoting a rustic look, enhancing both appearance and texture. Consider pairing your bread with a warm herb-infused olive oil for dipping—your taste buds will thank you!
Serving Suggestions for Artisan Garlic Parmesan Bread
Pairing with Soups and Salads
Artisan Garlic Parmesan Bread makes an incredible accompaniment to a variety of soups and salads. Imagine dipping a warm slice into a hearty butternut squash soup or serving it alongside a fresh Caesar salad—the flavorful garlic and parmesan enhance each bite. For the perfect pairing, opt for classic options like tomato basil soup or a zesty Italian minestrone. The bread’s crusty outer layer complements the smoothness of the soups beautifully!
Creative Uses in Sandwiches or as Bruschetta
Why not get creative? Artisan Garlic Parmesan Bread serves as an excellent base for gourmet sandwiches! Layer with turkey bacon, arugula, and a spread of creamy avocado for a delightful lunch. Alternatively, toast thick slices, top with diced tomatoes and basil for a quick bruschetta that sings with flavor. Go ahead and let your culinary imagination run wild—your tastebuds will thank you! For ideas, check out Serious Eats for more inspiring recipes and techniques.
Time Breakdown for Artisan Garlic Parmesan Bread
Getting ready to whip up your Artisan Garlic Parmesan Bread? Here’s a quick time breakdown so you can plan your baking session effectively:
Preparation Time
Approximately 50 minutes are needed to gather your ingredients and combine them into a dough. Make sure to allow enough time for everything to mix well!
Rising Time
The dough needs to rise for about 18 hours. This slow rise gives the bread its wonderful flavor and texture, so don’t rush it.
Baking Time
Once the dough has risen, plan for about 40 minutes in the oven. This will help create that perfect crispy crust you’ll love.
Total Time
From start to finish, including preparation, rising, and baking, you're looking at around 19 hours and 30 minutes. Yes, it takes time, but the results are profoundly delicious!
For more detailed guidance on making your Artisan Garlic Parmesan Bread, check out our full recipe here. Happy baking!
Nutritional Facts for Artisan Garlic Parmesan Bread
Calories per slice
A delicious slice of Artisan Garlic Parmesan Bread contains approximately 156 calories. This makes it a wonderful choice for a more indulgent snack or a side dish without completely derailing your healthy eating goals.
Macronutrient Breakdown
Here's a quick look at the macronutrient profile per slice:
- Carbohydrates: 24g
- Protein: 7g
- Fat: 3g (of which saturated fat is 2g)
This tasty bread not only satisfies your carb cravings but also provides a good amount of protein, thanks to the addition of parmesan cheese. For more insights on how different baking ingredients affect nutrition, check out nutrition resources from the USDA and consider how you might customize your next loaf!
FAQ about Artisan Garlic Parmesan Bread
Can I use instant yeast instead of active dry yeast?
Absolutely! You can substitute instant yeast for active dry yeast in the Artisan Garlic Parmesan Bread recipe. Just remember that you can combine instant yeast directly with the dry ingredients without proofing it first. This can save you some time, making your bread-baking experience even smoother!
How do I store leftover bread?
To keep your leftover Artisan Garlic Parmesan Bread fresh, store it in an airtight container or wrap it tightly in plastic wrap. It will maintain its deliciousness for up to three days at room temperature. If you want to ensure its longevity, check out this guide on storing bread properly.
Can I freeze this bread?
Yes, you can definitely freeze this delightful bread! To freeze it, wrap it securely in foil and then place it in a freezer bag. Your loaf will stay good for up to three months. When you’re ready to enjoy it again, allow it to thaw at room temperature and then reheat it in the oven to restore that perfect crust.
Conclusion on Artisan Garlic Parmesan Bread
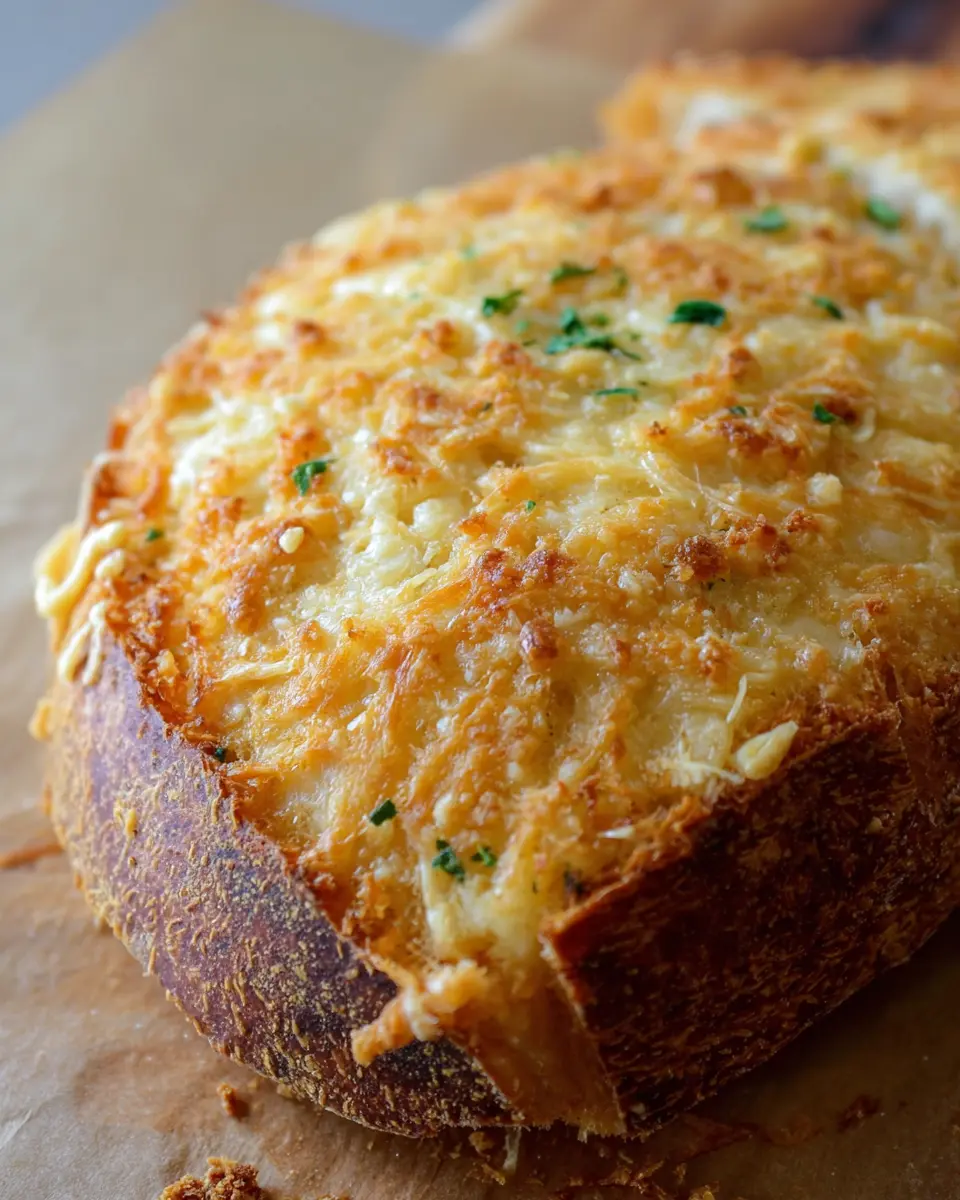
Baking your own Artisan Garlic Parmesan Bread is a delightful experience! There’s nothing quite like the joy of pulling a warm, crusty loaf from the oven and enjoying its cheesy, garlicky goodness. Give this recipe a try, and elevate your homemade bread game! You won’t regret it.

Artisan Garlic Parmesan Bread
Equipment
- Dutch oven
Ingredients
- 3¼ c. all-purpose flour or bread flour
- 1 ¼ tsp. coarse kosher sea salt
- ½ tsp. active dry yeast
- 1½ + 2 c. warm water
- 6 cloves garlic - fresh or roasted, minced
- 1 c. freshly grated or shredded parmesan cheese - divided
- ¼ tsp. rosemary - freshly minced (optional)
Instructions
- Whisk the flour, salt, and yeast in a medium bowl. While stirring with a wooden spoon, gradually add the water, stir until incorporated. Mix the dough gently and form into a rough ball.
- Transfer to a large clean (ungreased) bowl. Cover with plastic wrap and let the dough rise in a draft-free area at room temperature until the surface of the dough is covered with tiny bubbles and the dough has more than doubled in size, usually about 18 hours.
- Place a Dutch oven into the oven and turn it on to 450 degrees Fahrenheit (232 degrees Celsius). Allow it to heat for 30 minutes.
- Knead in minced garlic, ½ cup of cheese, and rosemary. Transfer the dough to a large square of parchment paper. Lightly dust dough with flour, cover it with plastic wrap, and allow it to rest for 30 minutes. Score an X in the top of the loaf.
- Carefully remove the Dutch oven from the oven. Place the shaped dough into it, cover, and return to the oven to bake for 30 minutes. Remove the lid, sprinkle with remaining cheese, and bake for an additional 8-12 minutes or until the top is nice and dark.
- Remove from the oven and allow to cool for at least 30 minutes before slicing to prevent a gummy crumb.

Leave a Reply