
Introduction to Homemade Handmade Sub Rolls
When it comes to crafting the perfect sandwich, the foundation is just as important as the filling. Enter homemade handmade sub rolls. These fluffy creations not only elevate your lunch game but also offer an opportunity for young professionals to embrace cooking in a rewarding way. Imagine sinking your teeth into a fresh, warm roll that you’ve made from scratch—it’s a simple pleasure that can brighten your day.
Why are these sub rolls a game-changer for you? They save you money and time by eliminating the need for store-bought bread, which often comes with preservatives. Plus, making your own rolls gives you the freedom to customize flavors and textures, whether you want to try whole wheat, add herbs, or shape them for any occasion.
In today’s busy world, taking thirty minutes to prepare something delicious can be a therapeutic escape. Not only will you impress your friends and colleagues with gourmet sandwiches, but you'll also create meals that fit your personal taste. With a few basic ingredients and some simple techniques, you’ll soon find that baking your own sub rolls isn't just doable—it's fun! Ready to get started? Let’s dive into the details of crafting these delightful rolls! For more ideas on fillings, check out this recipe website.
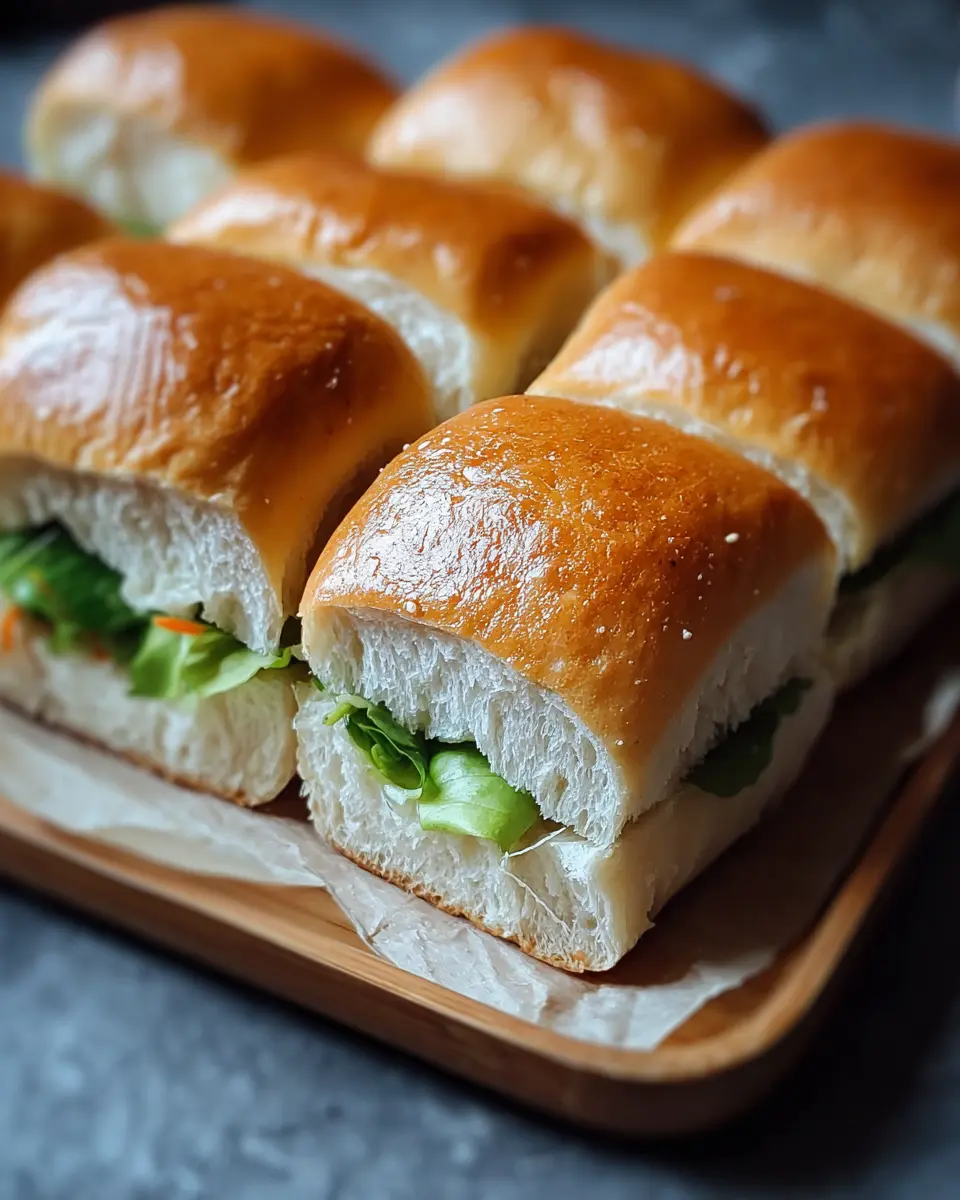
Ingredients for Homemade Handmade Sub Rolls
Essential ingredients for the perfect dough
Crafting the perfect homemade handmade sub rolls begins with high-quality ingredients that work in harmony. Here’s what you’ll need for a dough that’s fluffy and flavorful:
- 1 cup Whole Milk: It lends creaminess; opt for 2% milk or a dairy alternative if preferred.
- 2 tablespoons Sugar: For sweetness, feel free to swap in honey or agave syrup.
- 2 teaspoons Active Dry Yeast: Ensure it’s fresh to guarantee a good rise.
- 4 cups Bread Flour: This provides structure, but all-purpose flour can work, too.
- 1 teaspoon Fine Sea Salt: Enhances flavor beautifully.
- 2 large Eggs: If you're vegan, substitute these with a flax egg.
- 4 tablespoons Unsalted Butter: Use cold and cubed for proper incorporation.
Alternatives for dietary preferences
Flexibility is key when it comes to baking! If you have specific dietary needs, here are some alternatives that work wonders:
- For a dairy-free option, consider plant-based milks like almond or oat.
- Use a vegan butter substitute in place of unsalted butter to maintain that rich flavor.
- If gluten is a concern, try using a gluten-free flour blend designed for baking—just make sure to follow the package instructions!
With these ingredients, you’re well on your way to creating sub rolls that are not only delicious but also tailored to your preferences. Happy baking!
Preparing Homemade Handmade Sub Rolls
Crafting the perfect homemade handmade sub rolls may seem like a daunting task, but with a little patience and some basic ingredients, you’ll be well on your way to creating fluffy rolls that will elevate any sandwich. Let’s walk through the process step-by-step to demystify the art of roll-making.
Bloom the Yeast for Ultimate Fluffiness
The foundation of any good bread involves yeast, and blooming it is crucial for that airy texture we all cherish. Start by mixing 1 cup of warm milk, 2 tablespoons of sugar, and 2 teaspoons of active dry yeast in a medium bowl. Let this concoction sit for about 5-10 minutes until it's frothy. This step wakes up the yeast, ensuring it has the energy to help our rolls rise beautifully.
Whisk Together the Dry Ingredients
In a separate large mixing bowl, whisk together 4 cups of bread flour and 1 teaspoon of fine sea salt. The reason we use bread flour here is due to its higher gluten content, which contributes to the fluffiness of your rolls. If you’re looking for more information about flour types, check out this resource from King Arthur Baking.
Incorporate Butter for That Rich Flavor
Now it’s time to add a secret ingredient—4 tablespoons of cold, cubed unsalted butter. This will enhance the richness of your homemade handmade sub rolls. Combine this with your bloomed yeast mixture and 2 large eggs to form a dough. Mix until it’s both shaggy and inviting.
Knead the Dough to Develop Elasticity
Kneading is more than just an arm workout; it’s essential for developing your dough’s elasticity. Use your hands or a stand mixer fitted with a dough hook for about 8-10 minutes. What you’re looking for is a smooth, elastic dough that springs back when pressed. If you’re unsure, don’t hesitate to reach out to online baking communities for tips.
First Rise—Patience Is Key!
Once you have a lovely ball of dough, place it in a greased bowl and cover it with a kitchen towel. Allow it to rise in a warm environment until doubled in size, which will take about 1 hour. Think of this as the dough’s time to relax and expand!
Shape the Rolls for Perfect Sub Form
After your dough has risen, gently punch it down to release some of the air. Divide it into six equal pieces and shape each piece into elongated rolls. This will give you that classic sub shape.
Second Rise—Let Them Puff Up!
Arrange your shaped rolls on a lined baking sheet, cover them lightly, and let them rise for another 30 minutes. This is where they really start to puff up and gain their characteristic fluffiness.
Egg Wash for a Golden Finish
Before baking, preheat your oven to 400°F (200°C). Brush the tops of your rolls with an egg wash made from mixing 1 egg white and a splash of water. This will give your rolls that desirable golden crust.
Bake to Perfection and Cool Down
Finally, pop your baking sheet in the oven and let your rolls bake for about 15 minutes. Once they're golden brown and sound hollow when tapped on the bottom, transfer them to a wire rack to cool. The smell will be irresistible, and you’ll be ready to fill these beauties with anything from Turkey Bacon to Chicken Ham.
And voilà! You've made your own homemade handmade sub rolls. Don't forget to experiment with your favorite fillings to make these rolls even more enjoyable. What will you create?
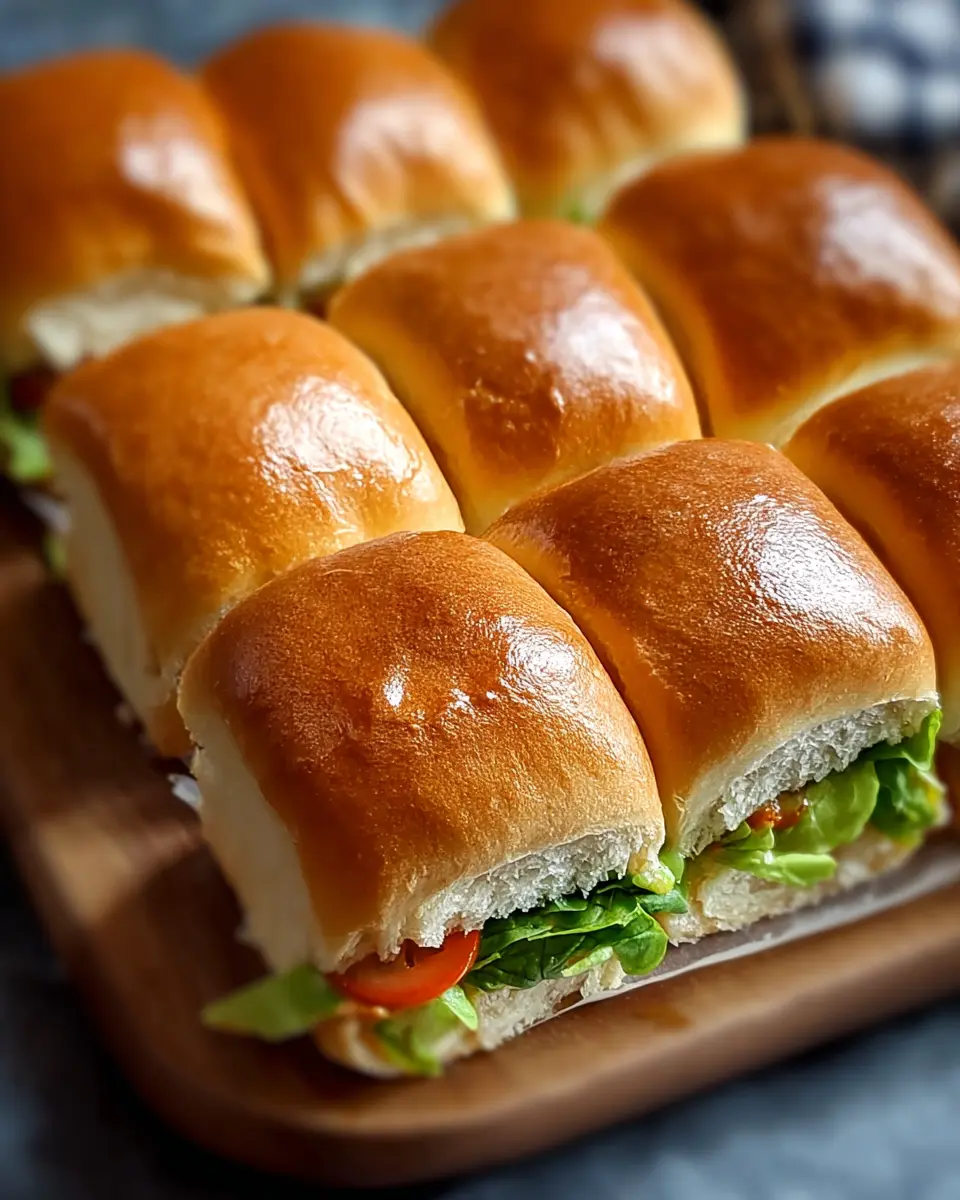
Variations on Homemade Handmade Sub Rolls
Flavor-Infused Sub Rolls
Take your homemade handmade sub rolls to the next level by infusing them with exciting flavors! Try adding a tablespoon of garlic powder or fresh herbs like rosemary or thyme to the dough for a fragrant twist. For a touch of sweetness, consider mixing in some sundried tomatoes or olives. These additions can elevate a simple sub to gourmet status, making it perfect for casual gatherings or picnics.
Whole Grain Options for Healthy Eaters
For those seeking a healthier alternative, you can easily create whole grain variations of your homemade handmade sub rolls. Substitute half of the bread flour with whole wheat flour, which boosts fiber content and adds a nutty flavor. In addition, incorporating seeds like flaxseeds or chia seeds can provide extra nutrition and texture. This way, you can enjoy delicious rolls without compromising on health!
Baking notes for Homemade Handmade Sub Rolls
Common mistakes to avoid
Baking homemade handmade sub rolls can be a joyful experience, but there are a few pitfalls to watch out for. First, ensure your yeast is fresh; expired yeast can lead to dense, sad rolls. Also, avoid over-kneading the dough, which can cause tough texture instead of fluffy perfection. Lastly, resist the temptation to rush the rising process—patience is key for achieving those light, airy rolls!
Ensuring the perfect texture every time
For consistently fluffy sub rolls, pay close attention to your dough's hydration level. A slightly sticky dough will yield softer rolls. Using bread flour is also advisable due to its higher protein content, which supports better rise and structure. Don’t forget that the second rise is critical—this is where the magic happens, ensuring your rolls are irresistibly light and tender. For more tips on dough consistency, check out this bread baking guide.
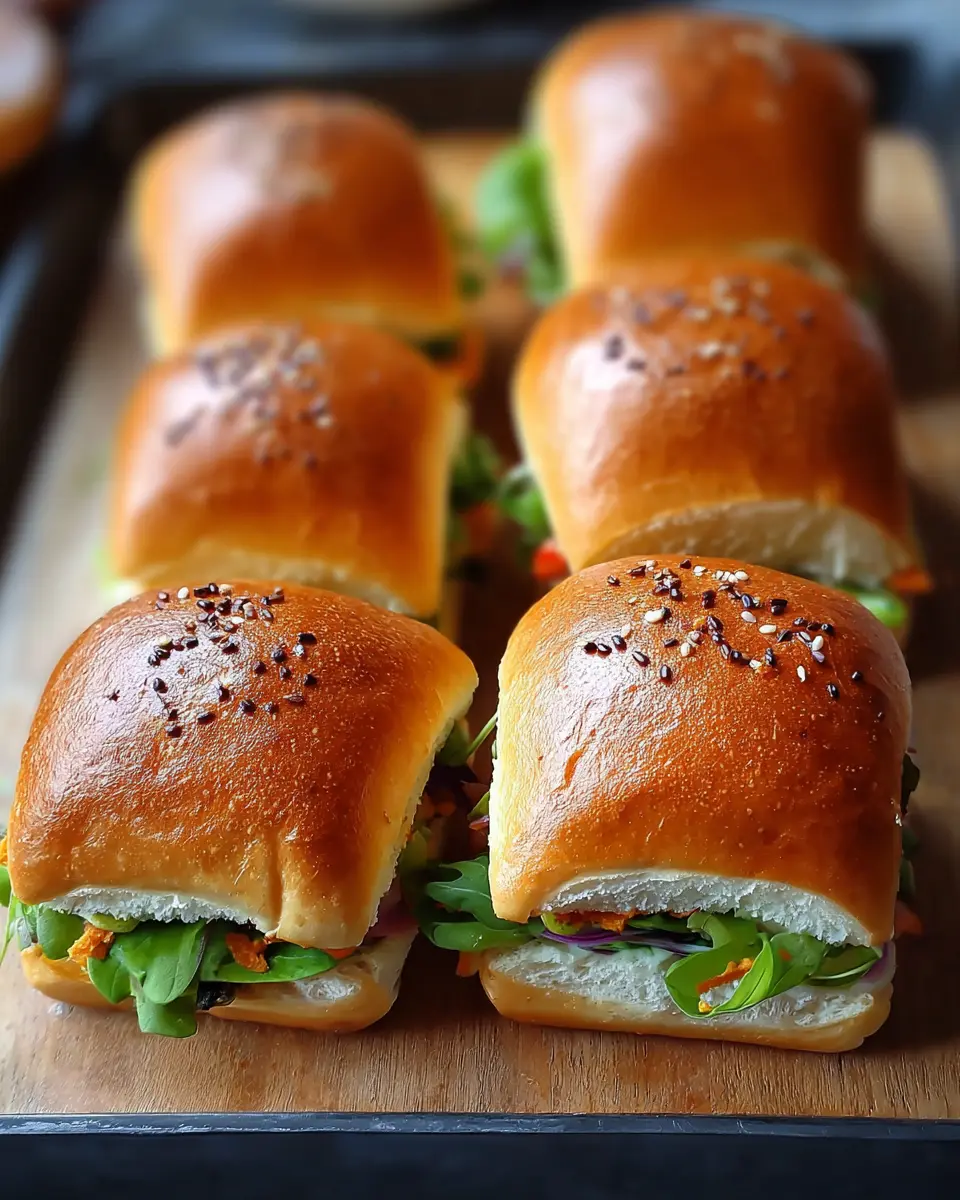
Serving suggestions for Homemade Handmade Sub Rolls
Filling ideas for every palate
These homemade handmade sub rolls are versatile, making them perfect for a variety of fillings. Try classic turkey bacon and avocado, or go for a satisfying chicken ham and cheese melt. For a vegetarian option, why not stuff them with roasted vegetables and hummus? If you're in the mood for something hearty, a beef and cheddar combo will hit the spot. Don't forget to experiment with flavor profiles — spicy chicken with jalapeños can add a kick!
Creative condiments to enhance flavors
Transform your sandwich into a gourmet experience with unique condiments. Think beyond regular mayonnaise—try a zesty cilantro lime dressing or a smoky chipotle mayo. Sweet toppings like honey mustard or balsamic glaze can balance savory fillings, while creamy avocado spreads elevate any combo. Explore mustard varieties and artisan aiolis for unexpected flavor bursts. The right sauce can truly make your homemade handmade sub rolls sing!
For more ideas, check Epicurious for inspiration on sandwiches and toppings that will surely impress.
Tips for Making Perfect Homemade Handmade Sub Rolls
Secrets for a Soft and Fluffy Texture
To achieve the ultimate homemade handmade sub rolls, your secret weapon is the dough's hydration. Use warm milk when blooming your yeast for optimal activation. Incorporating cold butter during kneading allows for a tender crumb. Also, don’t skip the second rise; it’s crucial for achieving that airy texture. Remember to shape your rolls gently—overworking can lead to a dense end result!
How to Store Them for Freshness
To keep your homemade handmade sub rolls fresh, allow them to cool completely after baking. Store them in an airtight container or a resealable plastic bag at room temperature for up to two days. For longer freshness, freeze your rolls by wrapping them tightly in plastic wrap and then storing them in a freezer bag. When you’re ready to eat, simply reheat them in the oven or microwave for that fresh-baked flavor!
By following these tips, your rolls will always be a delightful base for any sandwich filling. For more baking guidance, consider checking out resources from the King Arthur Baking Company or America's Test Kitchen.
Time details for Homemade Handmade Sub Rolls
Preparation time
Creating your homemade handmade sub rolls takes about 30 minutes of prep work. Most of that time is spent mixing, kneading, and shaping the dough, which is an excellent opportunity to channel your inner baker!
Baking time
Once your rolls are shaped and ready, they’ll bake for 15 minutes. Be prepared for your kitchen to smell heavenly as they transform into golden-brown perfection!
Total time
In total, plan for 1 hour and 45 minutes from start to finish. This includes the first rise, which is essential for achieving that fluffy texture. Making these rolls is well worth the time when you see how delightful they turn out!
For tips on storage and filling options, consider exploring resources from reputable baking platforms like King Arthur Baking or Serious Eats for added inspiration!
Nutritional Information for Homemade Handmade Sub Rolls
When it comes to crafting the perfect sub, knowing the nutritional profile of your homemade handmade sub rolls can help you make informed choices. Each roll contains approximately:
Calories per roll
- 180 calories: A balanced option for a satisfying meal without overindulging.
Protein content
- 5 grams of protein: A modest boost to keep you full and fueled throughout the day.
Carbohydrate breakdown
- 30 grams of carbohydrates: A great source of energy, making them ideal for busy schedules or active lifestyles.
These sub rolls not only taste fantastic but also provide a solid foundation for your favorite fillings. Whether it’s turkey bacon or chicken ham, knowing what’s in your food can enhance your culinary experience. For more insights into healthy eating, check out resources from Healthline or Mayo Clinic.
FAQs about Homemade Handmade Sub Rolls
How to achieve the best rise in your rolls?
For the ultimate fluffy texture in your homemade handmade sub rolls, make sure your yeast is fresh. Use water or milk at around 110°F (43°C) to create a cozy environment for the yeast to bloom. A warm location for rising—like inside an off oven with the light on—can enhance the dough's rise. Additionally, kneading the dough properly helps develop gluten, contributing to a better structure.
Can I make these rolls ahead of time?
Absolutely! You can prepare the dough ahead and let it rise in the refrigerator overnight. When you’re ready to bake, let it come to room temperature before shaping and allowing it to rise again. This not only saves you time but also builds extra flavor in your sub rolls.
What’s the best way to store leftover sub rolls?
To keep your rolls fresh, store them in an airtight container or a zip-top bag at room temperature for up to two days. For longer storage, consider freezing them. Just wrap each roll well in plastic wrap and place them in a freezer-safe bag. To enjoy, thaw at room temperature and warm them gently in the oven.
For more great baking tips, check out resources like King Arthur Baking and America’s Test Kitchen.
Conclusion on Homemade Handmade Sub Rolls
In conclusion, homemade handmade sub rolls are a delightful addition to any meal. Their fluffy texture and customizable nature make them perfect for sandwiches or as a standalone treat. Whether filled with turkey bacon or chicken ham, these rolls promise to elevate your dining experience. Happy baking!

Homemade Handmade Sub Rolls: Fluffy Perfection for Any Filling
Equipment
- Mixing Bowls
- Kitchen Towel
- baking sheet
- Oven
- wire rack
- Dough Hook
- Digital Kitchen Scale
Ingredients
For the Dough
- 1 cup Whole Milk Can substitute with 2% milk or a dairy alternative.
- 2 tablespoons Sugar Can be replaced with honey or agave syrup.
- 2 teaspoons Active Dry Yeast Ensure it’s fresh for optimal rise.
- 4 cups Bread Flour All-purpose flour can yield softer results.
- 1 teaspoon Fine Sea Salt A crucial ingredient for flavor enhancement.
- 2 large Eggs For vegan option, replace with a flax egg.
- 4 tablespoons Unsalted Butter Use cold, cubed for better incorporation.
For the Egg Wash
- 1 large Egg White Mix with a splash of water for best results.
Instructions
Making the Rolls
- Bloom the Yeast: In a medium bowl, combine warm milk, sugar, and active dry yeast. Stir gently and let it sit for about 5-10 minutes, until it becomes frothy and bubbly.
- Mix Dough: In a large mixing bowl, whisk together the bread flour and fine sea salt. Pour in the yeasty milk mixture along with beaten large eggs, mixing until a shaggy dough forms.
- Incorporate Butter: Add the cold, cubed unsalted butter to the dough. Knead by hand or use a mixer fitted with a dough hook for about 8-10 minutes, until the dough is smooth and elastic.
- First Rise: Shape the dough into a ball and place it in a greased bowl. Cover with a kitchen towel and let it rise in a warm environment until it doubles in size, approximately 1 hour.
- Divide and Shape: Gently punch down the risen dough to release air. Divide it into six equal pieces and shape each piece into elongated rolls to form your sub shape.
- Second Rise: Arrange the shaped rolls on a lined baking sheet, cover lightly with a towel, and let them rise for another 30 minutes until puffy.
- Prepare for Baking: Preheat your oven to 400°F (200°C). Brush the tops of the rolls with egg wash, making sure to coat them well. Using a sharp knife, make a few diagonal slashes on the top of each roll.
- Bake: Place the baking sheet in the oven and bake for about 15 minutes, or until the rolls are golden brown and sound hollow when tapped on the bottom.
- Cool: Once baked, transfer the rolls to a wire rack to cool completely before slicing or filling with your favorite ingredients.



Leave a Reply