
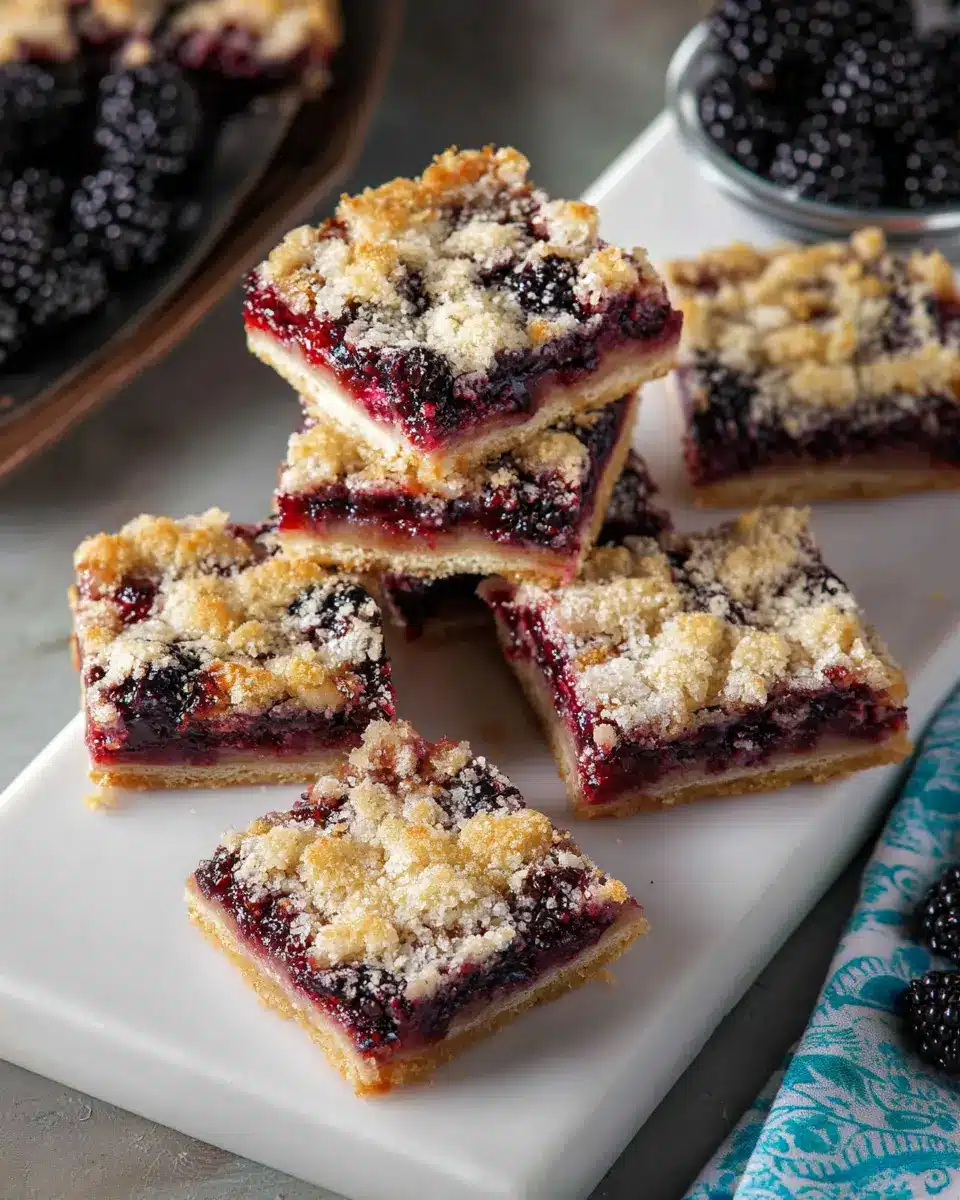
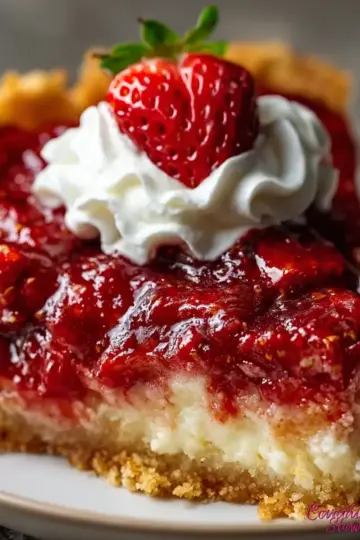
Introduction to Blackberry Pie Bars
Why Homemade Desserts Are the Best
Ah, the joy of a homemade dessert! There’s something truly special about whipping up a batch of treats in your own kitchen. Not only do they reflect your personal touch, but they are also made with love, ensuring every bite is that much sweeter. Blackberry pie bars are a perfect example of this. They skillfully combine the tartness of fresh blackberries with a buttery crust that’s simply irresistible.
Taste and Health Benefits
When you make desserts at home, you have complete control over the ingredients. You can choose high-quality, natural products and avoid artificial additives commonly found in store-bought options. Plus, making these bars can be a fun afternoon project, bringing friends or family together.
Imagine the smell of warm berries bubbling in the oven, and the moment you take them out, the golden crust beckoning you to try a piece right away. If you’re looking to impress at your next gathering or just want to indulge yourself, blackberry pie bars deliver on both flavor and nostalgic feelings.
Check out sources like The Kitchn for more inspiration on homemade desserts and discover how simplicity can lead to amazing results.
Ingredients for Blackberry Pie Bars
When it comes to making blackberry pie bars, having the right ingredients is crucial for that delicious, sunny flavor and perfectly balanced texture. Let’s break this down:
For the Crust
To create a buttery, flaky crust that serves as a delightful base for your bars, you'll need:
- 2 cups all-purpose flour
- 1 cup granulated sugar
- ¼ teaspoon salt
- 1 cup unsalted butter (cold, cut into ½-inch cubes)
The combination of flour and sugar provides that delightful sweetness, while the cold butter helps achieve that luscious crumb.
For the Filling
Now, let’s move on to the star of the show—the filling! To whip up a creamy, tangy, and sweet filling, gather:
- 2 large eggs
- ¾ cup granulated sugar
- ⅔ cup sour cream
- ½ cup all-purpose flour
- 1 ½ tablespoons lime juice
- Zest of 1 lime
- A pinch of salt
- 4 cups fresh blackberries (approximately 2 pints)
The tanginess from the sour cream and lime juice brightens the flavors of the juicy blackberries, making these bars irresistible! For more dessert inspiration, you can check out Serious Eats or Bon Appétit.
With these ingredients in hand, you're well on your way to whipping up a batch of mouth-watering blackberry pie bars that everyone will love!
Preparing Blackberry Pie Bars
Making blackberry pie bars is a delightful way to bring the classic flavors of blackberry pie into a portable, easy-to-share format. Let's walk through the steps to ensure your bars turn out just right!
Preheat and Prepare Your Baking Dish
The first step is setting the stage for your delicious creation. Preheat your oven to 350 °F. While it's heating up, take a 9x9-inch square baking dish and grease it thoroughly with butter or a non-stick spray. This will help the bars release easily after baking. Pro tip: if you line the bottom with parchment paper, you'll have even easier removal!
Make the Crust Mixture
Next, it’s time to create the crust that will serve as the foundation for your blackberry pie bars. In an electric mixer fitted with a paddle attachment, combine:
- 2 cups all-purpose flour
- 1 cup granulated sugar
- ¼ teaspoon salt
- 1 cup unsalted butter (cold, cut into cubes)
Beat the ingredients on medium speed until the mixture looks dry and crumbly. This should take about 2 to 3 minutes. If you don’t have a mixer, you can certainly use your hands or a pastry cutter instead—just remember to mix until crumbly!
Press the Crust into the Baking Dish and Pre-Bake
Now, reserve 1 ½ cups of that crust mixture to use later as a topping. Press the remaining crust mixture firmly and evenly into the bottom of your greased baking dish. This creates a solid base for your filling. Bake the crust for 12 to 15 minutes, or until it's just golden brown. The aroma will start to fill your kitchen—trust me, it’s a good sign!
Mix the Blackberry Filling
While the crust is cooling, let’s whip up that sumptuous filling! In a large bowl, whisk together:
- 2 large eggs
- ¾ cup granulated sugar
- ⅔ cup sour cream
- ½ cup all-purpose flour
- 1 ½ tablespoons lime juice
- Zest of 1 lime
- A pinch of salt
Finally, fold in 4 cups fresh blackberries. This juicy mixture will be the star of your blackberry pie bars!
Pour Filling Over the Crust and Add Topping
Spread your blackberry filling evenly over the pre-baked crust. Then, sprinkle the reserved crust mixture over the top. This will create a lovely crumble that adds texture and flavor!
Bake to Perfection
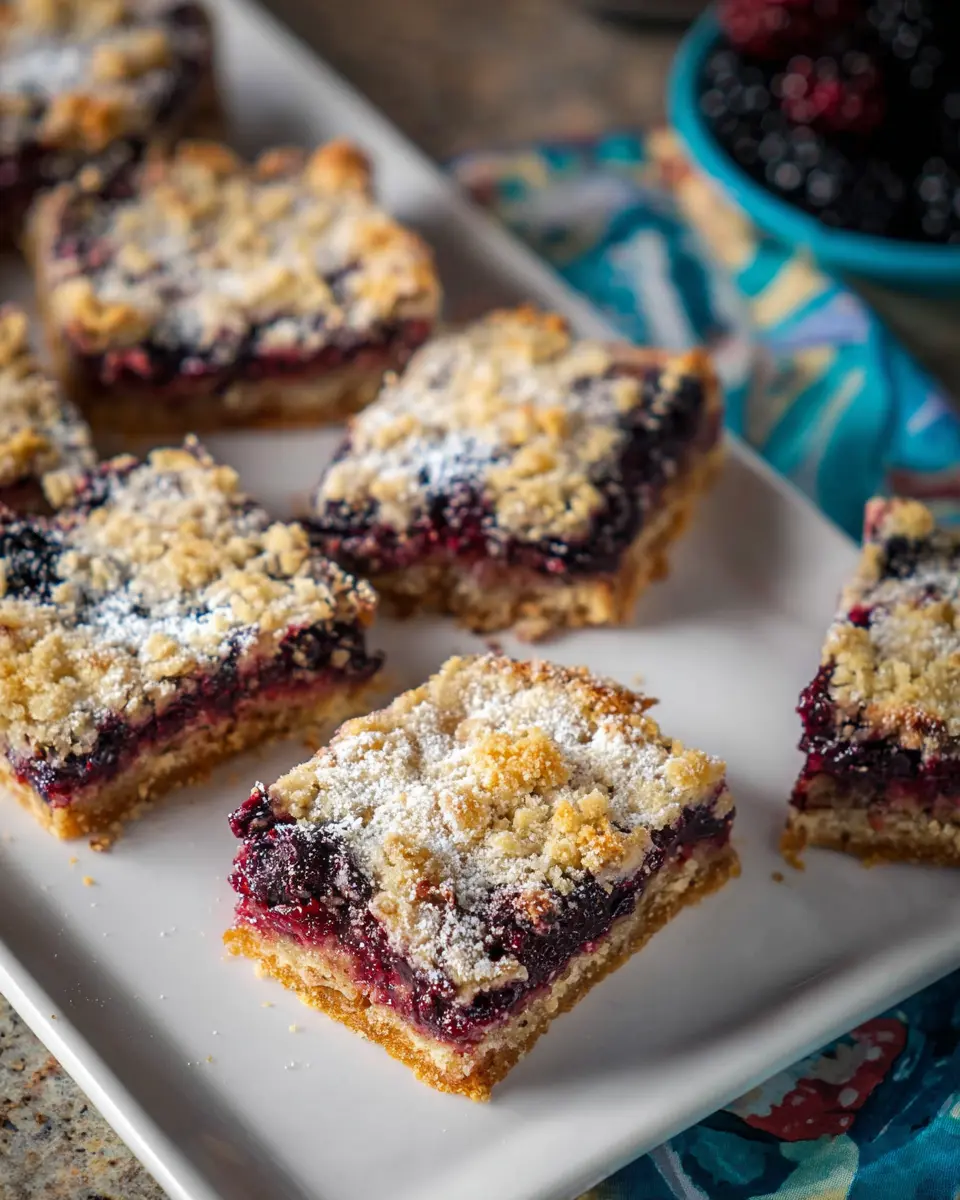
Bake the blackberry pie bars for 45 to 55 minutes, until the topping turns lightly brown and the filling is set. When you take them out, let them cool for about an hour before slicing. The cooling time allows the filling to firm up, making it easier to cut into neat bars.
And there you have it! Your delicious blackberry pie bars are ready to be enjoyed. Whether it's for a picnic or a simple dessert at home, these bars are sure to impress. Happy baking!
For more tips on creating the perfect dessert, consider checking out great resources on baking techniques and flavor pairings, such as King Arthur Baking or Serious Eats.
Variations on Blackberry Pie Bars
Gluten-free blackberry pie bars
For those with gluten sensitivities, making blackberry pie bars can still be delicious with a few simple swaps. Replace all-purpose flour with a gluten-free blend, ensuring it has a good binding agent like xanthan gum. Use gluten-free oats for the crumbly top, and you're set!
Vegan blackberry pie bars
If you’re looking for a plant-based version, replace the eggs with flaxseed meal or a store-bought egg replacer. Swap out the sour cream for a non-dairy alternative like coconut yogurt or silken tofu, blended until smooth. These tweaks ensure everyone can enjoy the sweet, tangy flavors of blackberry pie bars, regardless of dietary preferences.
Feel free to get creative—perhaps add a sprinkle of cinnamon or swap blackberries for blueberries for a fresh twist! For more tips on gluten-free and vegan baking, check out comprehensive resources from Food52 or Minimalist Baker.
Cooking tips and notes for Blackberry Pie Bars
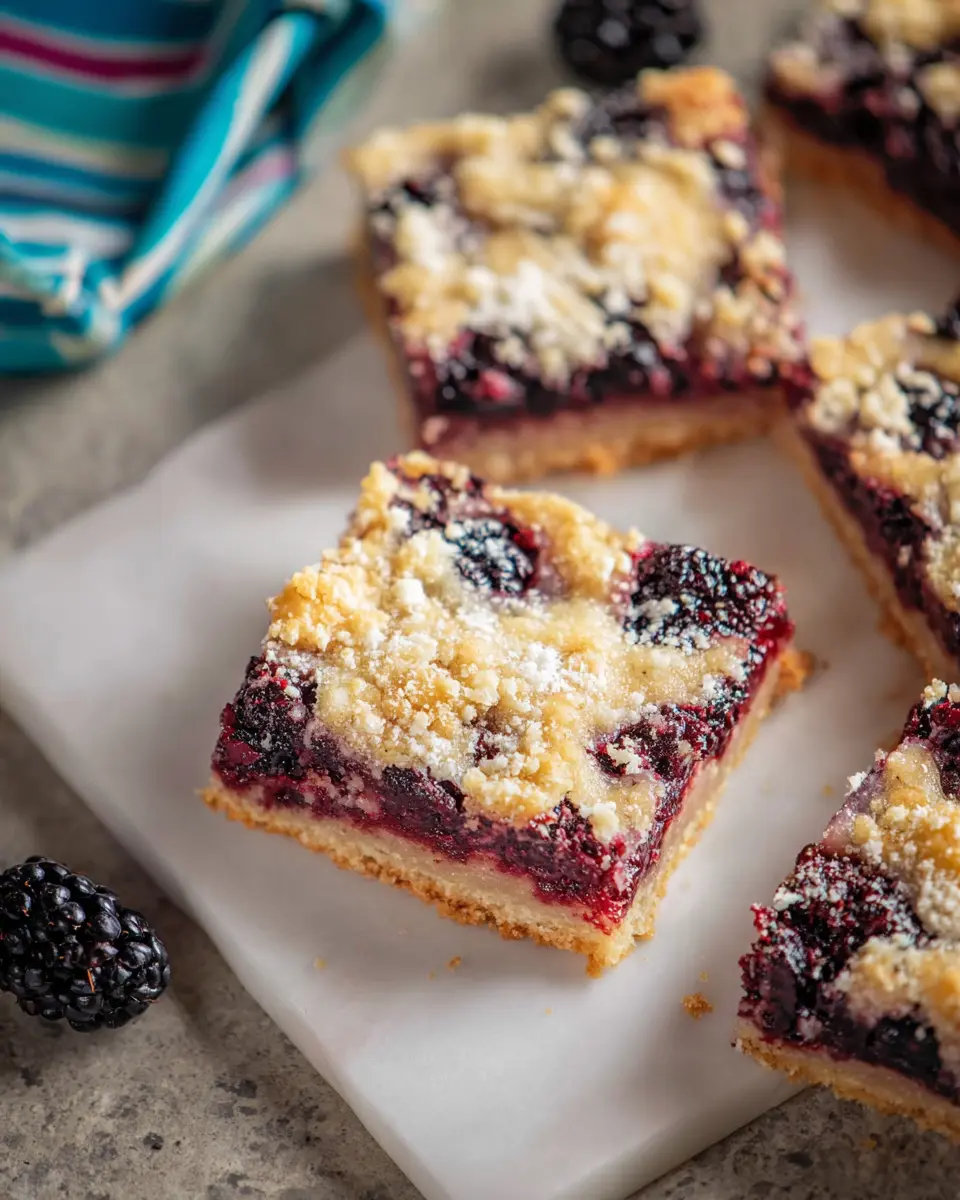
How to choose ripe blackberries
When selecting blackberries for your pie bars, look for deep, rich color—think dark purple to black. They should be plump and almost shiny, indicating they're ripe and bursting with flavor. Avoid any berries that are red or mushy, as they may not have the sweetness you want. Feel free to check out this guide on selecting berries for more tips.
Tips for achieving the perfect crust
To create a flawlessly flaky crust for your blackberry pie bars, make sure your butter is cold and cubed. When mixing, don’t overwork the dough; it should be crumbly but hold together when pressed. Consider chilling the crust for 15 minutes before baking—this helps it maintain its shape and prevents shrinking. If you prefer an extra flavorful base, toss in a dash of cinnamon or nutmeg for a delightful twist! For even more crust ideas, check out this baking resource.
Serving suggestions for Blackberry Pie Bars
Pairings that elevate the experience
To truly savor your blackberry pie bars, consider pairing them with complementary flavors. A dollop of homemade whipped cream or a scoop of vanilla ice cream takes these bars to the next level. To enhance the fruity goodness, serve with fresh mint leaves for a burst of color and freshness. You might even want to drizzle a bit of caramel sauce or a sprinkle of crushed graham crackers on top for added texture and sweetness.
Creative serving ideas
Get creative with your presentation! Serve your blackberry pie bars warm in a stylish dessert bowl for a cozy dessert option. You could even stack them up like a mini dessert tower, perfect for sharing at gatherings. For an outdoor gathering, wrap them in parchment paper and tie with twine for a rustic touch. Don't forget to include a charming note with suggested pairings; this adds a personal touch that friends and family will adore!
Time Breakdown for Blackberry Pie Bars
To plan your baking adventure wisely, here’s a handy breakdown of the times involved in creating these delicious blackberry pie bars.
Preparation Time
10 minutes is all you need to gather your ingredients and whip up the crust and filling.
Cooking Time
Set aside 1 hour for baking. This ensures your bars come out perfectly golden and delicious.
Cooling Time
After baking, let those bars cool for 1 hour. This step is crucial for achieving the right texture.
Total Time
In just 2 hours and 10 minutes, you’ll have a batch of scrumptious blackberry pie bars ready to enjoy. It's an easy and rewarding way to indulge in the flavors of summer whenever you crave a sweet treat!
For more dessert inspiration, consider checking out resources on seasonal fruits or even local farmers' markets for the freshest blackberries.
Feeling excited about trying these blackberry pie bars? Let’s get started on your delightful baking journey!
Nutritional Facts for Blackberry Pie Bars
Calories per bar
Each delightful bar of blackberry pie bars contains approximately 303 calories. This tasty treat is perfect for satisfying sweet cravings without going overboard.
Key nutrients breakdown
Here’s a quick look at the key nutrients per bar:
- Total Fat: 14.4g
- Carbohydrates: 41.2g
- Protein: 3.6g
These bars deliver a lovely balance of indulgence and nourishment. The combination of blackberries adds a delicious burst of antioxidants and vitamins, making these bars a guilt-free dessert option. Want to know more about the benefits of berries? Check out WebMD for an in-depth look.
FAQs about Blackberry Pie Bars
Can I use frozen blackberries?
Absolutely! If fresh blackberries aren’t available, frozen ones will work just fine for your blackberry pie bars. Just be sure to thaw them and drain any excess liquid to avoid a soggy filling. This will also help maintain the delicious flavor and texture you’re aiming for!
How should I store leftover bars?
To keep your blackberry pie bars fresh, store them in an airtight container in the refrigerator for up to five days. You can also separate layers with parchment paper to prevent sticking, making it easier to grab a bite later!
Can I make these ahead of time?
Definitely! These bars are ideal for make-ahead treats. You can bake them a day or two in advance, allowing their flavors to develop even more. Just remember to cool completely before slicing and storing them, and reheat slightly in the oven if you prefer them warm.
For more tips on baking and ingredient substitutions, check out King Arthur Baking for great resources!
Conclusion on Blackberry Pie Bars
The joy of homemade desserts
Bringing blackberry pie bars to your kitchen allows you to savor the delightful fusion of sweet and tart flavors, all while basking in the pride of creating something delicious from scratch. Homemade treats not only nourish the body but also the soul, making moments spent sharing them with loved ones even sweeter.
Blackberry Pie Bars
Equipment
- Electric Mixer
- 9x9 inch baking dish
Ingredients
FOR THE CRUST
- 2 cups all-purpose flour
- 1 cup granulated sugar
- ¼ teaspoon salt
- 1 cup unsalted butter cold, cut into ½-inch cubes
FOR THE FILLING
- 2 large eggs
- ¾ cup granulated sugar
- ⅔ cup sour cream
- ½ cup all-purpose flour
- 1 ½ tablespoons lime juice
- zest of 1 lime
- pinch salt
- 4 cups fresh blackberries approx. 2 pints
Instructions
Instructions
- Preheat the oven to 350 °F. Grease a 9x9-inch square baking dish.
- To make the crust, combine the sugar, flour, salt, and butter in an electric mixer fitted with a paddle attachment. Beat the ingredients on medium speed until the mixture looks dry and crumbly.
- Reserve 1 ½ cups of the crust mixture to use as a topping. Press the remaining mixture into the bottom of the pan. Bake the crust for 12 to 15 minutes, until golden brown.
- While crust is cooling, prepare the filling. Whisk the eggs in a large bowl and add the sugar, sour cream, flour, lime juice and zest, and salt. Fold in the blackberries.
- Spread the mixture over the crust. Sprinkle the reserved crust mixture over the filling.
- Bake for 45 to 55 minutes, until the top is lightly browned. Cool for 1 hour before slicing and serving.
Leave a Reply