
Introduction to Cheesy Garlic Chicken Wraps
Why Cheesy Garlic Chicken Wraps Are a Game-Changer for Busy Professionals
If you’re a busy professional juggling work and personal commitments, finding quick and satisfying meal options can be a challenge. Enter cheesy garlic chicken wraps! These delicious wraps take just 22 minutes from prep to plate, making them an ideal choice for a nutritious lunch or a speedy dinner.
What makes these wraps stand out? They combine protein-packed chicken, creamy textures, and bold garlic flavor, all wrapped up in a warm tortilla. The result is a meal that not only fuels you for the day ahead but is also a joy to eat. Plus, you can easily customize them with your favorite ingredients or even prep the filling a few days in advance — so your weeknight meals can be as effortless as they are tasty.
With the rising trend of meal prepping among young professionals, recipes like this one provide a versatile, healthy, and satisfying option for stress-free eating. Imagine enjoying an easy lunch that’s both comforting and delicious, without spending hours in the kitchen. What could be better?
For more quick meal ideas, check out this resource on healthy meal prepping.
Ingredients for Cheesy Garlic Chicken Wraps
Essential ingredients for the wraps
To make your flavorful cheesy garlic chicken wraps, you’ll need a few essential ingredients that pack a punch:
- Large tortillas: Choose regular or low-carb/high-protein options to suit your dietary needs.
- Cooked chicken: About 200 grams (7 oz) of chopped chicken works best, and using rotisserie chicken is a fantastic shortcut.
- Garlic: Freshly minced or grated garlic cloves add that irresistible kick.
- Light mayonnaise & Greek yogurt: These help create a creamy filling without the extra calories.
- Hot sauce: A dash of your favorite hot sauce brings just the right amount of heat.
- Salt: Enhances all the flavors beautifully.
- Cheese: About 90 grams (3 oz) of grated cheese, such as cheddar, for that gooey goodness.
- Green onion: Chopped for a fresh, oniony touch.
- Olive oil spray: To get that perfect golden crisp when cooking.
Optional ingredients for added flavor
Want to take your cheesy garlic chicken wraps to the next level? Here are some optional ingredients you can consider:
- Spinach or other greens: Add a handful for extra vitamins and a pop of color.
- Peppers: Sauté some bell peppers for added sweetness and crunch.
- Avocado: Slices make a creamy addition, balancing the spice.
- Lemon juice: A squeeze can brighten up the flavors immensely.
- Herbs and spices: Fresh cilantro, oregano, or a hint of paprika can offer unique flavor profiles.
Feel free to mix and match to suit your taste buds while keeping the preparation simple and fun! For more creative ideas on wraps, check out CookingLight for hints on healthy fillings.
Preparing Cheesy Garlic Chicken Wraps
When it comes to a quick and satisfying meal, cheesy garlic chicken wraps are a go-to! They're crispy on the outside, gooey on the inside, and packed with flavor. Let's break down the simple steps to prepare these delightful wraps—perfect for a delicious lunch or an easy dinner.
Gather Your Ingredients and Prep Workspace
Before you dive into cooking, take a moment to get organized. Here’s what you’ll need:
- Ingredients
- 2 large tortillas (regular or low-carb)
- 7 oz cooked chicken (about 200 grams, chopped; rotisserie chicken works wonders)
- 2 garlic cloves (minced or grated to your taste)
- 2 tablespoons light mayonnaise
- 1 tablespoon light Greek yogurt
- 2 teaspoons hot sauce (I like Frank’s)
- ¼ teaspoon salt
- 3 oz grated cheese (cheddar blends are fantastic)
- 1 green onion (chopped)
- Olive oil spray
Set aside a clean cutting board and mixing bowl. Also, make sure you have a non-stick pan ready for cooking. Getting everything in place not only simplifies the cooking process but also keeps it enjoyable.
Create the Cheesy Chicken Filling
In your mixing bowl, combine the chopped chicken, minced garlic, mayonnaise, Greek yogurt, hot sauce, and salt. Stir until everything is well combined. This luscious mixture is what makes your cheesy garlic chicken wraps so flavorful! The combination of creamy mayonnaise and tangy yogurt will keep the chicken moist while adding an extra layer of taste. If you're interested in more protein-packed lunches, check out this article for ideas.
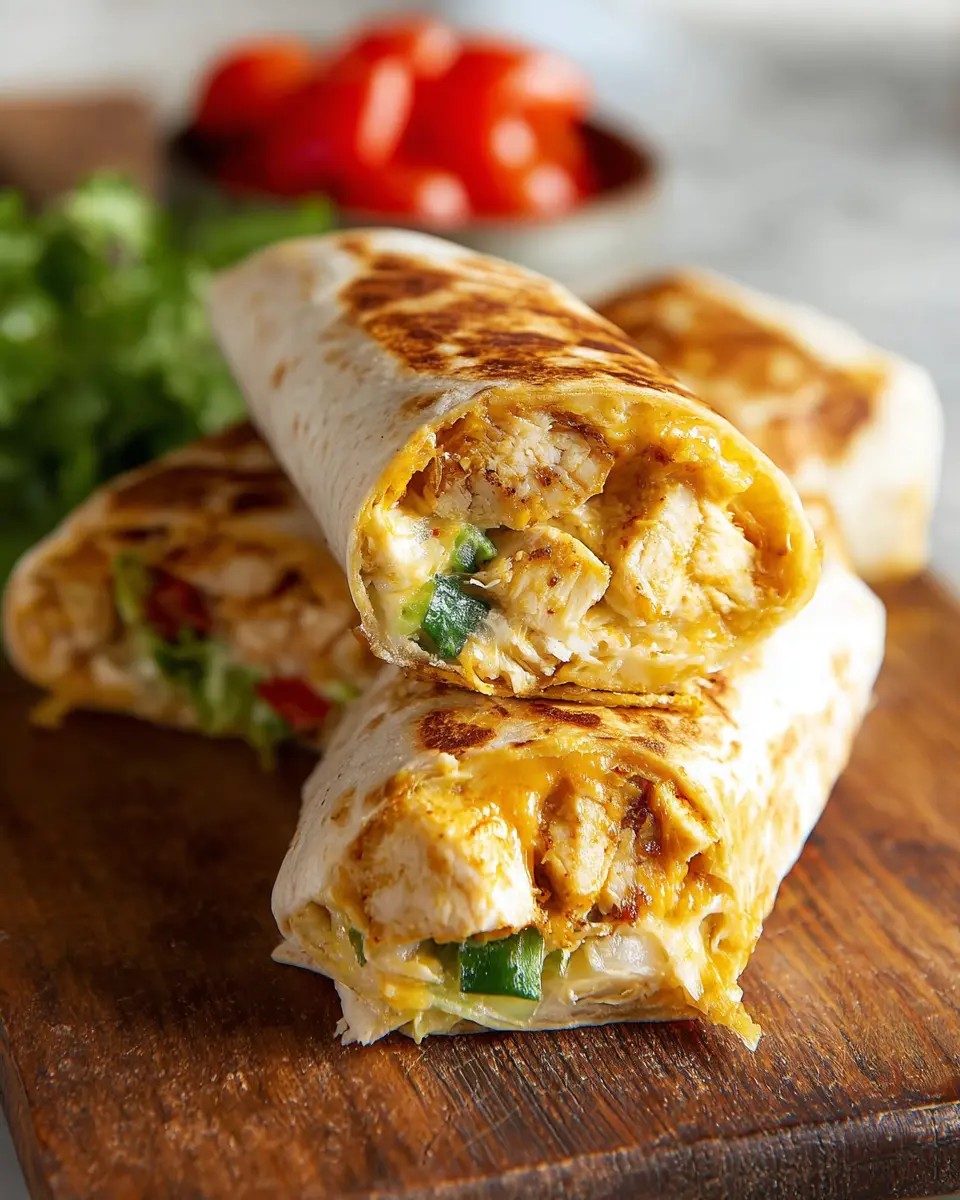
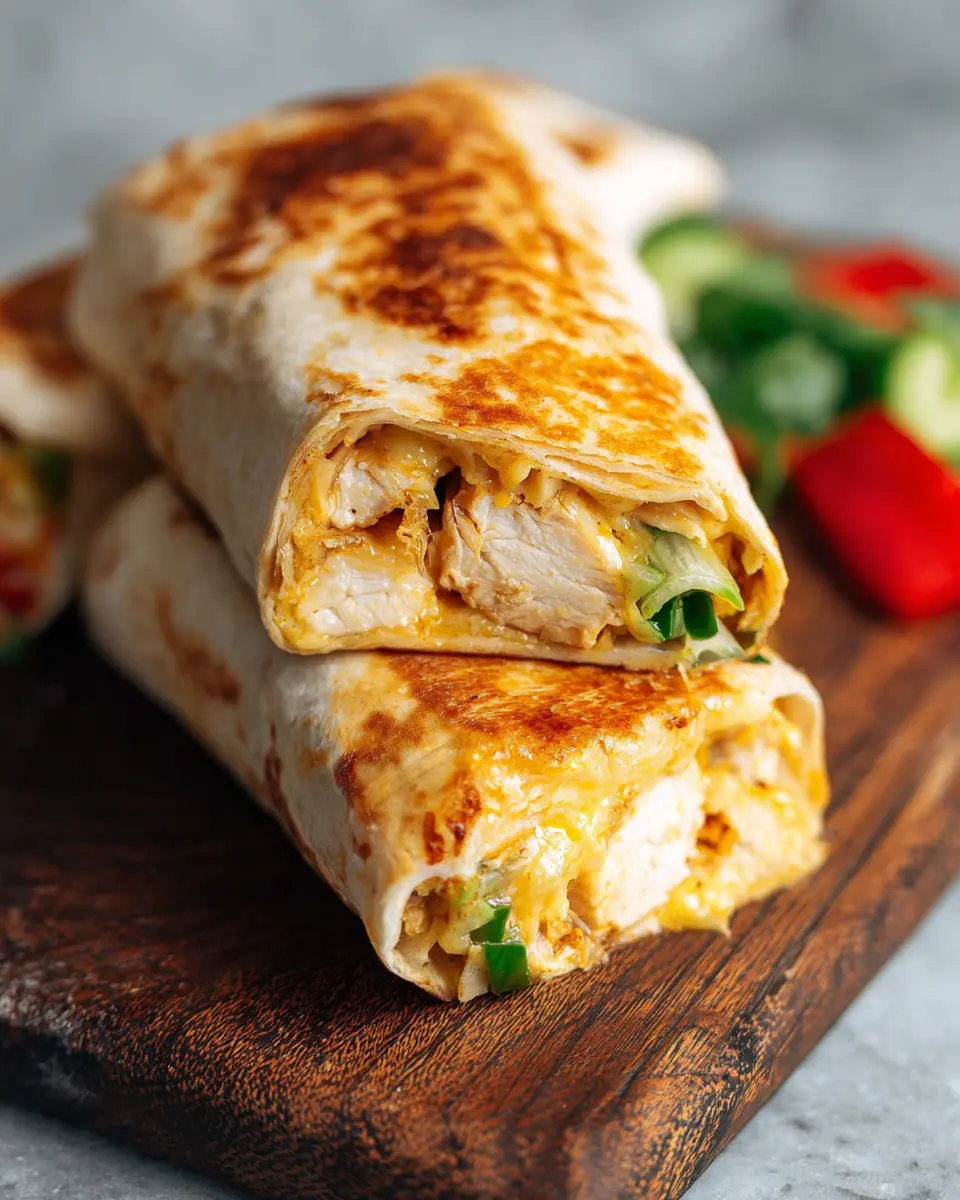
Assemble the Wraps
Now that your filling is ready, it’s time to wrap it all up!
- Lay out a tortilla flat on your workspace.
- On the lower third of the tortilla, sprinkle about 2 tablespoons of cheese.
- Add roughly ⅔ cup of your chicken mixture.
- Top with another tablespoon of cheese and a sprinkle of chopped green onion.
Once that’s done, fold in the sides of the tortilla and roll it up tightly from the bottom. Starting tight ensures you get a deliciously packed wrap!
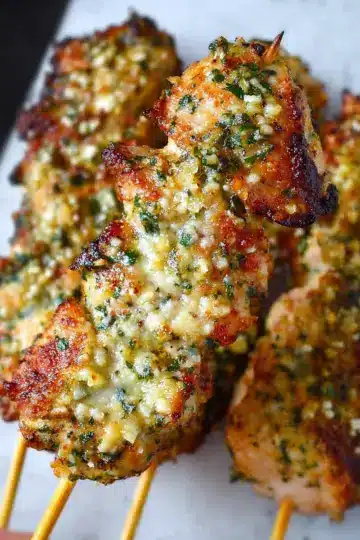
Cook the Wraps for the Perfect Crunch
Heat a non-stick pan over medium-high heat and give it a light spray with olive oil. Place the wraps seam-side down. Cook them for about 3–4 minutes on each side until they are golden and crispy. A lid helps trap the heat, ensuring that the insides are heated through and that cheese melts beautifully.
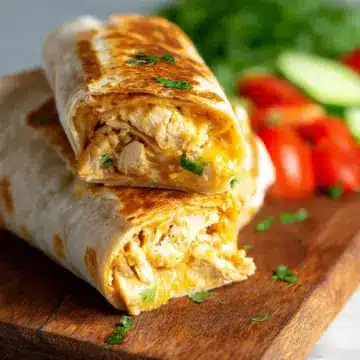
Slice and Serve
Once your cheesy garlic chicken wraps are beautifully golden brown, take them off the heat. Slice them in half, and they’re ready to serve! Pair them with a crisp salad, some crunchy tortilla chips, or even a side of salsa for dipping. Trust me, these wraps are a hit at any gathering—perfect for casual lunches or weeknight dinners. Enjoy every cheesy bite!

Variations on Cheesy Garlic Chicken Wraps
Spicy Cheesy Garlic Chicken Wraps
Looking to turn up the heat? Try adding sliced jalapeños or a dash of cayenne pepper to your chicken mixture for a spicy twist on these cheesy garlic chicken wraps. You can also swap out the regular hot sauce for a spicier version or even a smoky chipotle sauce. This adds a depth of flavor that pairs beautifully with the cheesy goodness! For those who love spice, consider using pepper jack cheese instead of the cheddar blend for an extra kick.
Vegetarian Cheesy Garlic Wraps
Not a fan of chicken? No worries! You can easily transform these cheesy garlic chicken wraps into a vegetarian delight. Replace the chicken with sautéed mushrooms, roasted red peppers, or a mix of your favorite veggies. Adding black beans or chickpeas enhances the protein content while remaining satisfying. You can also use a herbed cream cheese for an extra creamy texture that complements the garlic flavor perfectly. Check out this source for more ideas on vegetarian protein options.
Cooking Notes for Cheesy Garlic Chicken Wraps
Tips for Achieving the Best Texture
To get that perfect crunch on your cheesy garlic chicken wraps, make sure your pan is hot before adding the wraps. Additionally, spritz the outside of the tortilla with olive oil spray for that golden finish. If you're using an air fryer, ensure the wraps are not overcrowded, allowing hot air to circulate evenly.
Storing and Reheating Wraps Effectively
If you have leftovers, store your cooked wraps in an airtight container in the fridge for up to two days. When you're ready to enjoy them again, reheat in a skillet or air fryer to revive that crispy texture. While freezing the wrapped version isn't recommended, feel free to freeze any leftover filling for up to a month! This way, you can whip up fresh wraps anytime. For more practical tips on food storage, check out this guide.
Serving Suggestions for Cheesy Garlic Chicken Wraps
Pairing with Salads or Dips
To elevate your cheesy garlic chicken wraps, consider serving them alongside a crisp salad. A fresh kale or mixed greens salad drizzled with a zesty lemon vinaigrette can balance the richness of the wraps beautifully. For a delightful dipping option, guacamole or a spicy salsa complements the flavors perfectly—adding an enjoyable kick!
Ideas for Sides to Complete Your Meal
To round out your meal, think about pairing your wraps with some roasted vegetables, like zucchini or bell peppers, seasoned with herbs. Crispy sweet potato fries can also add a satisfying crunch. If you’re in the mood for something a bit more indulgent, tortilla chips are excellent for scooping up any leftover dips. With these sides, your cheesy garlic chicken wraps will shine!
Time details for Cheesy Garlic Chicken Wraps
Preparation time
The preparation time for these cheesy garlic chicken wraps is just 15 minutes. This quick assembly allows you to jump right into enjoying your delicious meal without spending too much time in the kitchen.
Cooking time
You'll need about 7 minutes for cooking. In this short time, you’ll achieve golden, crispy wraps that’ll have everyone craving more.
Total time
All in all, you can whip up these delightful wraps in just 22 minutes. Perfect for a speedy lunch or a satisfying dinner that’s ready before you know it!
For more cooking inspiration, check out the USDA's guidelines on poultry cooking for safe and delicious chicken dishes.
Nutritional Information for Cheesy Garlic Chicken Wraps
Calories
Each serving of these delightful cheesy garlic chicken wraps packs approximately 476 calories. This makes it a satisfying option for lunch or dinner without derailing your health goals!
Protein
With about 38 grams of protein, these wraps are a nutritious choice for maintaining energy levels throughout your busy day. Thanks to the chicken and cheese, you’ll be fueled up and ready to tackle whatever comes next.
Sodium
One consideration with these wraps is the sodium content, which totals around 1,090 milligrams per serving. While this provides flavor, be mindful if you’re watching your salt intake. Pairing with a fresh side salad can help balance things out!
For more insights on nutrition, check out resources from the American Heart Association. Eating well can indeed be delicious!
FAQs about Cheesy Garlic Chicken Wraps
Can I use other types of meat in these wraps?
Absolutely! While the recipe features chicken, you can easily switch it up. Try using turkey bacon for a smoky twist or beef for a heartier option. Even shredded chicken ham works well if you're looking for something different. The beauty of these wraps is their versatility!
Are there gluten-free options available?
Yes, there are plenty of gluten-free choices! Simply swap regular tortillas for gluten-free alternatives made from rice or corn. Make sure to check the labels for any hidden gluten ingredients, especially in sauces. With these easy substitutions, everyone can enjoy cheesy garlic chicken wraps.
How can I make these wraps healthier?
If you're aiming for a lighter version, consider using less cheese or opting for lower-fat varieties. You can also add extra veggies, like spinach or bell peppers, to boost the nutritional content. Another option is to serve them with a fresh side salad to balance the meal. Remember, healthy can still be delicious!
Conclusion on Cheesy Garlic Chicken Wraps
In summary, cheesy garlic chicken wraps are a delightful combination of flavors and textures, making them an easy go-to meal. Perfect for lunch or dinner, these wraps are versatile and satisfying. Try them with a side salad, and enjoy a moment of delicious bliss! For more recipes, explore Irena Macri's creations.
Cheesy Garlic Chicken Wraps
Equipment
- Non-stick pan
Ingredients
- 2 large tortillas regular or low-carb/high-protein
- 7 oz cooked chicken about 200 grams, chopped (rotisserie is great)
- 2 garlic cloves minced or grated (adjust to taste)
- 2 tablespoons light mayonnaise
- 1 tablespoon light Greek yogurt or plain yogurt
- 2 teaspoons hot sauce like Frank’s
- ¼ teaspoon salt
- 3 oz grated cheese about 90 grams (I used a cheddar blend)
- 1 green onion chopped
- Olive oil spray
Instructions
- In a bowl, mix chopped chicken, garlic, mayonnaise, yogurt, hot sauce, and salt.
- Lay out your wrap. On the lower third of the tortilla, sprinkle about 2 tablespoons of cheese, then top with about ⅔ cup of the chicken mixture. Add another tablespoon of cheese and a sprinkle of green onion.
- Fold in the sides of the tortilla, then roll it up tightly from the bottom.
- Heat a non-stick pan over medium-high. Spray with olive oil.
- Place wraps seam-side down. Cook for 3–4 minutes per side until crispy and golden. Cover with a lid to help heat the inside.
- Slice in half and serve!
Leave a Reply