
Introduction to Artisan Bread
Making artisan bread at home is not just a cooking project—it's a delightful experience that can transform your daily meals. The aroma of freshly baked bread wafting through your kitchen creates a warm, comforting atmosphere that store-bought varieties simply can't compete with. Plus, there’s something incredibly satisfying about kneading dough and watching it rise, knowing you crafted something delicious from scratch.
Why Homemade Artisan Bread is a Game-Changer?
Homemade artisan bread boasts a rich, chewy interior and a beautifully crisp crust, making every bite a pleasure. Did you know that baking your own bread can save you money? The cost of ingredients for a loaf often comes in at less than what you’d pay for a comparable product at the store. Plus, it allows you to control the ingredients—no preservatives or additives here!
Beyond the flavor and cost-efficiency, baking bread can also be a mindful practice. It can serve as a creative outlet, a way to unwind after a long day, and even an opportunity to bond with friends and family over a shared love for good food. If you’re ready to dive into this rewarding culinary adventure, you’ve come to the right place! Let’s get started on your journey to baking the perfect loaf of artisan bread.
Ingredients for Artisan Bread
Essential Ingredients for the Perfect Loaf
Creating the ultimate artisan bread requires just a handful of essential ingredients. You’ll need:
- 3 ¾ cups bread flour: This gives your bread that amazing chewy texture.
- 2 ¼ teaspoons instant yeast: The leavening agent that helps the dough rise beautifully.
- 1 ¾ teaspoons kosher salt: Essential for flavor and strength in the dough.
- 1 ½ cups warm water: Perfectly warmed to activate the yeast without killing it; aim for between 120°F and 130°F.
These staples form the foundation of your bread, allowing for a gorgeous loaf with a crispy crust and a soft interior. If you're curious about the science behind bread making, check out resources like the King Arthur Baking Company for comprehensive tips.
Optional Additions for Enhanced Flavor
Once you've mastered the basics, consider adding optional ingredients to elevate your artisan bread.
- Herbs and Spices: A tablespoon of dried rosemary or garlic powder can add a delightful flavor dimension.
- Olive Oil: Incorporating olive oil can enhance the richness of your bread.
- Nuts or Seeds: Think about adding walnuts or sunflower seeds for texture and nutrition.
These additions not only improve taste but can also give your bread a unique identity. Remember, the possibilities are endless, so don't hesitate to get creative and experiment!
Preparing Artisan Bread
Making artisan bread is an incredibly rewarding endeavor that fills your kitchen with mouthwatering aromas and yields a loaf that's chewy on the inside with a delightful crust on the outside. Let's walk through the steps to create this masterpiece!
Gather your ingredients
To get started, you'll need to gather just four essential ingredients:
- 3 ¾ cups bread flour
- 2 ¼ teaspoons instant yeast
- 1 ¾ teaspoons kosher salt
- 1 ½ cups warm water (between 120°F and 130°F)
Having everything on hand makes the process smoother, and trust me, once you experience the joy of homemade bread, you won't want to stop at one loaf!
Mix the dry ingredients
In a large mixing bowl, combine the bread flour, instant yeast, and kosher salt. Stir them together using a large wooden spoon until they're well mixed. This simple step is crucial; it ensures that your yeast is evenly distributed throughout the flour, allowing for consistent rising.
Combine with water
Once the dry ingredients are ready, it's time to add the warm water. Pour it in gradually while stirring. The resulting mixture will be quite sticky; don’t worry—that's exactly what we want! Ensuring there are no lumps of flour is essential, as these can create uneven texture in your artisan bread.
First rise: let the magic happen
Cover the bowl and place it in a warm, draft-free area for about 1 ½ to 2 hours, or until it has doubled in size. This is where the magic happens, as the yeast awakens and starts to work its wonders. You might wonder why waiting is essential—it's all about developing that fantastic flavor!
Shape the dough
After the first rise, turn the dough out onto a lightly floured surface, seam side down. Using floured hands, form it into a round loaf. This shaping is simple but effective for creating a beautiful finished product.
Preheat your Dutch oven
While you're shaping your dough, go ahead and preheat your oven to 450°F. Place a Dutch oven with its lid inside to heat for at least 30 minutes. This step is crucial for creating the perfect crust!
Second rise: patience is key
Now that your dough is shaped, place it on parchment paper and cover it loosely. Let it rise again for about 10 minutes. This second rise allows the gluten to relax and expands the flavor even further.
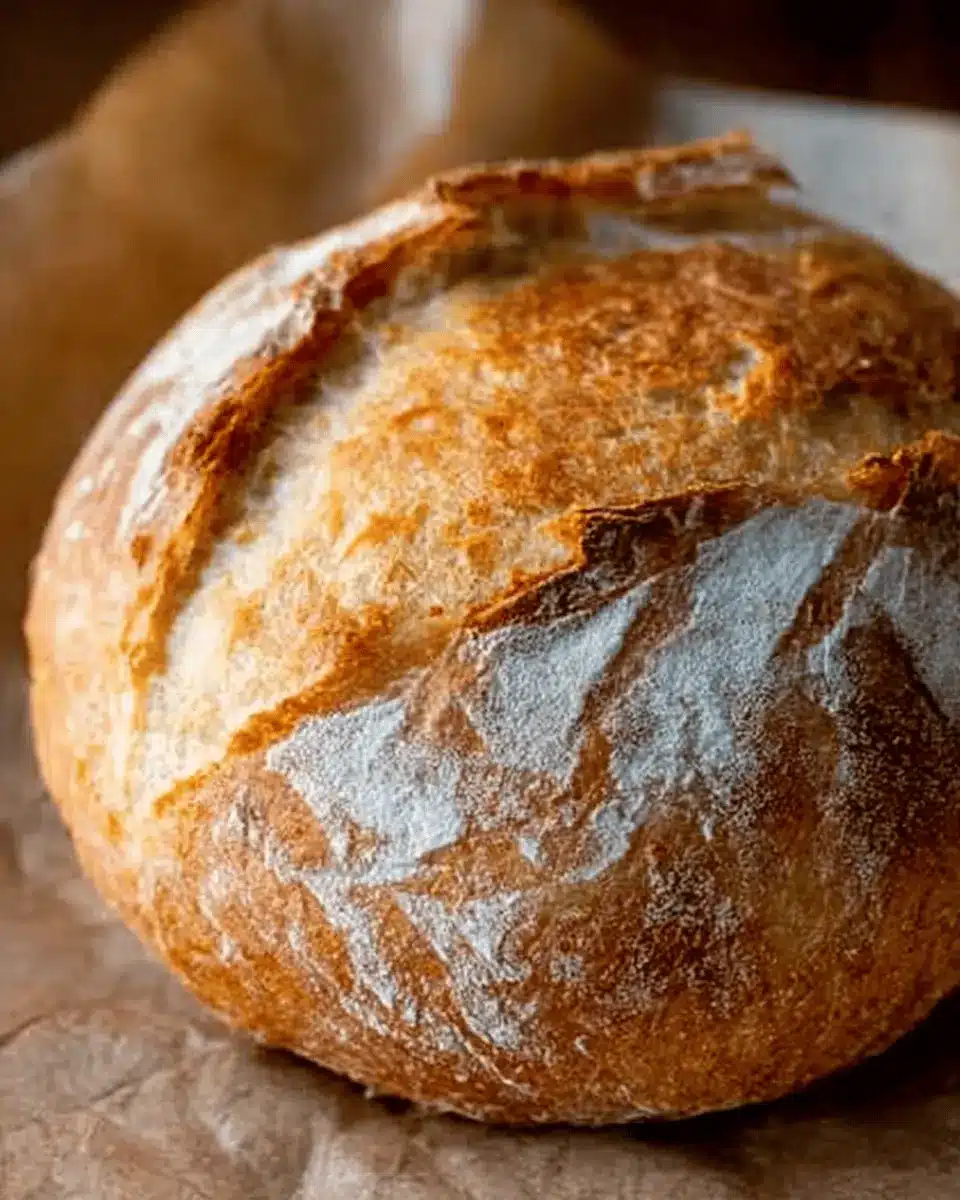
Score and bake the bread
Once your dough has risen again, it's time for the exciting part! Using a sharp knife or a bread lame, make a shallow cut across the top of your dough. Carefully lift the dough using the parchment and transfer it into the hot Dutch oven. Cover it with the lid and bake for 30 minutes. Remove the lid and bake for an additional 15 to 17 minutes, allowing the crust to turn a beautiful golden brown!
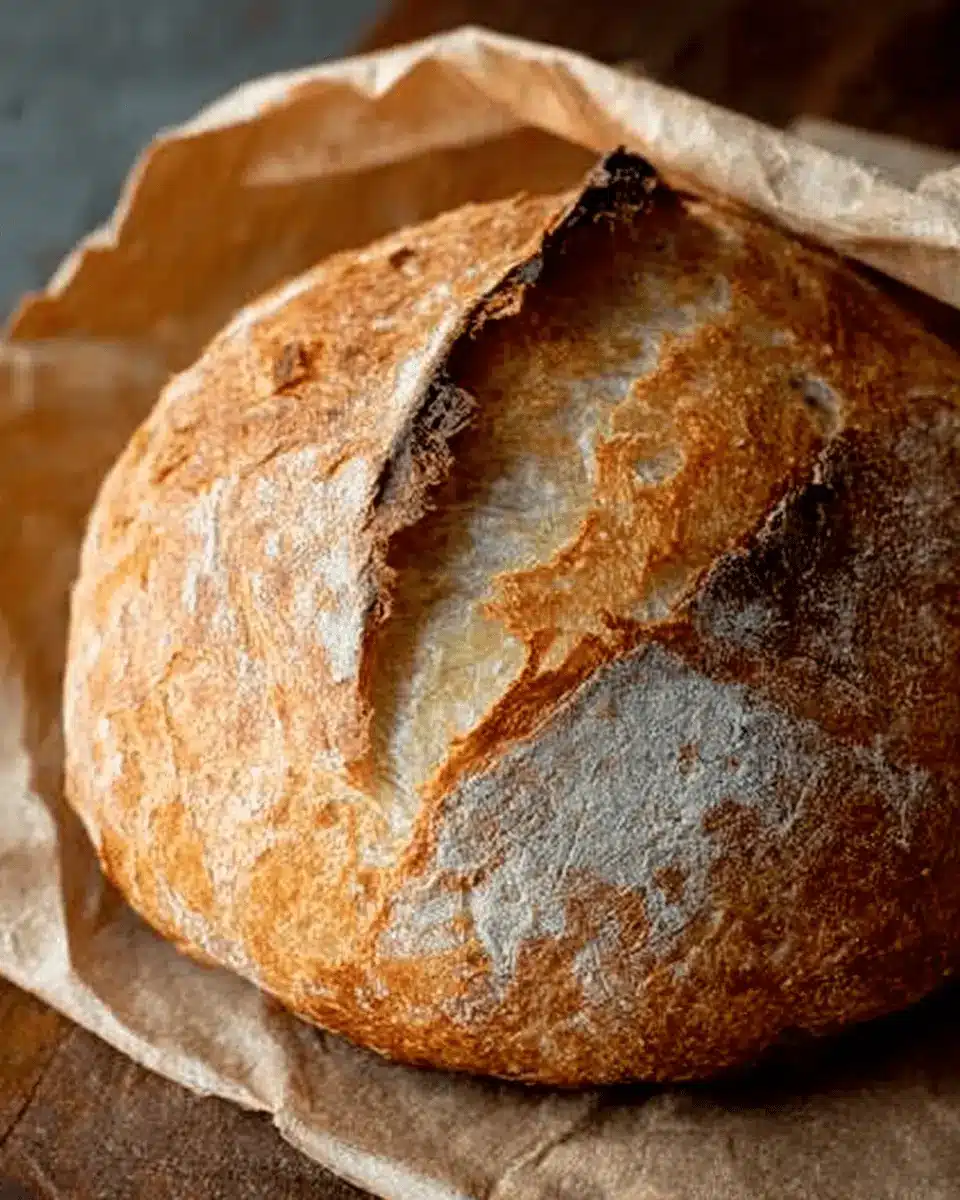
Cooling and slicing
After baking, transfer your loaf to a wire rack and let it cool for at least 20 minutes before slicing. I know it can be tempting, but slicing into hot bread might result in a gummy interior. The wait is worth it, as slicing into that crispy crust will be a glorious moment!
Making artisan bread at home might seem intimidating, but with these simple steps, you'll be well on your way to impressing friends and family with your baking skills. Happy baking!

Variations on Artisan Bread
Artisan bread is a versatile canvas for your culinary creativity! Here are some fun ideas to take your bread-making to the next level.
Incorporating Herbs and Spices
Enhance the flavor of your artisan bread by mixing in fresh or dried herbs. Think rosemary, thyme, or even a pinch of garlic powder! These additions not only infuse your loaf with aromatic goodness but also add a beautiful touch to your kitchen. Experiment with spices, like cumin or paprika, for a unique twist that can elevate your sandwiches or serve as a stunning dinner side.
Adding Seeds and Nuts for Texture
For an irresistible crunch, consider adding seeds like sesame, sunflower, or flaxseed. Chopped nuts, such as walnuts or hazelnuts, can also offer delightful texture while adding healthy fats. A sprinkle on top before baking gives your artisan bread an appealing look and an exciting flavor boost. These additions make your bread not only tastier but also more nutritious—perfect for those cozy meals at home!
Explore more about bread variations on sites like King Arthur Baking to inspire your next baking adventure.
Tips for Perfect Artisan Bread
Common Pitfalls to Avoid
Getting your artisan bread just right can be a challenge, but avoiding these pitfalls makes a world of difference:
- Water Temperature: Too hot and you kill the yeast; too cold, and it stays dormant. Aim for about 125°F.
- Flour Measurements: Measure your flour accurately to avoid dense bread. A kitchen scale works wonders!
- Insufficient Rising Time: Don’t rush the fermentation! Properly letting the dough rise is key to achieving the right texture.
Best Practices for Bread-Making Success
To elevate your artisan bread, consider these best practices:
- Use Quality Ingredients: Fresh yeast and high-protein bread flour are essential for the best flavor and texture.
- Rest the Dough: An overnight rise in the fridge enhances flavor and creates a more complex taste.
- Experiment with Steam: Create steam in the oven for that perfect crust by adding a pan with water during baking.
For more tips on bread-making science, check out King Arthur Baking for valuable resources. Enjoy the process, and embrace the rustic charm of your homemade artisan bread!
Serving suggestions for Artisan Bread
Great pairings with homemade soup
Homemade artisan bread is a perfect companion for your favorite soups. The crusty exterior and chewy interior make it ideal for soaking up creamy tomato soup or hearty lentil stew. Try pairing it with classic chicken noodle soup for a comforting meal. For a splash of freshness, serve it alongside vegetable soups—think vibrant minestrone or gazpacho, allowing the flavors to meld beautifully. Want to elevate your experience? A sprinkle of fresh herbs on your soup adds an aromatic touch that works wonders with your delectable bread!
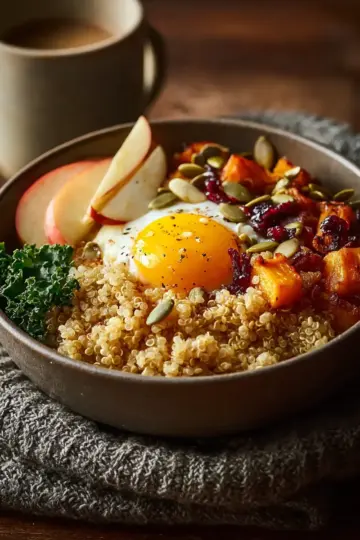
Creative ways to enjoy artisan bread
Don’t stop at just soup! Consider crafting delightful sandwiches to showcase your artisan bread. Layer it with turkey bacon, fresh greens, and a zesty pesto for a gourmet lunch. Or, transform it into crunchy bruschetta topped with tomatoes, basil, and a drizzle of balsamic glaze. For a sweet twist, toast slices and spread them with butter, homemade jam, or Nutella. Feel adventurous? Try using the bread to create croutons! Toss cubed bread with olive oil, garlic, and herbs, then bake until crispy for a perfect salad addition. The possibilities are deliciously endless!
Time Breakdown for Artisan Bread
Preparation Time
Crafting your delicious artisan bread begins with about 3 hours of preparation. This includes mixing the ingredients and allowing the dough to rise. If you’re feeling adventurous, consider an overnight rise for even more flavor! Just pop the dough in the fridge for up to 24 hours.
Baking Time
Once your dough is ready, it’s time to bake! The total baking time is around 45 minutes. That includes 30 minutes with the lid on and an additional 15 to 17 minutes uncovered for that beautiful golden crust.
Total Time
In all, you're looking at 3 hours and 45 minutes from start to finish, including rising and baking. It might seem like a commitment, but the aroma alone is worth it! Plus, you have a freshly baked loaf to show for your effort—perfect for sharing!
For more tips on perfecting your bread-making techniques, check out this guide on bread fermentation.
Nutritional Facts for Artisan Bread
When diving into the world of artisan bread, understanding its nutritional profile can be quite enlightening. Here’s a quick breakdown of what you can expect per serving:
Calories
A serving of this flavorful artisan bread contains approximately 222 calories. Perfect for a hearty meal or a satisfying snack!
Carbohydrates
You’ll find about 44 grams of carbohydrates in each slice, making this bread a great energy source to power your day.
Protein
Each serving delivers a solid 8 grams of protein, adding a nice boost to your diet, especially if you're pairing the bread with toppings like turkey bacon or chicken ham.
With its crispy exterior and chewy interior, artisan bread not only tastes amazing but also offers a balance of nutrients that can fit nicely into a variety of meal plans. For more detailed info on bread nutrition, check Healthline and see how it can complement your healthy lifestyle!
FAQs about Artisan Bread
Can I use all-purpose flour instead of bread flour?
Absolutely! While bread flour typically yields a chewier texture thanks to its higher protein content, all-purpose flour can work just fine for artisan bread. You might notice a slightly softer crust and texture, but your bread will still be delicious. If you’re experimenting, consider adding a bit of vital wheat gluten to enhance elasticity.
How do I know when my bread is done?
A simple and effective method to check if your artisan bread is done baking is to tap the bottom of the loaf. If it sounds hollow, it’s likely ready to come out of the oven! Also, the crust should turn a lovely golden-brown color. Using a digital thermometer, your bread should register around 200°F to 210°F at the center for best results.
What’s the best way to store homemade artisan bread?
To keep your artisan bread fresh, let it cool completely before storing. Wrap it in a clean kitchen towel for breathability, or use a paper bag to maintain its crusty exterior. If you want to store it longer, slice the bread and freeze it in airtight containers or freezer bags. This way, you can enjoy a slice of freshly baked bread whenever your cravings hit!
Conclusion on Artisan Bread
Creating your own artisan bread is not just about sustenance; it’s about experience and joy in baking. With just four ingredients, you can craft deliciously chewy bread that's perfect for any occasion. Dive into this baking adventure and enjoy the fruits of your labor! Happy baking!

Artisan Bread
Equipment
- Dutch oven
Ingredients
Main Ingredients
- 3 ¾ cups bread flour divided (450 grams)
- 2 ¼ teaspoons instant yeast
- 1 ¾ teaspoons kosher salt (10 grams)
- 1 ½ cups warm water between 120°F and 130°F (360 grams)
Instructions
Preparation
- In a large mixing bowl, add flour, yeast, and salt, stirring to combine with a large wooden spoon. Stir in water until the mixture is very sticky, and no lumps of flour remain. Cover and place in a warm, draft-free area until doubled in size, about 1 ½ to 2 hours.
- For an overnight rise: After mixing the dough, cover and refrigerate until doubled in size. This will take about 8 hours but will keep in the fridge up to 24 hours total.
- Preheat the oven to 450°F. Place a large Dutch oven with a lid in the oven for at least 30 minutes.
- Remove the dough from the refrigerator and let rest at room temperature for 15 minutes.
- Using lightly floured hands, reach down one side of the dough to the bottom of the bowl, pull up, and stretch the edge of the dough over the center toward the opposite side. Turn the bowl 90 degrees and repeat the folding and turning, working in a circle around the dough until the dough starts to hold its shape, about 8 to 10 rotations. Pinch any seams together at the center of the dough ball.
- Turn out the dough onto a lightly floured surface, placing it seam side down. Shape into a round loaf. Transfer the dough onto parchment paper and sprinkle it with flour. Loosely cover with plastic wrap or a tea towel for 10 minutes.
- Using a sharp knife or bread lame, cut a slit about ¼-inch deep across the top of the dough. Very carefully place the dough with the parchment paper directly into the preheated Dutch oven. Cover with the lid.
- Bake for 30 minutes. Remove the lid and bake until deeply golden brown, about 15 to 17 minutes more. Carefully remove the bread from the Dutch oven using the parchment paper to help, and place on a wire rack to cool for at least 20 minutes before slicing.


Leave a Reply